Prerequisites
- An active Flipt Cloud account with configured environments
- A GitHub repository containing your feature flag data (managed by Flipt Cloud)
- Flipt v2 installed on your target environment
- Access to the GitHub repository containing your feature flag data
Migration Overview
Since Flipt Cloud already stores your feature flag data in Git repositories, migrating to Flipt v2 is straightforward. You’ll configure Flipt v2 to sync with the same GitHub repository that Flipt Cloud has been using.1. Identify Your Flipt Cloud Repository
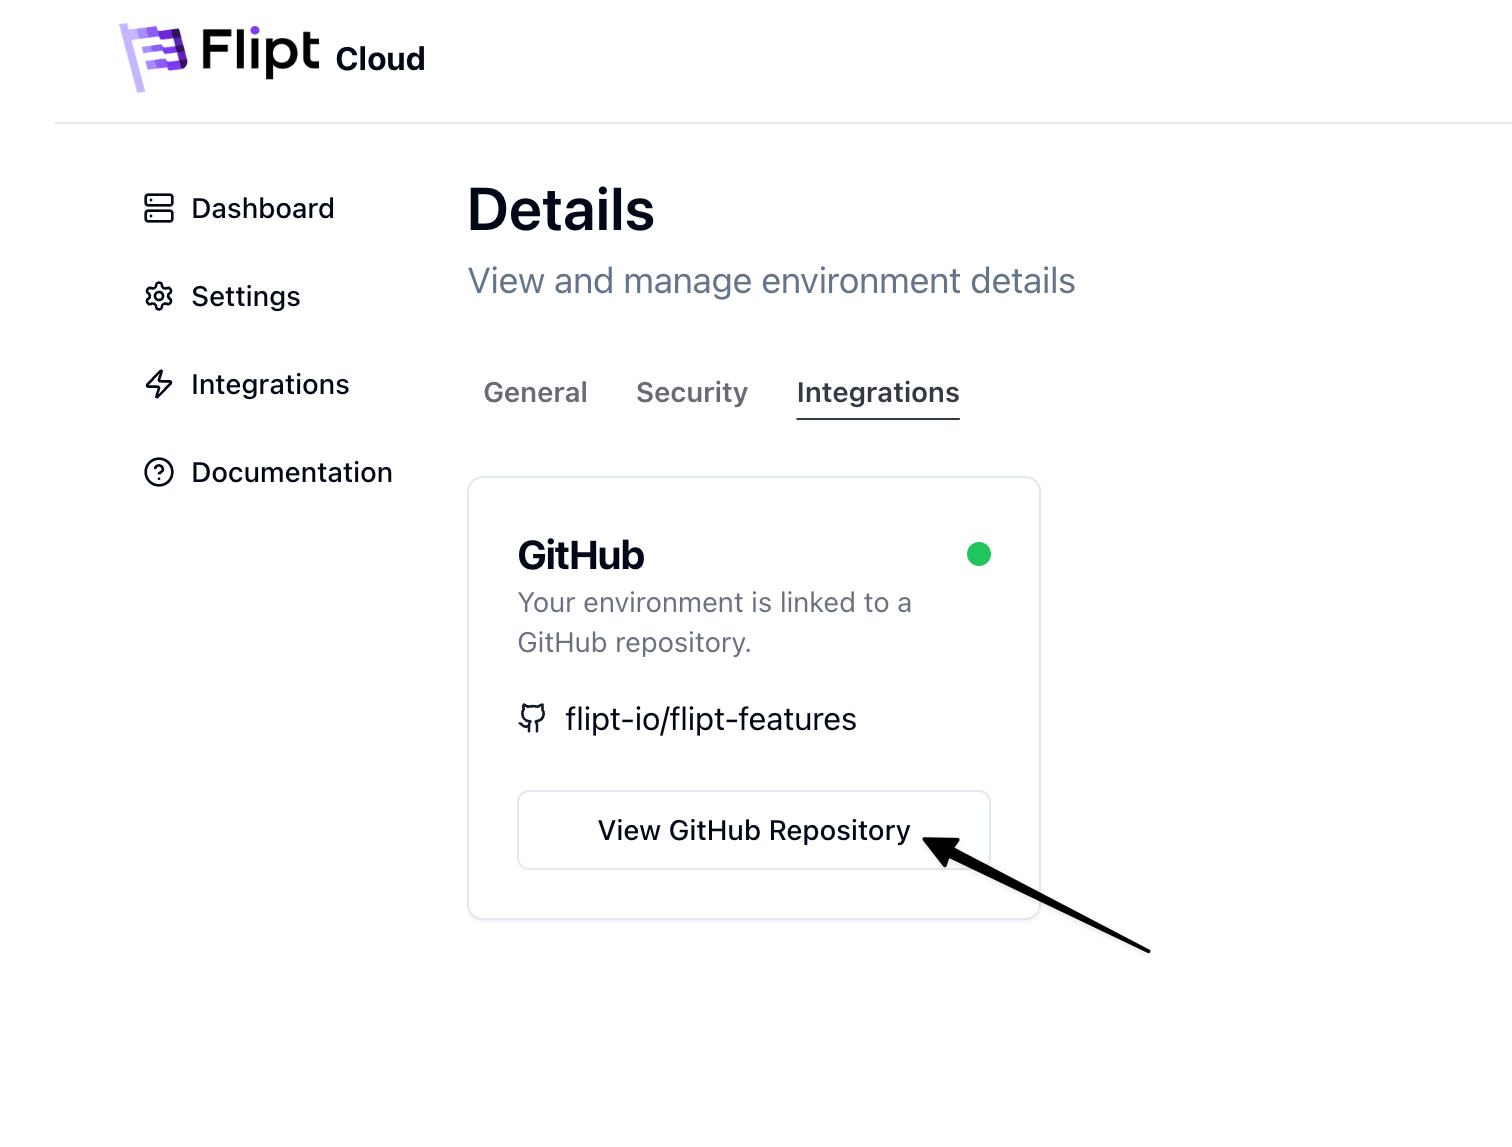
First, identify the GitHub repository and configuration that Flipt Cloud is using for your environment:- Log into your Flipt Cloud dashboard
- Navigate to your environment settings
- Click on the Integrations tab
- Click on the ‘View GitHub Repository’ button
- Note the following information:
- Repository URL: The GitHub repository where your flags are stored
- Branch: The branch being used (typically
main) - Directory: The directory path within the repository (if any)
2. Export Authorization Configuration
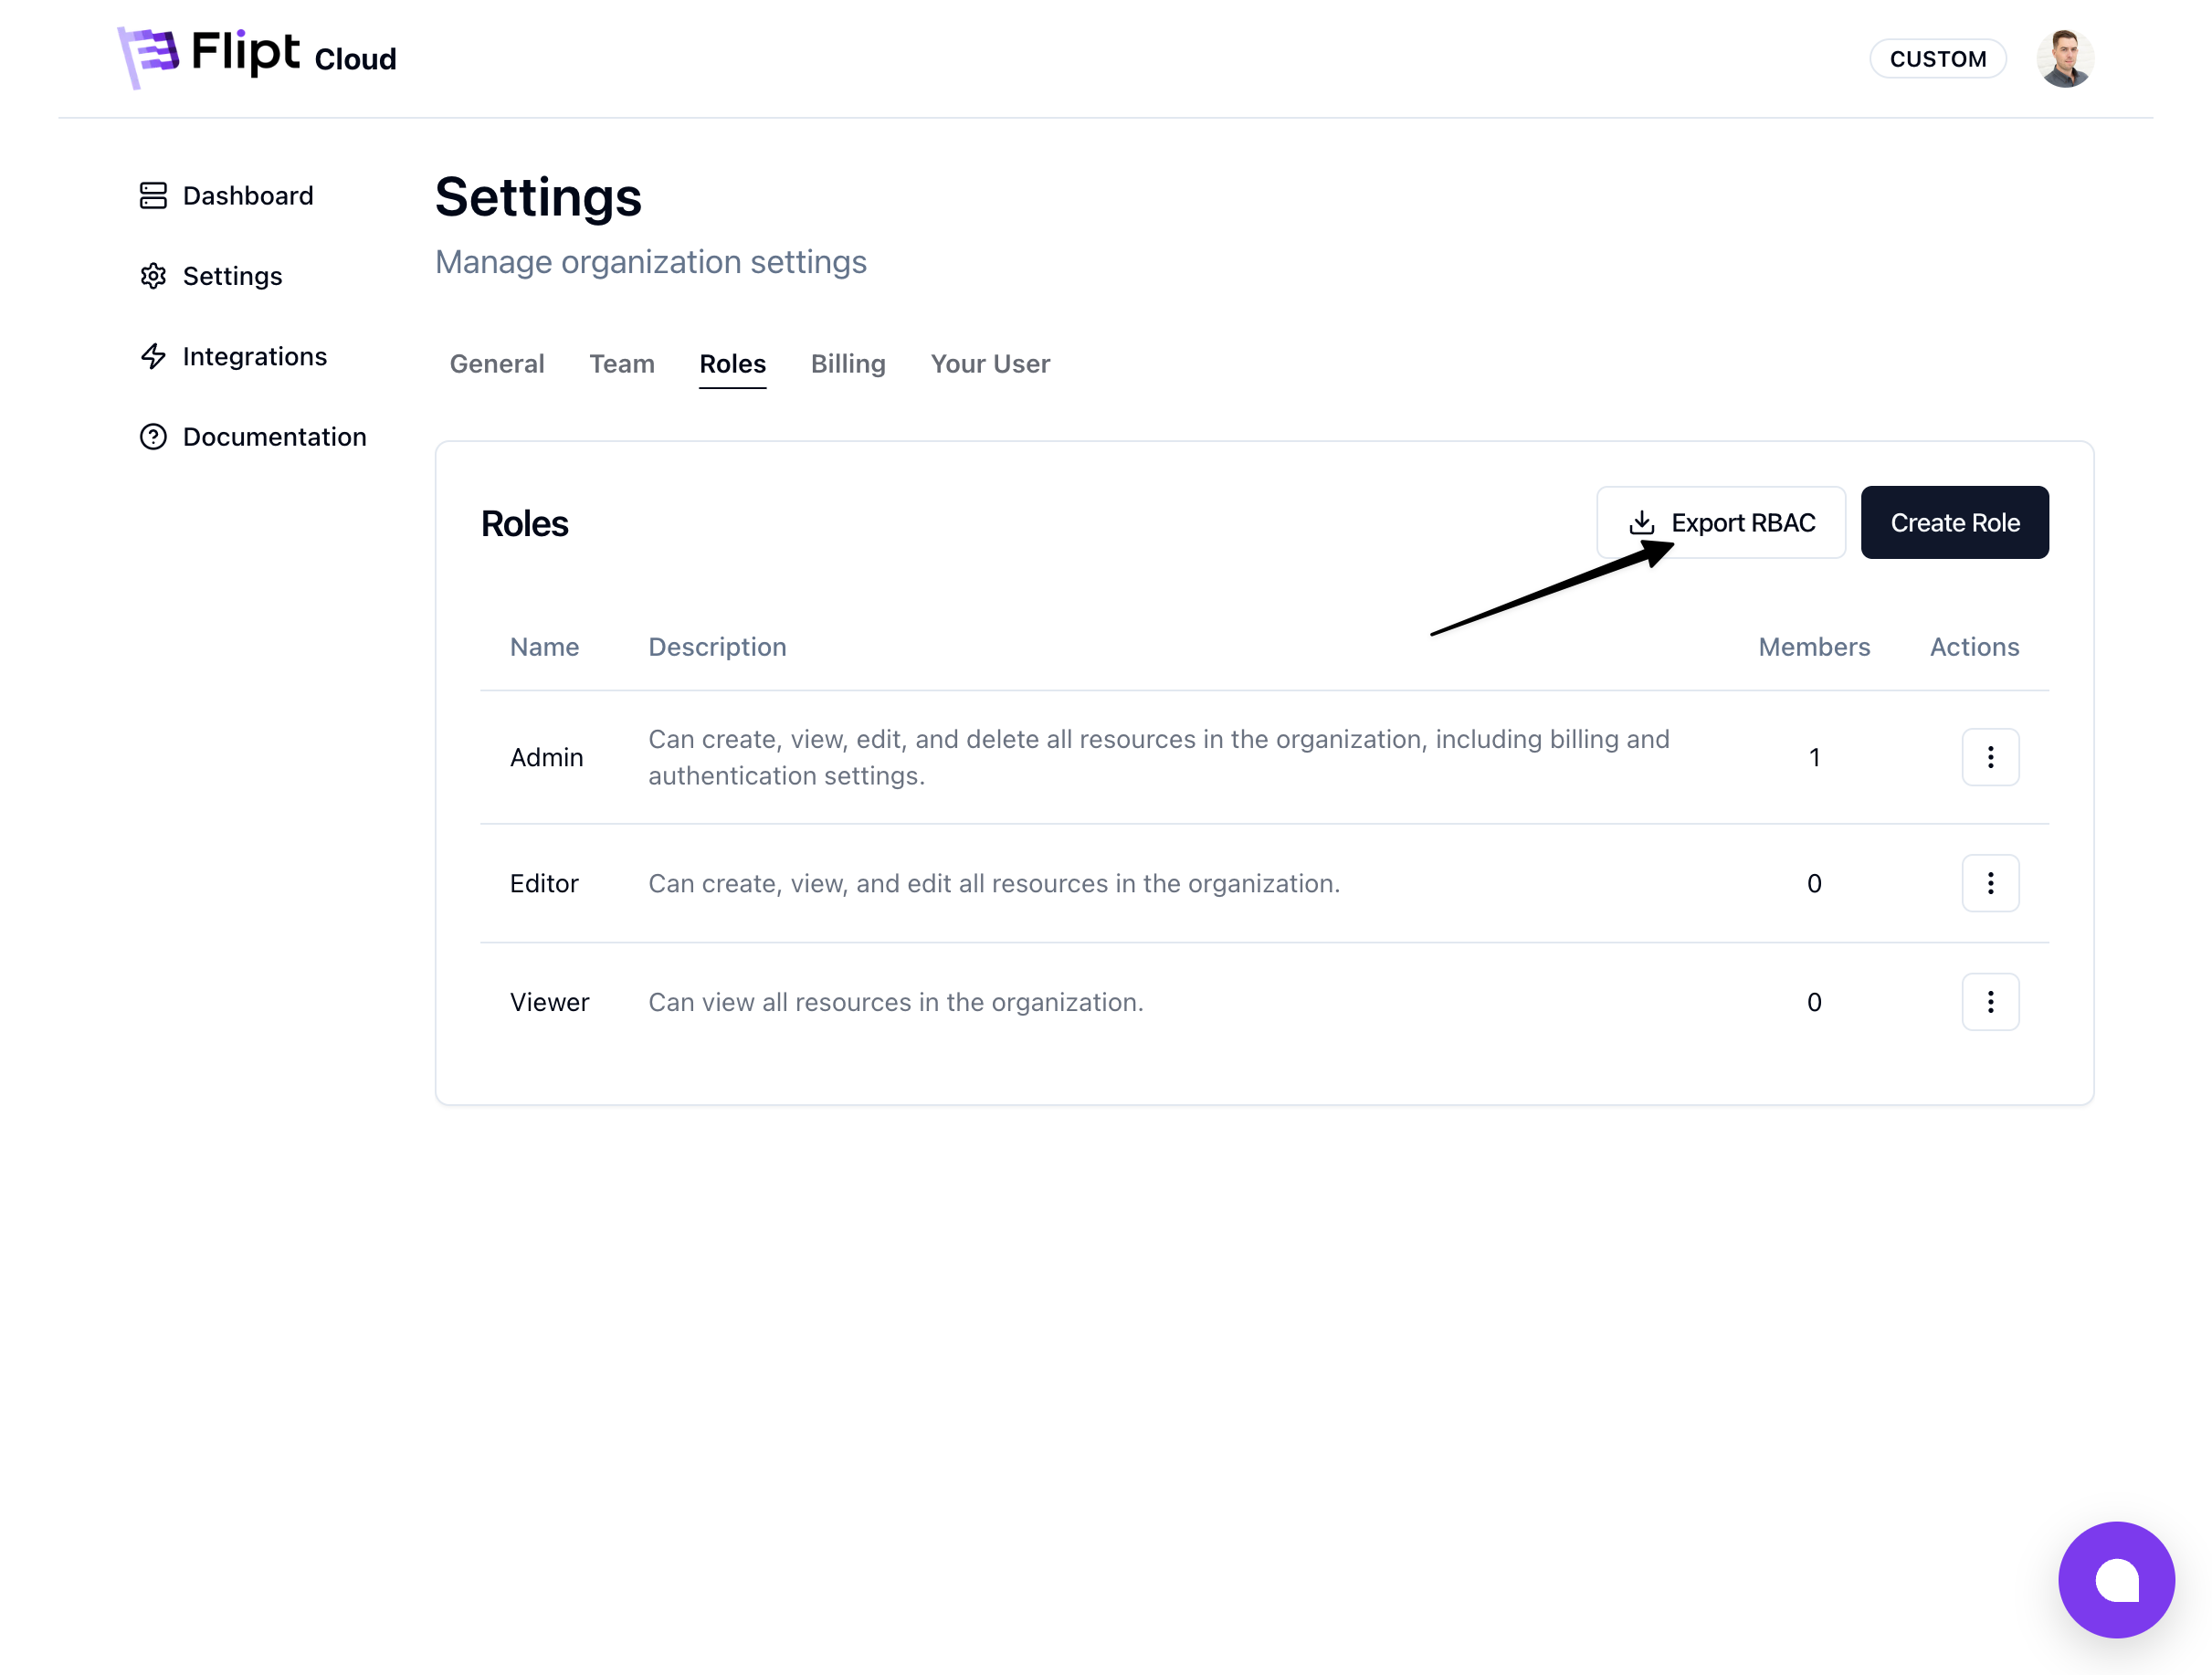
- While logged into Flipt Cloud, click on the Settings tab
- Click on the Roles tab
- Click on the Export RBAC button
- Download the authorization configuration archive and save it for later
3. Set Up GitHub Authentication
Create a GitHub Personal Access Token (PAT) that Flipt v2 can use to access your repository:- Go to GitHub Settings > Developer settings > Personal access tokens
- Click “Generate new token”
- Give your token a descriptive name (e.g., “Flipt v2 Migration”)
- Select the appropriate resource owner and repositories
- Set an expiration date
- Select the following repository scopes:
reporead and write access (for private repositories)contentsread and write access
- Click “Generate token” and copy the token
4. Configure Flipt v2
Create or update your Flipt v2 configuration file to connect to your existing GitHub repository:Add GitHub Credentials
Configure Storage Backend
<your-username>and<your-repo>with your actual GitHub repository detailsbranchwith the branch used by Flipt Cloud (if different frommain)pathwith your preferred local storage location
Configure Environments
If you have multiple environments in Flipt Cloud, configure them in Flipt v2:Make sure the directory paths match exactly what Flipt Cloud was using to
avoid data conflicts.
Configure Authorization
If you have any custom RBAC roles or permissions in Flipt Cloud, you’ll need to configure them in Flipt v2. Unarchive the authorization configuration from earlier and put the files somewhere accessible to Flipt v2. Update thepolicy.rego file to have the package name flipt.authz.v2 instead of flipt.authz.v1.
policy.rego
config.yaml file to point to the new policy files:
5. Start Flipt v2
-
Set your GitHub token as an environment variable:
-
Start Flipt v2 with your configuration:
-
Flipt v2 will:
- Clone your existing repository
- Load your feature flag data
- Begin syncing with GitHub
6. Verify Migration
- Access the Flipt v2 UI (typically at
http://localhost:8080) - Verify that all your feature flags, segments, and rules are present
- Check that all environments are configured correctly
- Test flag evaluation to ensure everything works as expected
7. Update Your Applications
Update your applications to point to your new Flipt v2 instance instead of Flipt Cloud:- Update SDK Configuration: Change the Flipt server URL in your application code
- Update API Keys: Generate new Static Tokens in Flipt v2 if needed
- Test Evaluation: Verify that flag evaluation works with your new instance
8. Decommission Flipt Cloud
Once you’ve verified that your migration is successful:- Update any remaining applications to use Flipt v2
- When ready, you can delete your Flipt Cloud environment
Data Continuity
Your feature flag data will remain intact throughout this migration because:- Flipt Cloud stores data in your GitHub repository
- Flipt v2 reads from the same repository structure
- No data transformation or conversion is required
- All flag history is preserved in Git
Troubleshooting
Repository Access Issues
If Flipt v2 cannot access your repository:- Verify your GitHub token has the correct permissions
- Check that the repository URL is correct
- Ensure the branch name matches what Flipt Cloud was using
- Ensure the directory path matches what Flipt Cloud was using
Sync Issues
If changes aren’t syncing properly:- Check the
poll_intervalsetting - Verify write permissions on the local storage path
- Verify your GitHub token as the correct scopes (write access to the repository)
- Review Flipt v2 logs for sync errors
Next Steps
After successful migration:- Configure authentication for your team
- Set up environments for your deployment pipeline
- Review configuration settings for your deployment
- Setup Merge Proposals for your environments
Support
If you encounter issues during migration:- Check the Flipt v2 documentation
- Join our Discord community
- Visit GitHub Discussions
References: