What You’ll Learn
In this guide, you will learn how to configure Keycloak as an OIDC provider for Flipt. By the end of this guide, we will have:- ⚙️ Setup Keycloak by creating a realm, user, and client
- 🔒 Configured Keycloak as an OIDC provider for Flipt
Prerequisites
For this guide you’re going to need the following:- Docker
- Read the Login With Google guide
Setting Up Keycloak
To set up Keycloak for authentication, you will need to create a new realm, client, and user.This section of the guide is a simplified version of the Keycloak: Getting
Started Docker
Guide.
1. Start Keycloak
Start Keycloak using Docker:2. Access Keycloak
Access Keycloak at http://localhost:8080 and log in with the admin credentials (admin/admin).
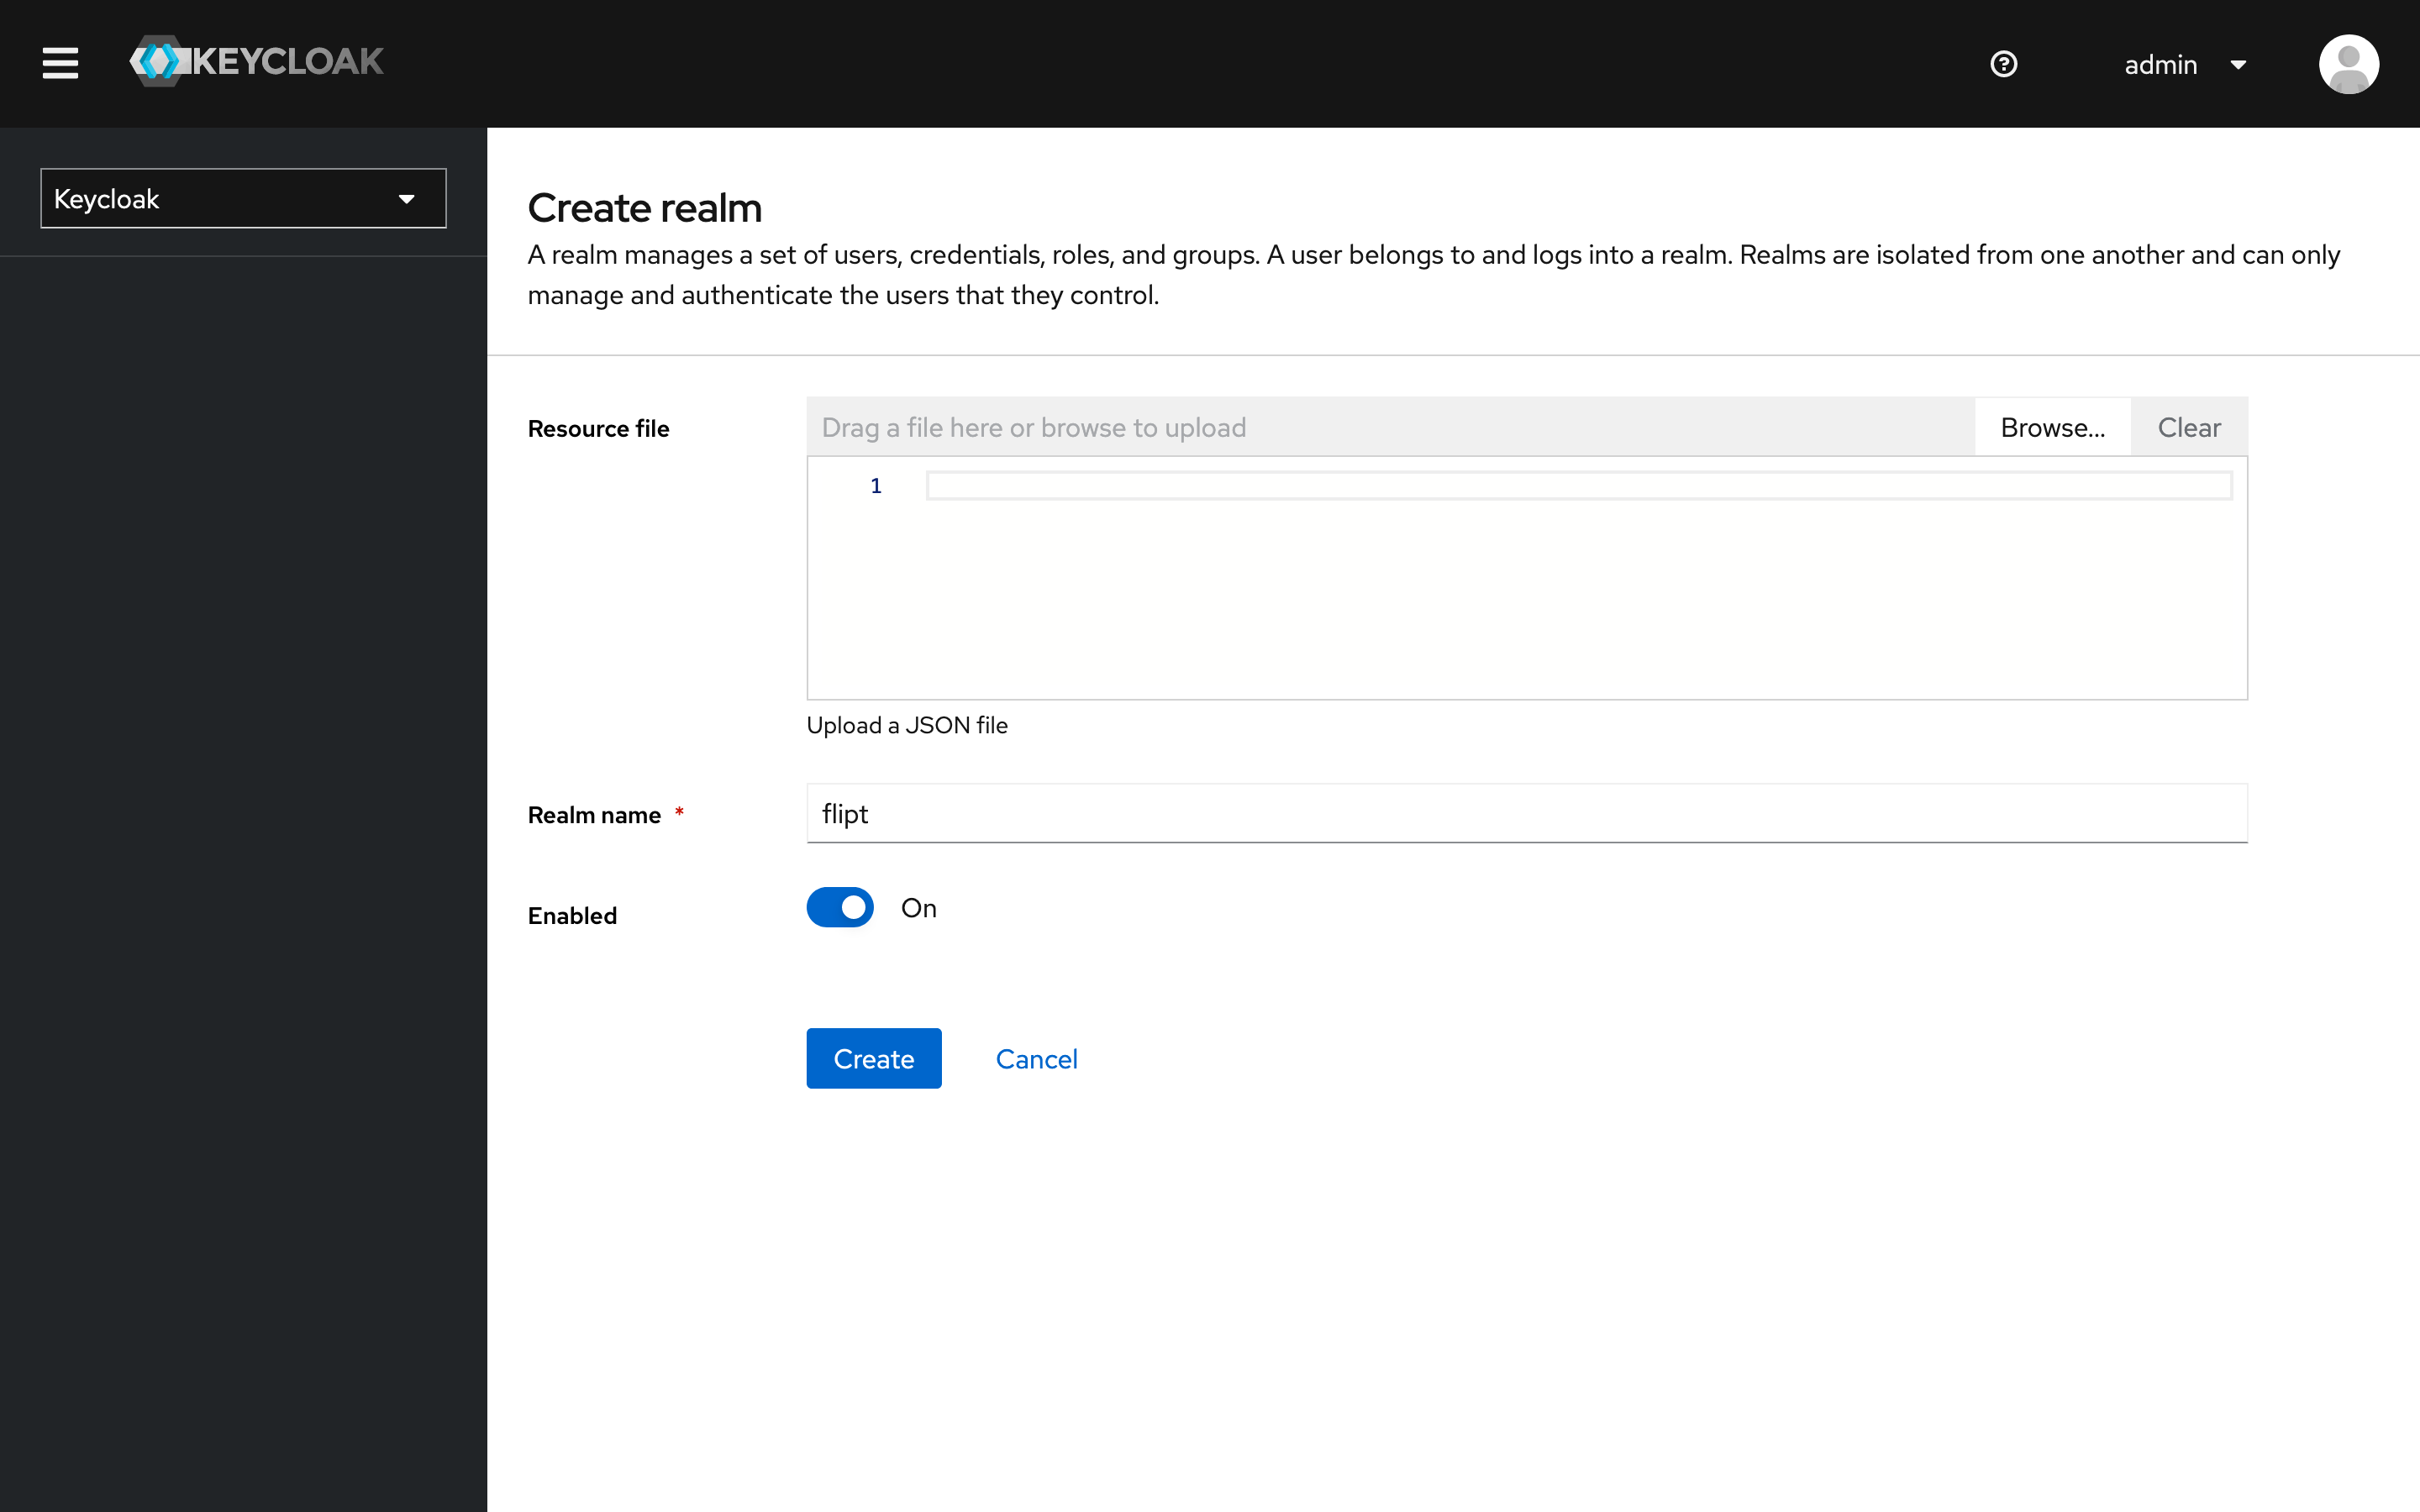
3. Create a Realm
Create a new realm calledflipt:
- Click on
Keycloakin the top-left corner. - Click on the
Create realmbutton. - Enter
fliptas the realm name. - Click on the
Createbutton.
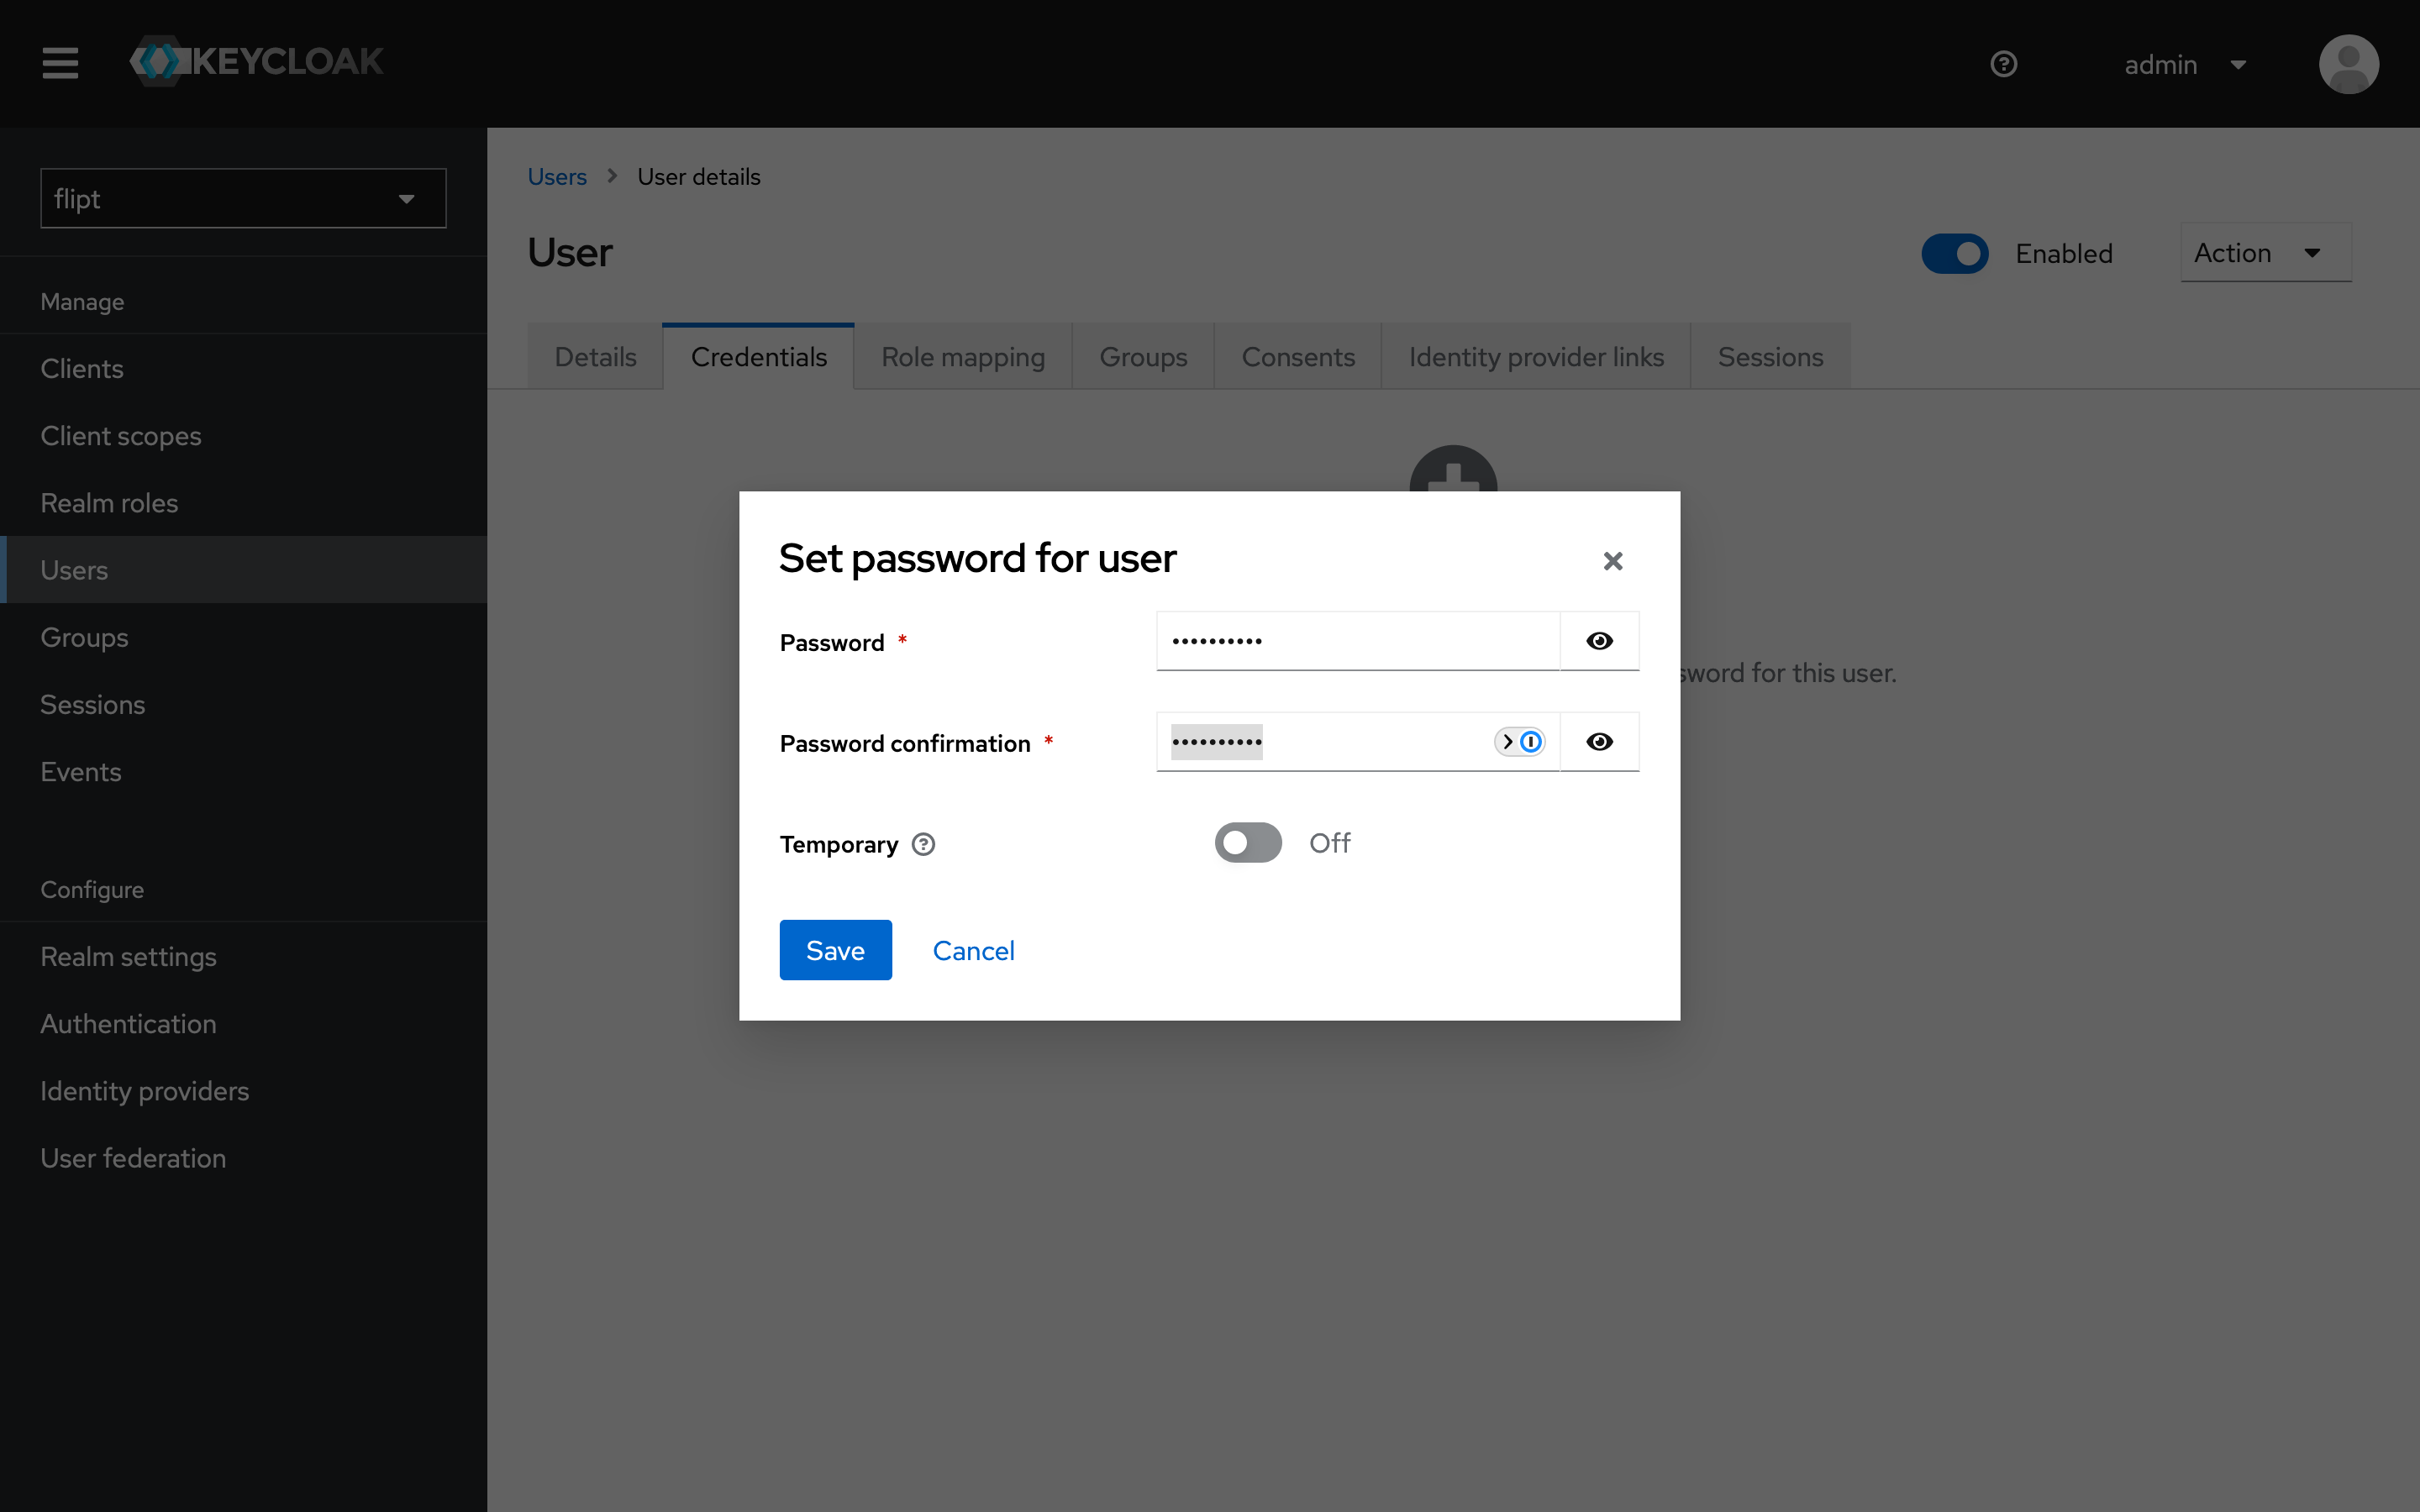
4. Create a User
Create a new user calleduser:
- Click on the
Userstab. - Click on the
Create new userbutton. - Fill in the user details and click on the
Createbutton. - Set the user’s password by clicking on the
Credentialstab and clickSet Password. - Enter a password and confirm the password.
- Toggle
TemporarytoOFFso that the user does not need to change their password on the first login. - Click
Save.
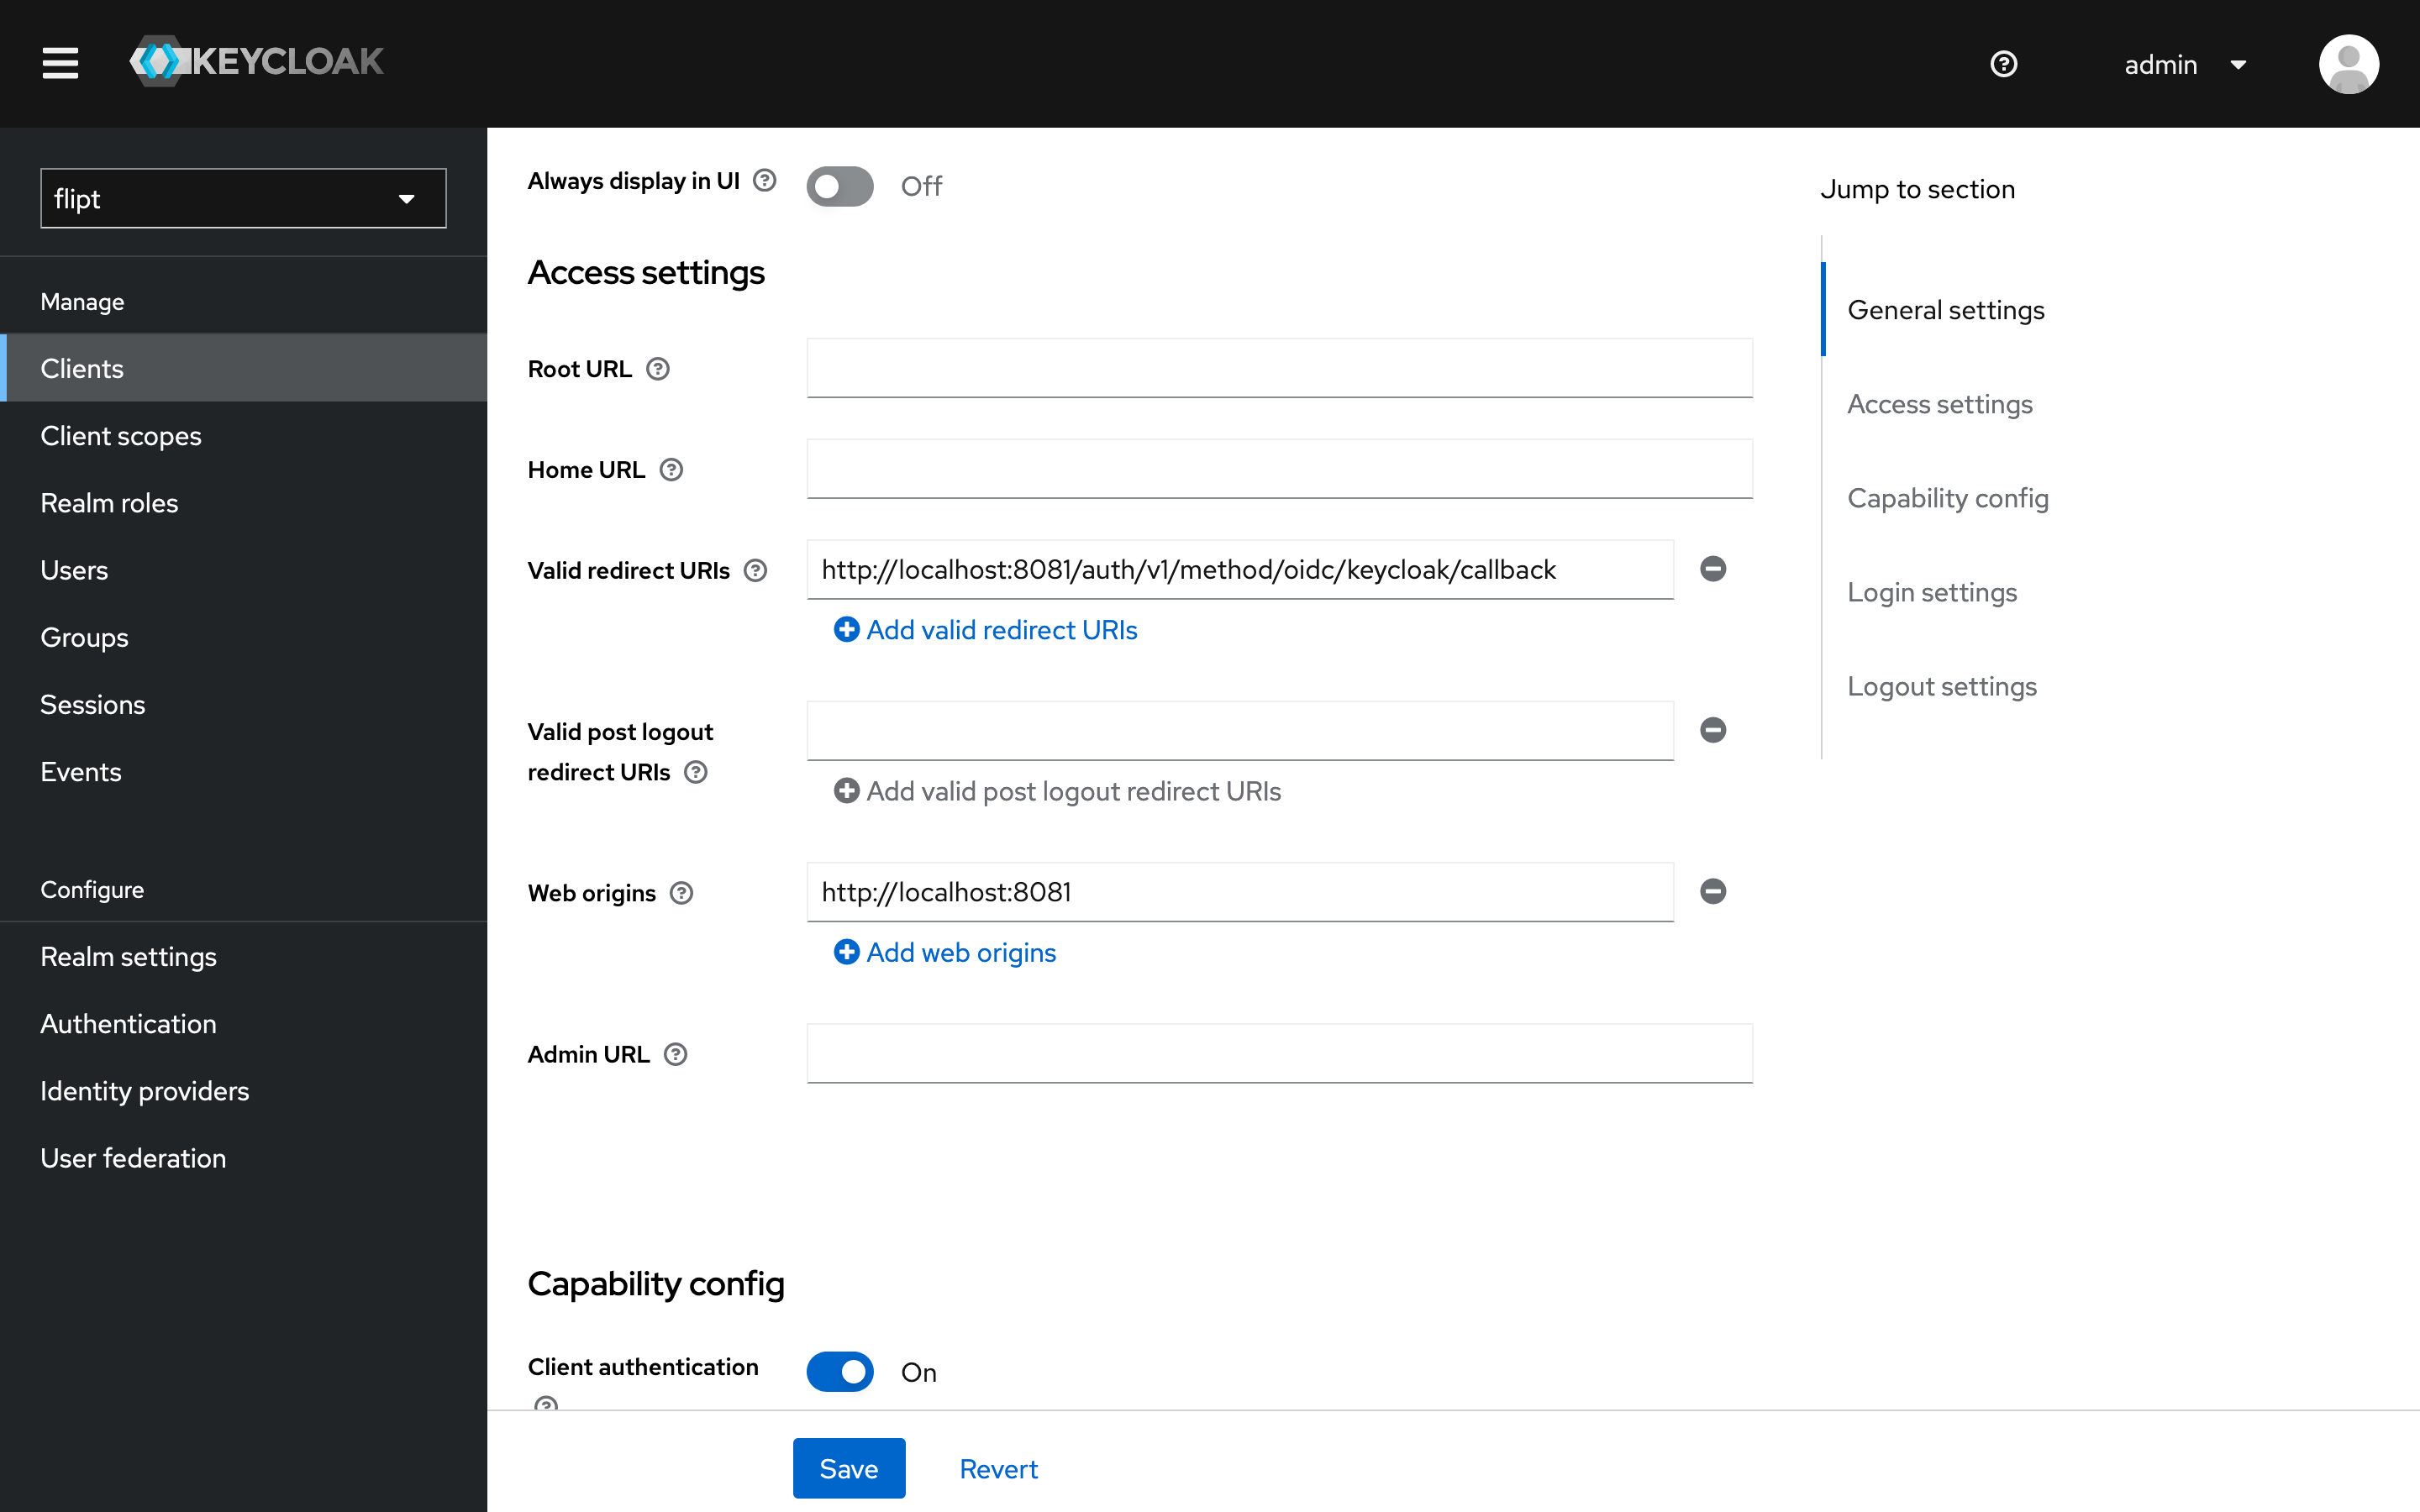
5. Create a Client
Create a new client calledflipt:
- Click on the
Clientstab. - Click on the
Create Clientbutton. - Ensure
OpenID Connectis selected as the client type. - Enter
fliptas the client ID and click onNext. - Ensure the
Standard flowandDirect access grantsare enabled and click onNext. - Set the
Valid Redirect URIstohttp://localhost:8081/auth/v1/method/oidc/keycloak/callback. - Set the
Web Originstohttp://localhost:8081. - Ensure
Client authenticationis set toON. - Click on
Save.
6. Copy Client ID and Secret
- From the
fliptclient, click on theCredentialstab. - The client ID will be displayed at the top of the page (e.g.,
flipt). Copy this value and save it for later. - Click on the copy icon next to the
Client Secretfield to copy the client secret. Save this value for later.
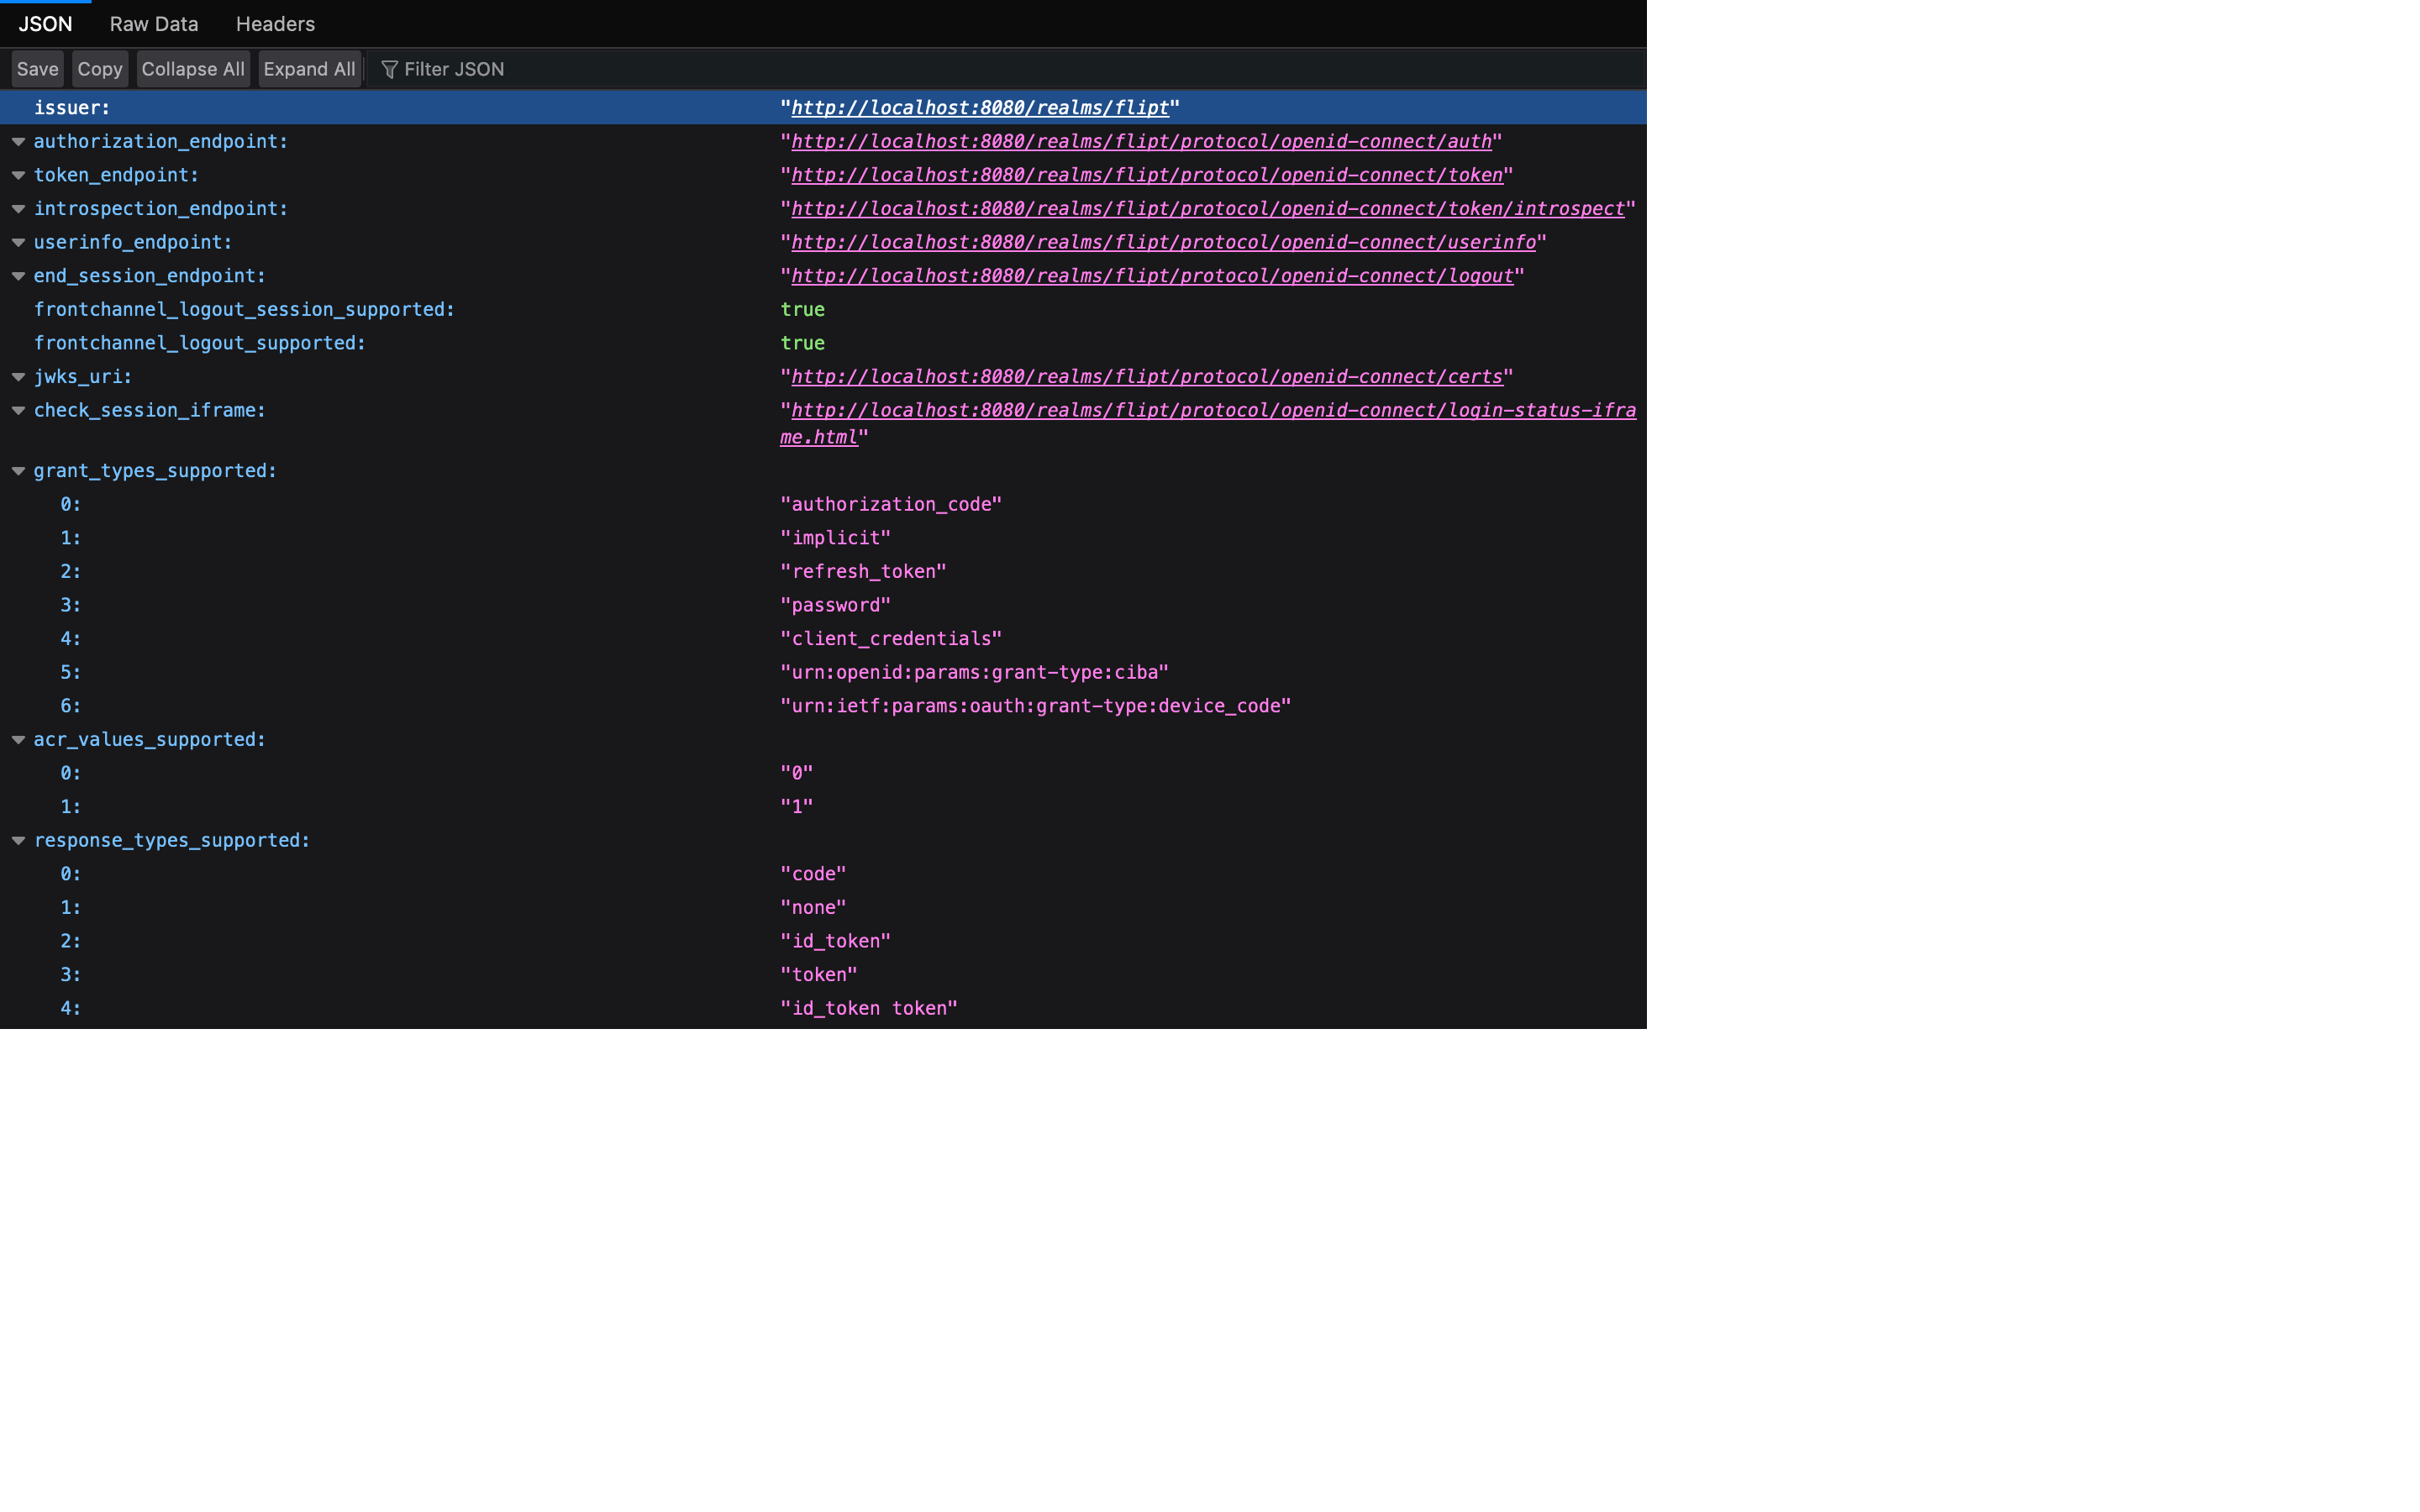
7. Get Required URLs
- In another browser tab, paste the following URL into the address bar:
- Copy the
issuerURL from the JSON response. This will be used as theissuer_urlin the Flipt configuration.
Running Flipt
Now that we have an OIDC client configured in our Keycloak instance, we can begin configuring Flipt to leverage it.1. Define a Flipt config.yml
We’re going to create a configuration file named config.yml in the current directory.
This file will tell Flipt to increase its logging level to the maximum to aid in debugging. We will also set the HTTP port to 8081 to avoid conflicts with Keycloak.
It will also set authentication as required = true.
This is needed to ensure that Flipt enforces its APIs and must be provided with a credential of some sort to gain access.
config.yml
2. Add keycloak provider to config.yml
In your config.yml file, add the following configuration in the authentication section to enable the OIDC method and configure the Keycloak provider:
config.yml
oidc method, and it has a section called providers. Each key beneath the providers section is unique and can be whatever you want. However, the name is important as it affects the redirect_url generated for the particular provider.
Each provider section has a consistent structure. You’re required to provide the issuer_url, client_id, client_secret and redirect_address.
The scopes section is optional, and allows Flipt the opportunity to obtain additional details on the authenticating caller (e.g. email and profile picture).
3. Start Flipt
You can now start your Flipt instance using the following command:Login with Keycloak you should be navigated away to your Keycloak instance to complete the authentication flow.