> ## Documentation Index
> Fetch the complete documentation index at: https://docs.flipt.io/llms.txt
> Use this file to discover all available pages before exploring further.
# Authentication
> This document describes how to configure the authentication mechanisms for Flipt v2.
Flipt supports the ability to secure its core API routes by setting the `required` field to `true` on the `authentication` configuration object.
```yaml config.yaml theme={null}
authentication:
required: true
```
When authentication is set to `required`, the API will ensure valid credentials are present on all API requests.
Once authentication has been set to `required: true` all API routes will require a client token to be present.
The UI will require a session-compatible authentication method (e.g. [OIDC](#method-oidc)) to be enabled.
## Exclusions
Exclusions allow you to disable authentication for sections of the API.
The Flipt API is made up of several top-level API sections, each with its own unique prefix.
For example:
* `/evaluate/v1` is the application facing flag state evaluation API
Several of these API sections can be optionally omitted from requiring authentication.
A common use case is to allow the evaluation API to be publicly accessible while still requiring authenticated users to manage feature-flag configuration and state.
By default, when authentication is configured as `required: true`, the effective configuration for the exclusions looks like this:
```yaml config.yaml theme={null}
authentication:
required: true
exclude:
evaluation: false
```
This means every part of the Flipt API is required for authentication.
However, taking the example from before, we could skip authentication for the evaluation section of the Flipt API like so:
```yaml config.yaml theme={null}
authentication:
required: true
exclude:
evaluation: true
```
## Session
This section contains common properties for establishing browser sessions via a "session compatible" authentication method. Session-compatible methods enable support for login in the UI. The methods below state whether or not they're session compatible (e.g. [OIDC](#method-oidc) is session compatible).
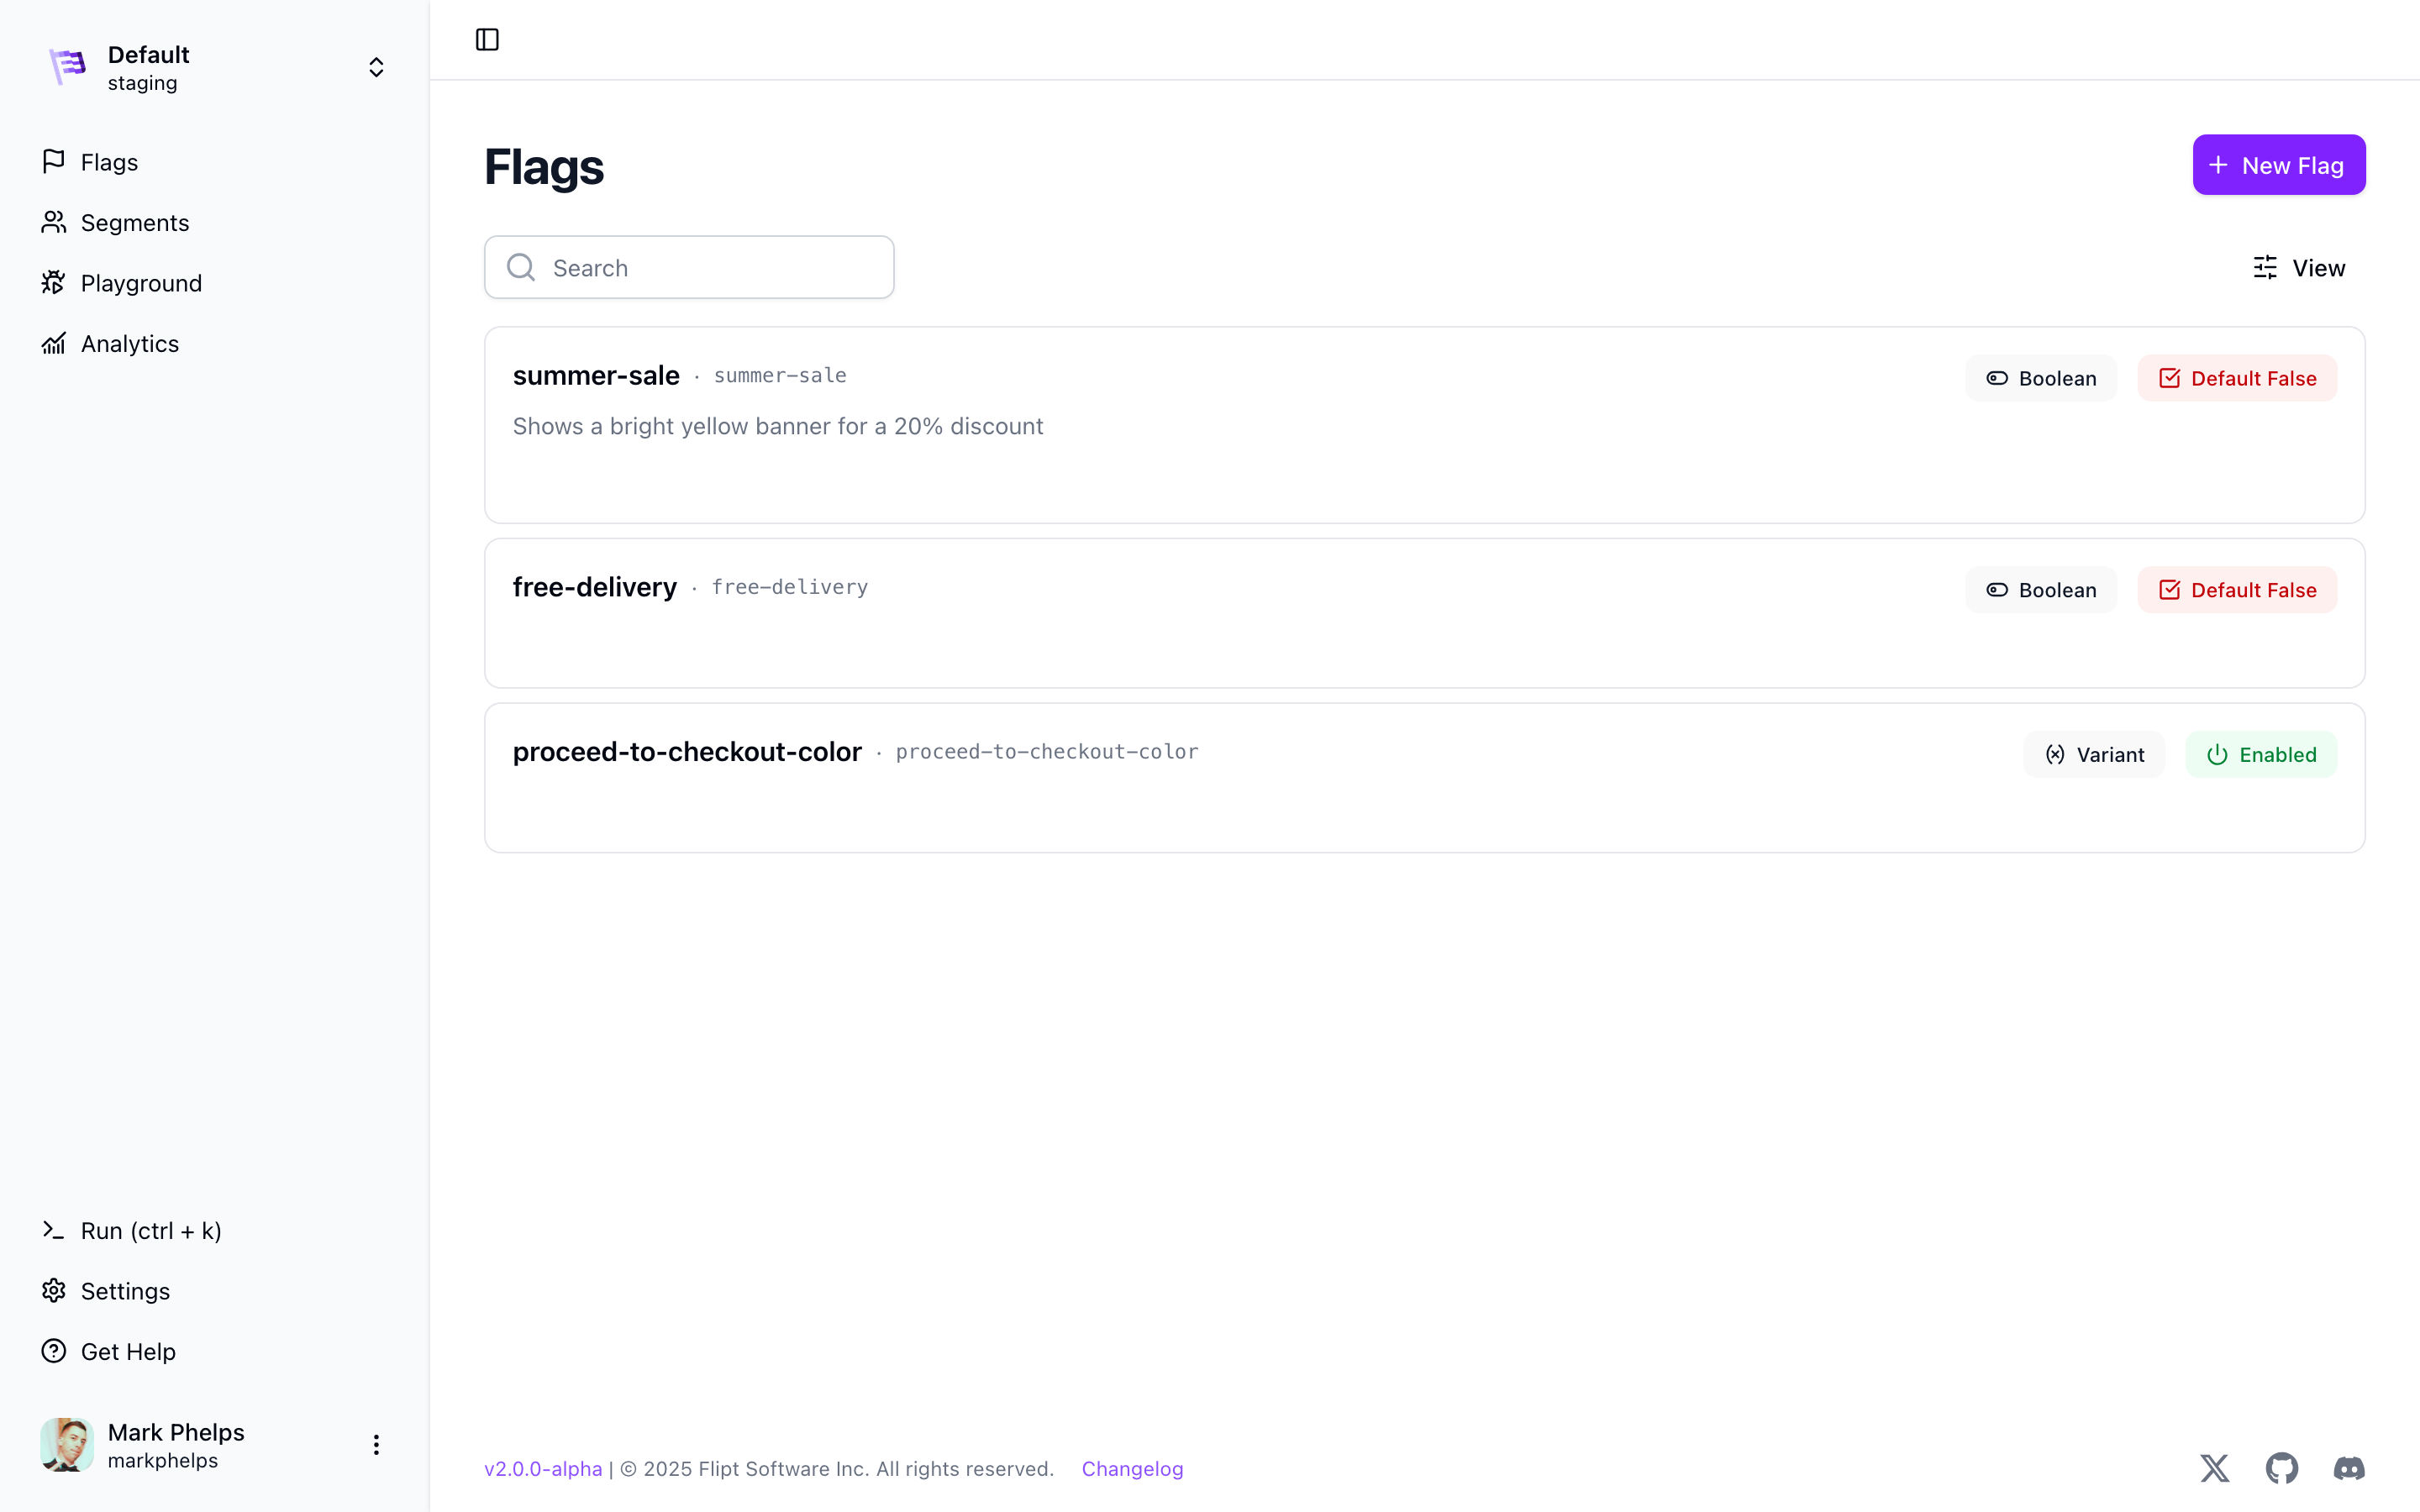 In order to establish a browser session over HTTP (via a `Cookie` header) some configuration is required.
```yaml config.yaml theme={null}
authentication:
required: true
session:
domain: "flipt.yourorg.com"
secure: true
csrf:
key: "some_secret_string"
```
When a "session compatible" authentication method is enabled the `domain` property is **required**.
It should be configured with the public domain your Flipt instance is hosted on.
The other properties aren't required to be explicitly configured.
To best secure your instance of Flipt, we advise that you run Flipt with `secure: true`.
This will require you to expose Flipt over HTTPS.
Additionally, we advise that you configure a `csrf.key` with a 32 or 64-byte random string of data.
```
openssl rand -base64 64
```
### Session Storage
Session storage allows you to configure where the session data is stored. All session enabled authentication methods will use the same configured session storage backend.
Currently, Flipt v2 supports the following session storage backends:
* `memory`
* `redis`
#### Memory
The `memory` backend is the default and will store session data in memory. This means that the session data will be lost when the Flipt server restarts.
```yaml config.yaml theme={null}
authentication:
required: true
session:
storage:
type: memory
```
#### Redis
The `redis` backend will store session data in a Redis instance. This means that the session data will be persisted across Flipt server restarts and can be shared across multiple Flipt servers.
```yaml config.yaml theme={null}
authentication:
required: true
session:
storage:
type: redis
redis:
mode: single # Required: either "single" or "cluster"
host: localhost
port: 6379
db: 0
password: password
```
The `mode` parameter is **required** and must be set to either:
* `single` - For standalone Redis instances (most common)
* `cluster` - For Redis cluster setups
##### Redis Cluster Example
For Redis cluster configurations, use `mode: cluster`:
```yaml config.yaml theme={null}
authentication:
required: true
session:
storage:
type: redis
redis:
mode: cluster
host: localhost
port: 6379
db: 0
password: password
```
### Session Cleanup
Session cleanup is a feature that allows you to configure the periodic deletion of *expired* authentications created with the associated method.
```yaml config.yaml theme={null}
authentication:
required: true
session:
cleanup:
grace_period: 24h
```
`grace_period` is used to ensure that *expired* tokens are preserved for at least this configured duration.
This allows you to keep authentications around for auditing purposes after expiration.
Expired tokens are instances where the `expires_at` timestamp occurs before the current time.
The grace period is added onto this timestamp as a predicate when the delete operation is made.
Tokens that have expired (`expires_at` is before `now()`) will begin immediately failing authentication when presented as a credential to the API.
The `grace_period` is simply for the cleanup process.
## Methods
Each key within the `methods` section is a particular authentication method.
These methods are disabled (`enabled: false`) by default.
Enabling and configuring a method allows for different ways to establish client token credentials within Flipt.
### Static Token
The `token` method is NOT a `session compatible` authentication method.
The `token` method provides the ability to create client tokens statically, defined in the configuration file.
```yaml config.yaml theme={null}
authentication:
required: true
methods:
token:
enabled: true
storage:
tokens:
"some_token_id":
credential: "some_token_credential"
metadata:
some_key: "some_value"
```
#### Using Secret References
To avoid storing token values directly in your configuration file, you can use [secret references](/v2/configuration/overview#secret-references) with a configured [secret provider](/v2/configuration/secrets).
Using the [file provider](/v2/configuration/secrets#file-provider):
```yaml config.yaml theme={null}
authentication:
required: true
methods:
token:
enabled: true
storage:
tokens:
"ci_token":
credential: "${secret:file:ci-token}" # References /etc/flipt/secrets/ci-token
metadata:
name: "CI Pipeline Token"
"dev_token":
credential: "${secret:file:dev-token}" # References /etc/flipt/secrets/dev-token
metadata:
name: "Development Token"
```
Using the [HashiCorp Vault provider](/v2/configuration/secrets#hashicorp-vault-provider):
```yaml config.yaml theme={null}
authentication:
required: true
methods:
token:
enabled: true
storage:
tokens:
"ci_token":
credential: "${secret:vault:flipt/tokens:ci-token}" # References flipt/tokens secret, key: ci-token
metadata:
name: "CI Pipeline Token"
"dev_token":
credential: "${secret:vault:flipt/tokens:dev-token}" # References flipt/tokens secret, key: dev-token
metadata:
name: "Development Token"
```
Using a cloud provider ([AWS](/v2/configuration/secrets#aws-secrets-manager-provider), [GCP](/v2/configuration/secrets#gcp-secret-manager-provider), or [Azure](/v2/configuration/secrets#azure-key-vault-provider)):
```yaml config.yaml theme={null}
authentication:
required: true
methods:
token:
enabled: true
storage:
tokens:
"ci_token":
credential: "${secret:aws:ci-token}" # AWS Secrets Manager
metadata:
name: "CI Pipeline Token"
"dev_token":
credential: "${secret:gcp:dev-token}" # GCP Secret Manager
metadata:
name: "Development Token"
```
See [Secrets](/v2/configuration/secrets) for details on configuring secret
providers.
### OIDC
The `OIDC` method is a `session compatible` authentication method.
The `oidc` method provides the ability to establish client tokens via OAuth 2.0 with OIDC flow.
Once enabled and configured, the UI will automatically leverage it and present any configured providers as login options.
```yaml config.yaml theme={null}
authentication:
required: true
methods:
oidc:
enabled: true
email_matches:
- ^.*@flipt.io$
providers:
some_provider: # insert your provider name
issuer_url: "https://some.oidc.issuer.com"
client_id: "some_client_identifier"
client_secret: "some_client_secret_credential"
redirect_address: "https://your.flipt.instance.url.com"
scopes:
- email
- profile
```
Multiple providers can be configured simultaneously. Each provider will result in a login option being presented in the UI, along with a configured endpoint to support the provider flow.
Flipt v2 has been tested with each of the following providers:
* [Google](https://developers.google.com/identity/openid-connect/openid-connect)
* [Auth0](https://auth0.com/docs/get-started/applications/application-settings)
* [GitLab](https://docs.gitlab.com/ee/integration/openid_connect_provider.html)
* [Dex](https://dexidp.io/docs/openid-connect/)
* [Okta](https://developer.okta.com/docs/concepts/oauth-openid/#oauth-2-0)
* [AzureAD](https://docs.microsoft.com/en-us/azure/active-directory/develop/v2-protocols-oidc)
* [Keycloak](https://www.keycloak.org/docs/latest/server_admin/index.html#_identity_broker_oidc)
Though the intention is that it should work with all OIDC providers, these are just the handful the Flipt team has validated.
Following any of the links above should take you to the relevant documentation for each of these providers' OIDC client setups.
You can use the credentials and client configuration obtained using those steps as configuration for your Flipt instance.
#### Callback URL
When configuring your OIDC provider, you will need to provide a callback URL for the provider to redirect back to Flipt after a successful login.
The callback URL will be in the form of `https://your.flipt.instance.url.com/auth/v1/method/oidc/{provider}/callback`.
You can find the callback URL for each provider that you configure in your Flipt instance by querying the API.
```bash theme={null}
curl --request GET \
--url https://your.flipt.instance.url.com/auth/v1/method \
--header 'Accept: application/json'
```
```json theme={null}
{
"methods": [
{
"method": "METHOD_TOKEN",
"enabled": true,
"sessionCompatible": false,
"metadata": null
},
{
"method": "METHOD_OIDC",
"enabled": true,
"sessionCompatible": true,
"metadata": {
"providers": {
"google": {
"authorize_url": "/auth/v1/method/oidc/google/authorize",
"callback_url": "/auth/v1/method/oidc/google/callback"
}
}
}
}
]
}
```
#### Email Matches
Flipt operators may wish to lock down access to the Flipt API and UI to a specific group of users within their organization behind OIDC.
Since OIDC has the ability to retrieve email addresses, Flipt also provides a configuration option of using `email_matches` which are [regular expressions](https://github.com/google/re2/wiki/Syntax) that can be used to match against the OIDC email.
You must request the `email` scope from your OIDC provider in order for this
feature to work.
You can see an example of that above in the [sample configuration](#method-oidc).
#### Algorithms
By default, Flipt expects OIDC ID tokens to be signed with the `RS256` algorithm. Some identity providers sign tokens with other algorithms (for example, `ES256` or `PS256`). You can configure the accepted signing algorithms per provider using the `algorithms` field.
Supported algorithms: `RS256`, `RS384`, `RS512`, `ES256`, `ES384`, `ES512`, `PS256`, `PS384`, `PS512`.
```yaml config.yaml theme={null}
authentication:
required: true
methods:
oidc:
enabled: true
providers:
some_provider:
issuer_url: "https://some.oidc.issuer.com"
client_id: "some_client_identifier"
client_secret: "some_client_secret_credential"
redirect_address: "https://your.flipt.instance.url.com"
algorithms:
- ES256
```
If not specified, the default is `["RS256"]`.
#### UserInfo Claims
Some OIDC providers keep ID token claims minimal and require calling the UserInfo endpoint to obtain additional attributes such as email, display name, or group membership. This is especially common for providers that omit or truncate group claims in the ID token.
You can enable fetching additional claims from the provider's UserInfo endpoint by setting `fetch_extra_user_info` to `true`. When enabled, Flipt calls the UserInfo endpoint during the login callback and merges the returned claims into the session.
```yaml config.yaml theme={null}
authentication:
required: true
methods:
oidc:
enabled: true
providers:
some_provider:
issuer_url: "https://some.oidc.issuer.com"
client_id: "some_client_identifier"
client_secret: "some_client_secret_credential"
redirect_address: "https://your.flipt.instance.url.com"
fetch_extra_user_info: true
```
If not specified, the default is `false`.
#### Custom Authorize Parameters
Some OIDC providers require extra query parameters on the authorization request. For example, Auth0 can use an `audience` parameter to request API access, and some providers use parameters such as `domain_hint`, `connection`, or `idp` to route users to the correct identity provider.
Configure these values with the `authorize_parameters` map on the provider. Flipt appends each key-value pair to the OIDC authorize URL during login.
```yaml config.yaml theme={null}
authentication:
required: true
methods:
oidc:
enabled: true
providers:
some_provider:
issuer_url: "https://some.oidc.issuer.com"
client_id: "some_client_identifier"
client_secret: "some_client_secret_credential"
redirect_address: "https://your.flipt.instance.url.com"
authorize_parameters:
audience: "https://api.example.com"
prompt: "login"
domain_hint: "example.com"
```
If not specified, the default is an empty map.
#### Self-Signed Certificates
If your OIDC provider uses self-signed or internal CA certificates (common with self-hosted Keycloak, Dex, or corporate identity providers), Flipt will reject the TLS connection with an error like:
```text theme={null}
x509: certificate signed by unknown authority
```
The full error may also appear as `tls: failed to verify certificate: x509: certificate signed by unknown authority` depending on the log context.
Flipt relies on the system trust store for TLS validation. To trust your internal CA, you need to add your CA certificate(s) to the container's trust store.
Unlike the [`kubernetes` auth
method](/v2/configuration/authentication#kubernetes), OIDC does not expose a
`ca_path` configuration option. You must add your CA certificate(s) to the
container's system trust store instead.
##### Dockerfile Example
```dockerfile theme={null}
FROM flipt/flipt:latest
# Install CA certificates tooling
RUN apk add --no-cache ca-certificates
# Copy your internal CA certificate(s)
COPY certs/Internal_Root_CA.crt /usr/local/share/ca-certificates/
COPY certs/Internal_Intermediate_CA.crt /usr/local/share/ca-certificates/
# Update the system trust store
RUN update-ca-certificates
```
##### Kubernetes Example
First, create a Secret containing your CA certificate:
```bash theme={null}
kubectl create secret generic internal-ca-certs \
--from-file=ca.crt=/path/to/your/ca.crt
```
Then deploy Flipt with an init container that updates the trust store:
```yaml theme={null}
apiVersion: apps/v1
kind: Deployment
metadata:
name: flipt
spec:
replicas: 1
selector:
matchLabels:
app: flipt
template:
metadata:
labels:
app: flipt
spec:
initContainers:
- name: update-ca-certs
image: alpine:latest
command: ["sh", "-c"]
args:
- |
apk add --no-cache ca-certificates &&
cp /certs/*.crt /usr/local/share/ca-certificates/ &&
update-ca-certificates &&
cp -r /etc/ssl/certs/* /shared-certs/
volumeMounts:
- name: ca-certs
mountPath: /certs
- name: shared-certs
mountPath: /shared-certs
containers:
- name: flipt
image: flipt/flipt:v2
volumeMounts:
- name: shared-certs
mountPath: /etc/ssl/certs
readOnly: true
volumes:
- name: ca-certs
secret:
secretName: internal-ca-certs
- name: shared-certs
emptyDir: {}
```
You can verify that the certificates are trusted by running:
```bash theme={null}
echo | openssl s_client -connect your-oidc-provider:443 2>&1 | grep "Verification"
```
You should see `Verification: OK` if the CA is properly trusted.
#### PKCE
A good amount of OIDC providers support the PKCE (Proof Key for Code Exchange) flow and the implicit OAuth flow. Flipt allows for a configuration to enable PKCE for all the legs of the OIDC authentication flow.
To enable this, you must set the [`use_pkce`](/v2/configuration/overview#authentication-methods-oidc) property to `true` for each provider you would like to leverage PKCE with.
#### Example: OIDC With Google
Given we're running our instance of Flipt on the public internet at `https://flipt.myorg.com`.
Using Google as an example and the documentation linked above, we obtained the following credentials for a Google OAuth client:
```yaml theme={null}
client_id: "CyJcdvQMadOjSEx7ArArom0ytrbIHWd2Fb3N59oh8NQ="
client_secret: "WGgJmfQqN7cf17dFyZKXDL5S445/qhp+hfDAC0Mnl7oBrxgdAgiMyuwCkPiwfgQy"
```
We could create a provider definition in our configuration like so:
```yaml config.yaml theme={null}
authentication:
required: true
methods:
oidc:
enabled: true
providers:
google:
issuer_url: "https://accounts.google.com"
client_id: "CyJcdvQMadOjSEx7ArArom0ytrbIHWd2Fb3N59oh8NQ="
client_secret: "WGgJmfQqN7cf17dFyZKXDL5S445/qhp+hfDAC0Mnl7oBrxgdAgiMyuwCkPiwfgQy"
redirect_address: "https://flipt.myorg.com"
scopes:
- email
- profile
```
The redirect URL for this provider would be
`https://flipt.myorg.com/auth/v1/method/oidc/google/callback`.
Additional `scopes` such as `profile` aren't 100% necessary, however, adding
them will result in Flipt being able to identify more details about your users
such as personalized greeting messages and user profile pictures in the UI.
Once this configuration has been enabled a `Login with Google` option will be presented in the UI.
Clicking this button will navigate the user to a Google consent screen.
Once the user has authenticated with Google, they will be redirected to the address defined in the `redirect_address` section of the provider configuration.
Google's consent screen can be configured to only accept accounts that are within your Google Workspace organization.
Other providers have similar mechanisms for attenuating who can leverage this authentication flow.
### GitHub
The `GitHub` method is a `session compatible` authentication method.
The `github` method provides the ability to establish client tokens via OAuth 2.0 with GitHub as the identity provider.
Once enabled and configured, the UI will automatically leverage it and present a "Login with GitHub" button.
```yaml config.yaml theme={null}
authentication:
required: true
methods:
github:
enabled: true
client_id: "some_client_identifier"
client_secret: "some_client_secret_credential"
redirect_address: "https://your.flipt.instance.url.com"
scopes:
- user:email
```
In order to establish a browser session over HTTP (via a `Cookie` header) some configuration is required.
```yaml config.yaml theme={null}
authentication:
required: true
session:
domain: "flipt.yourorg.com"
secure: true
csrf:
key: "some_secret_string"
```
When a "session compatible" authentication method is enabled the `domain` property is **required**.
It should be configured with the public domain your Flipt instance is hosted on.
The other properties aren't required to be explicitly configured.
To best secure your instance of Flipt, we advise that you run Flipt with `secure: true`.
This will require you to expose Flipt over HTTPS.
Additionally, we advise that you configure a `csrf.key` with a 32 or 64-byte random string of data.
```
openssl rand -base64 64
```
### Session Storage
Session storage allows you to configure where the session data is stored. All session enabled authentication methods will use the same configured session storage backend.
Currently, Flipt v2 supports the following session storage backends:
* `memory`
* `redis`
#### Memory
The `memory` backend is the default and will store session data in memory. This means that the session data will be lost when the Flipt server restarts.
```yaml config.yaml theme={null}
authentication:
required: true
session:
storage:
type: memory
```
#### Redis
The `redis` backend will store session data in a Redis instance. This means that the session data will be persisted across Flipt server restarts and can be shared across multiple Flipt servers.
```yaml config.yaml theme={null}
authentication:
required: true
session:
storage:
type: redis
redis:
mode: single # Required: either "single" or "cluster"
host: localhost
port: 6379
db: 0
password: password
```
The `mode` parameter is **required** and must be set to either:
* `single` - For standalone Redis instances (most common)
* `cluster` - For Redis cluster setups
##### Redis Cluster Example
For Redis cluster configurations, use `mode: cluster`:
```yaml config.yaml theme={null}
authentication:
required: true
session:
storage:
type: redis
redis:
mode: cluster
host: localhost
port: 6379
db: 0
password: password
```
### Session Cleanup
Session cleanup is a feature that allows you to configure the periodic deletion of *expired* authentications created with the associated method.
```yaml config.yaml theme={null}
authentication:
required: true
session:
cleanup:
grace_period: 24h
```
`grace_period` is used to ensure that *expired* tokens are preserved for at least this configured duration.
This allows you to keep authentications around for auditing purposes after expiration.
Expired tokens are instances where the `expires_at` timestamp occurs before the current time.
The grace period is added onto this timestamp as a predicate when the delete operation is made.
Tokens that have expired (`expires_at` is before `now()`) will begin immediately failing authentication when presented as a credential to the API.
The `grace_period` is simply for the cleanup process.
## Methods
Each key within the `methods` section is a particular authentication method.
These methods are disabled (`enabled: false`) by default.
Enabling and configuring a method allows for different ways to establish client token credentials within Flipt.
### Static Token
The `token` method is NOT a `session compatible` authentication method.
The `token` method provides the ability to create client tokens statically, defined in the configuration file.
```yaml config.yaml theme={null}
authentication:
required: true
methods:
token:
enabled: true
storage:
tokens:
"some_token_id":
credential: "some_token_credential"
metadata:
some_key: "some_value"
```
#### Using Secret References
To avoid storing token values directly in your configuration file, you can use [secret references](/v2/configuration/overview#secret-references) with a configured [secret provider](/v2/configuration/secrets).
Using the [file provider](/v2/configuration/secrets#file-provider):
```yaml config.yaml theme={null}
authentication:
required: true
methods:
token:
enabled: true
storage:
tokens:
"ci_token":
credential: "${secret:file:ci-token}" # References /etc/flipt/secrets/ci-token
metadata:
name: "CI Pipeline Token"
"dev_token":
credential: "${secret:file:dev-token}" # References /etc/flipt/secrets/dev-token
metadata:
name: "Development Token"
```
Using the [HashiCorp Vault provider](/v2/configuration/secrets#hashicorp-vault-provider):
```yaml config.yaml theme={null}
authentication:
required: true
methods:
token:
enabled: true
storage:
tokens:
"ci_token":
credential: "${secret:vault:flipt/tokens:ci-token}" # References flipt/tokens secret, key: ci-token
metadata:
name: "CI Pipeline Token"
"dev_token":
credential: "${secret:vault:flipt/tokens:dev-token}" # References flipt/tokens secret, key: dev-token
metadata:
name: "Development Token"
```
Using a cloud provider ([AWS](/v2/configuration/secrets#aws-secrets-manager-provider), [GCP](/v2/configuration/secrets#gcp-secret-manager-provider), or [Azure](/v2/configuration/secrets#azure-key-vault-provider)):
```yaml config.yaml theme={null}
authentication:
required: true
methods:
token:
enabled: true
storage:
tokens:
"ci_token":
credential: "${secret:aws:ci-token}" # AWS Secrets Manager
metadata:
name: "CI Pipeline Token"
"dev_token":
credential: "${secret:gcp:dev-token}" # GCP Secret Manager
metadata:
name: "Development Token"
```
See [Secrets](/v2/configuration/secrets) for details on configuring secret
providers.
### OIDC
The `OIDC` method is a `session compatible` authentication method.
The `oidc` method provides the ability to establish client tokens via OAuth 2.0 with OIDC flow.
Once enabled and configured, the UI will automatically leverage it and present any configured providers as login options.
```yaml config.yaml theme={null}
authentication:
required: true
methods:
oidc:
enabled: true
email_matches:
- ^.*@flipt.io$
providers:
some_provider: # insert your provider name
issuer_url: "https://some.oidc.issuer.com"
client_id: "some_client_identifier"
client_secret: "some_client_secret_credential"
redirect_address: "https://your.flipt.instance.url.com"
scopes:
- email
- profile
```
Multiple providers can be configured simultaneously. Each provider will result in a login option being presented in the UI, along with a configured endpoint to support the provider flow.
Flipt v2 has been tested with each of the following providers:
* [Google](https://developers.google.com/identity/openid-connect/openid-connect)
* [Auth0](https://auth0.com/docs/get-started/applications/application-settings)
* [GitLab](https://docs.gitlab.com/ee/integration/openid_connect_provider.html)
* [Dex](https://dexidp.io/docs/openid-connect/)
* [Okta](https://developer.okta.com/docs/concepts/oauth-openid/#oauth-2-0)
* [AzureAD](https://docs.microsoft.com/en-us/azure/active-directory/develop/v2-protocols-oidc)
* [Keycloak](https://www.keycloak.org/docs/latest/server_admin/index.html#_identity_broker_oidc)
Though the intention is that it should work with all OIDC providers, these are just the handful the Flipt team has validated.
Following any of the links above should take you to the relevant documentation for each of these providers' OIDC client setups.
You can use the credentials and client configuration obtained using those steps as configuration for your Flipt instance.
#### Callback URL
When configuring your OIDC provider, you will need to provide a callback URL for the provider to redirect back to Flipt after a successful login.
The callback URL will be in the form of `https://your.flipt.instance.url.com/auth/v1/method/oidc/{provider}/callback`.
You can find the callback URL for each provider that you configure in your Flipt instance by querying the API.
```bash theme={null}
curl --request GET \
--url https://your.flipt.instance.url.com/auth/v1/method \
--header 'Accept: application/json'
```
```json theme={null}
{
"methods": [
{
"method": "METHOD_TOKEN",
"enabled": true,
"sessionCompatible": false,
"metadata": null
},
{
"method": "METHOD_OIDC",
"enabled": true,
"sessionCompatible": true,
"metadata": {
"providers": {
"google": {
"authorize_url": "/auth/v1/method/oidc/google/authorize",
"callback_url": "/auth/v1/method/oidc/google/callback"
}
}
}
}
]
}
```
#### Email Matches
Flipt operators may wish to lock down access to the Flipt API and UI to a specific group of users within their organization behind OIDC.
Since OIDC has the ability to retrieve email addresses, Flipt also provides a configuration option of using `email_matches` which are [regular expressions](https://github.com/google/re2/wiki/Syntax) that can be used to match against the OIDC email.
You must request the `email` scope from your OIDC provider in order for this
feature to work.
You can see an example of that above in the [sample configuration](#method-oidc).
#### Algorithms
By default, Flipt expects OIDC ID tokens to be signed with the `RS256` algorithm. Some identity providers sign tokens with other algorithms (for example, `ES256` or `PS256`). You can configure the accepted signing algorithms per provider using the `algorithms` field.
Supported algorithms: `RS256`, `RS384`, `RS512`, `ES256`, `ES384`, `ES512`, `PS256`, `PS384`, `PS512`.
```yaml config.yaml theme={null}
authentication:
required: true
methods:
oidc:
enabled: true
providers:
some_provider:
issuer_url: "https://some.oidc.issuer.com"
client_id: "some_client_identifier"
client_secret: "some_client_secret_credential"
redirect_address: "https://your.flipt.instance.url.com"
algorithms:
- ES256
```
If not specified, the default is `["RS256"]`.
#### UserInfo Claims
Some OIDC providers keep ID token claims minimal and require calling the UserInfo endpoint to obtain additional attributes such as email, display name, or group membership. This is especially common for providers that omit or truncate group claims in the ID token.
You can enable fetching additional claims from the provider's UserInfo endpoint by setting `fetch_extra_user_info` to `true`. When enabled, Flipt calls the UserInfo endpoint during the login callback and merges the returned claims into the session.
```yaml config.yaml theme={null}
authentication:
required: true
methods:
oidc:
enabled: true
providers:
some_provider:
issuer_url: "https://some.oidc.issuer.com"
client_id: "some_client_identifier"
client_secret: "some_client_secret_credential"
redirect_address: "https://your.flipt.instance.url.com"
fetch_extra_user_info: true
```
If not specified, the default is `false`.
#### Custom Authorize Parameters
Some OIDC providers require extra query parameters on the authorization request. For example, Auth0 can use an `audience` parameter to request API access, and some providers use parameters such as `domain_hint`, `connection`, or `idp` to route users to the correct identity provider.
Configure these values with the `authorize_parameters` map on the provider. Flipt appends each key-value pair to the OIDC authorize URL during login.
```yaml config.yaml theme={null}
authentication:
required: true
methods:
oidc:
enabled: true
providers:
some_provider:
issuer_url: "https://some.oidc.issuer.com"
client_id: "some_client_identifier"
client_secret: "some_client_secret_credential"
redirect_address: "https://your.flipt.instance.url.com"
authorize_parameters:
audience: "https://api.example.com"
prompt: "login"
domain_hint: "example.com"
```
If not specified, the default is an empty map.
#### Self-Signed Certificates
If your OIDC provider uses self-signed or internal CA certificates (common with self-hosted Keycloak, Dex, or corporate identity providers), Flipt will reject the TLS connection with an error like:
```text theme={null}
x509: certificate signed by unknown authority
```
The full error may also appear as `tls: failed to verify certificate: x509: certificate signed by unknown authority` depending on the log context.
Flipt relies on the system trust store for TLS validation. To trust your internal CA, you need to add your CA certificate(s) to the container's trust store.
Unlike the [`kubernetes` auth
method](/v2/configuration/authentication#kubernetes), OIDC does not expose a
`ca_path` configuration option. You must add your CA certificate(s) to the
container's system trust store instead.
##### Dockerfile Example
```dockerfile theme={null}
FROM flipt/flipt:latest
# Install CA certificates tooling
RUN apk add --no-cache ca-certificates
# Copy your internal CA certificate(s)
COPY certs/Internal_Root_CA.crt /usr/local/share/ca-certificates/
COPY certs/Internal_Intermediate_CA.crt /usr/local/share/ca-certificates/
# Update the system trust store
RUN update-ca-certificates
```
##### Kubernetes Example
First, create a Secret containing your CA certificate:
```bash theme={null}
kubectl create secret generic internal-ca-certs \
--from-file=ca.crt=/path/to/your/ca.crt
```
Then deploy Flipt with an init container that updates the trust store:
```yaml theme={null}
apiVersion: apps/v1
kind: Deployment
metadata:
name: flipt
spec:
replicas: 1
selector:
matchLabels:
app: flipt
template:
metadata:
labels:
app: flipt
spec:
initContainers:
- name: update-ca-certs
image: alpine:latest
command: ["sh", "-c"]
args:
- |
apk add --no-cache ca-certificates &&
cp /certs/*.crt /usr/local/share/ca-certificates/ &&
update-ca-certificates &&
cp -r /etc/ssl/certs/* /shared-certs/
volumeMounts:
- name: ca-certs
mountPath: /certs
- name: shared-certs
mountPath: /shared-certs
containers:
- name: flipt
image: flipt/flipt:v2
volumeMounts:
- name: shared-certs
mountPath: /etc/ssl/certs
readOnly: true
volumes:
- name: ca-certs
secret:
secretName: internal-ca-certs
- name: shared-certs
emptyDir: {}
```
You can verify that the certificates are trusted by running:
```bash theme={null}
echo | openssl s_client -connect your-oidc-provider:443 2>&1 | grep "Verification"
```
You should see `Verification: OK` if the CA is properly trusted.
#### PKCE
A good amount of OIDC providers support the PKCE (Proof Key for Code Exchange) flow and the implicit OAuth flow. Flipt allows for a configuration to enable PKCE for all the legs of the OIDC authentication flow.
To enable this, you must set the [`use_pkce`](/v2/configuration/overview#authentication-methods-oidc) property to `true` for each provider you would like to leverage PKCE with.
#### Example: OIDC With Google
Given we're running our instance of Flipt on the public internet at `https://flipt.myorg.com`.
Using Google as an example and the documentation linked above, we obtained the following credentials for a Google OAuth client:
```yaml theme={null}
client_id: "CyJcdvQMadOjSEx7ArArom0ytrbIHWd2Fb3N59oh8NQ="
client_secret: "WGgJmfQqN7cf17dFyZKXDL5S445/qhp+hfDAC0Mnl7oBrxgdAgiMyuwCkPiwfgQy"
```
We could create a provider definition in our configuration like so:
```yaml config.yaml theme={null}
authentication:
required: true
methods:
oidc:
enabled: true
providers:
google:
issuer_url: "https://accounts.google.com"
client_id: "CyJcdvQMadOjSEx7ArArom0ytrbIHWd2Fb3N59oh8NQ="
client_secret: "WGgJmfQqN7cf17dFyZKXDL5S445/qhp+hfDAC0Mnl7oBrxgdAgiMyuwCkPiwfgQy"
redirect_address: "https://flipt.myorg.com"
scopes:
- email
- profile
```
The redirect URL for this provider would be
`https://flipt.myorg.com/auth/v1/method/oidc/google/callback`.
Additional `scopes` such as `profile` aren't 100% necessary, however, adding
them will result in Flipt being able to identify more details about your users
such as personalized greeting messages and user profile pictures in the UI.
Once this configuration has been enabled a `Login with Google` option will be presented in the UI.
Clicking this button will navigate the user to a Google consent screen.
Once the user has authenticated with Google, they will be redirected to the address defined in the `redirect_address` section of the provider configuration.
Google's consent screen can be configured to only accept accounts that are within your Google Workspace organization.
Other providers have similar mechanisms for attenuating who can leverage this authentication flow.
### GitHub
The `GitHub` method is a `session compatible` authentication method.
The `github` method provides the ability to establish client tokens via OAuth 2.0 with GitHub as the identity provider.
Once enabled and configured, the UI will automatically leverage it and present a "Login with GitHub" button.
```yaml config.yaml theme={null}
authentication:
required: true
methods:
github:
enabled: true
client_id: "some_client_identifier"
client_secret: "some_client_secret_credential"
redirect_address: "https://your.flipt.instance.url.com"
scopes:
- user:email
```
 #### Allowed Organizations
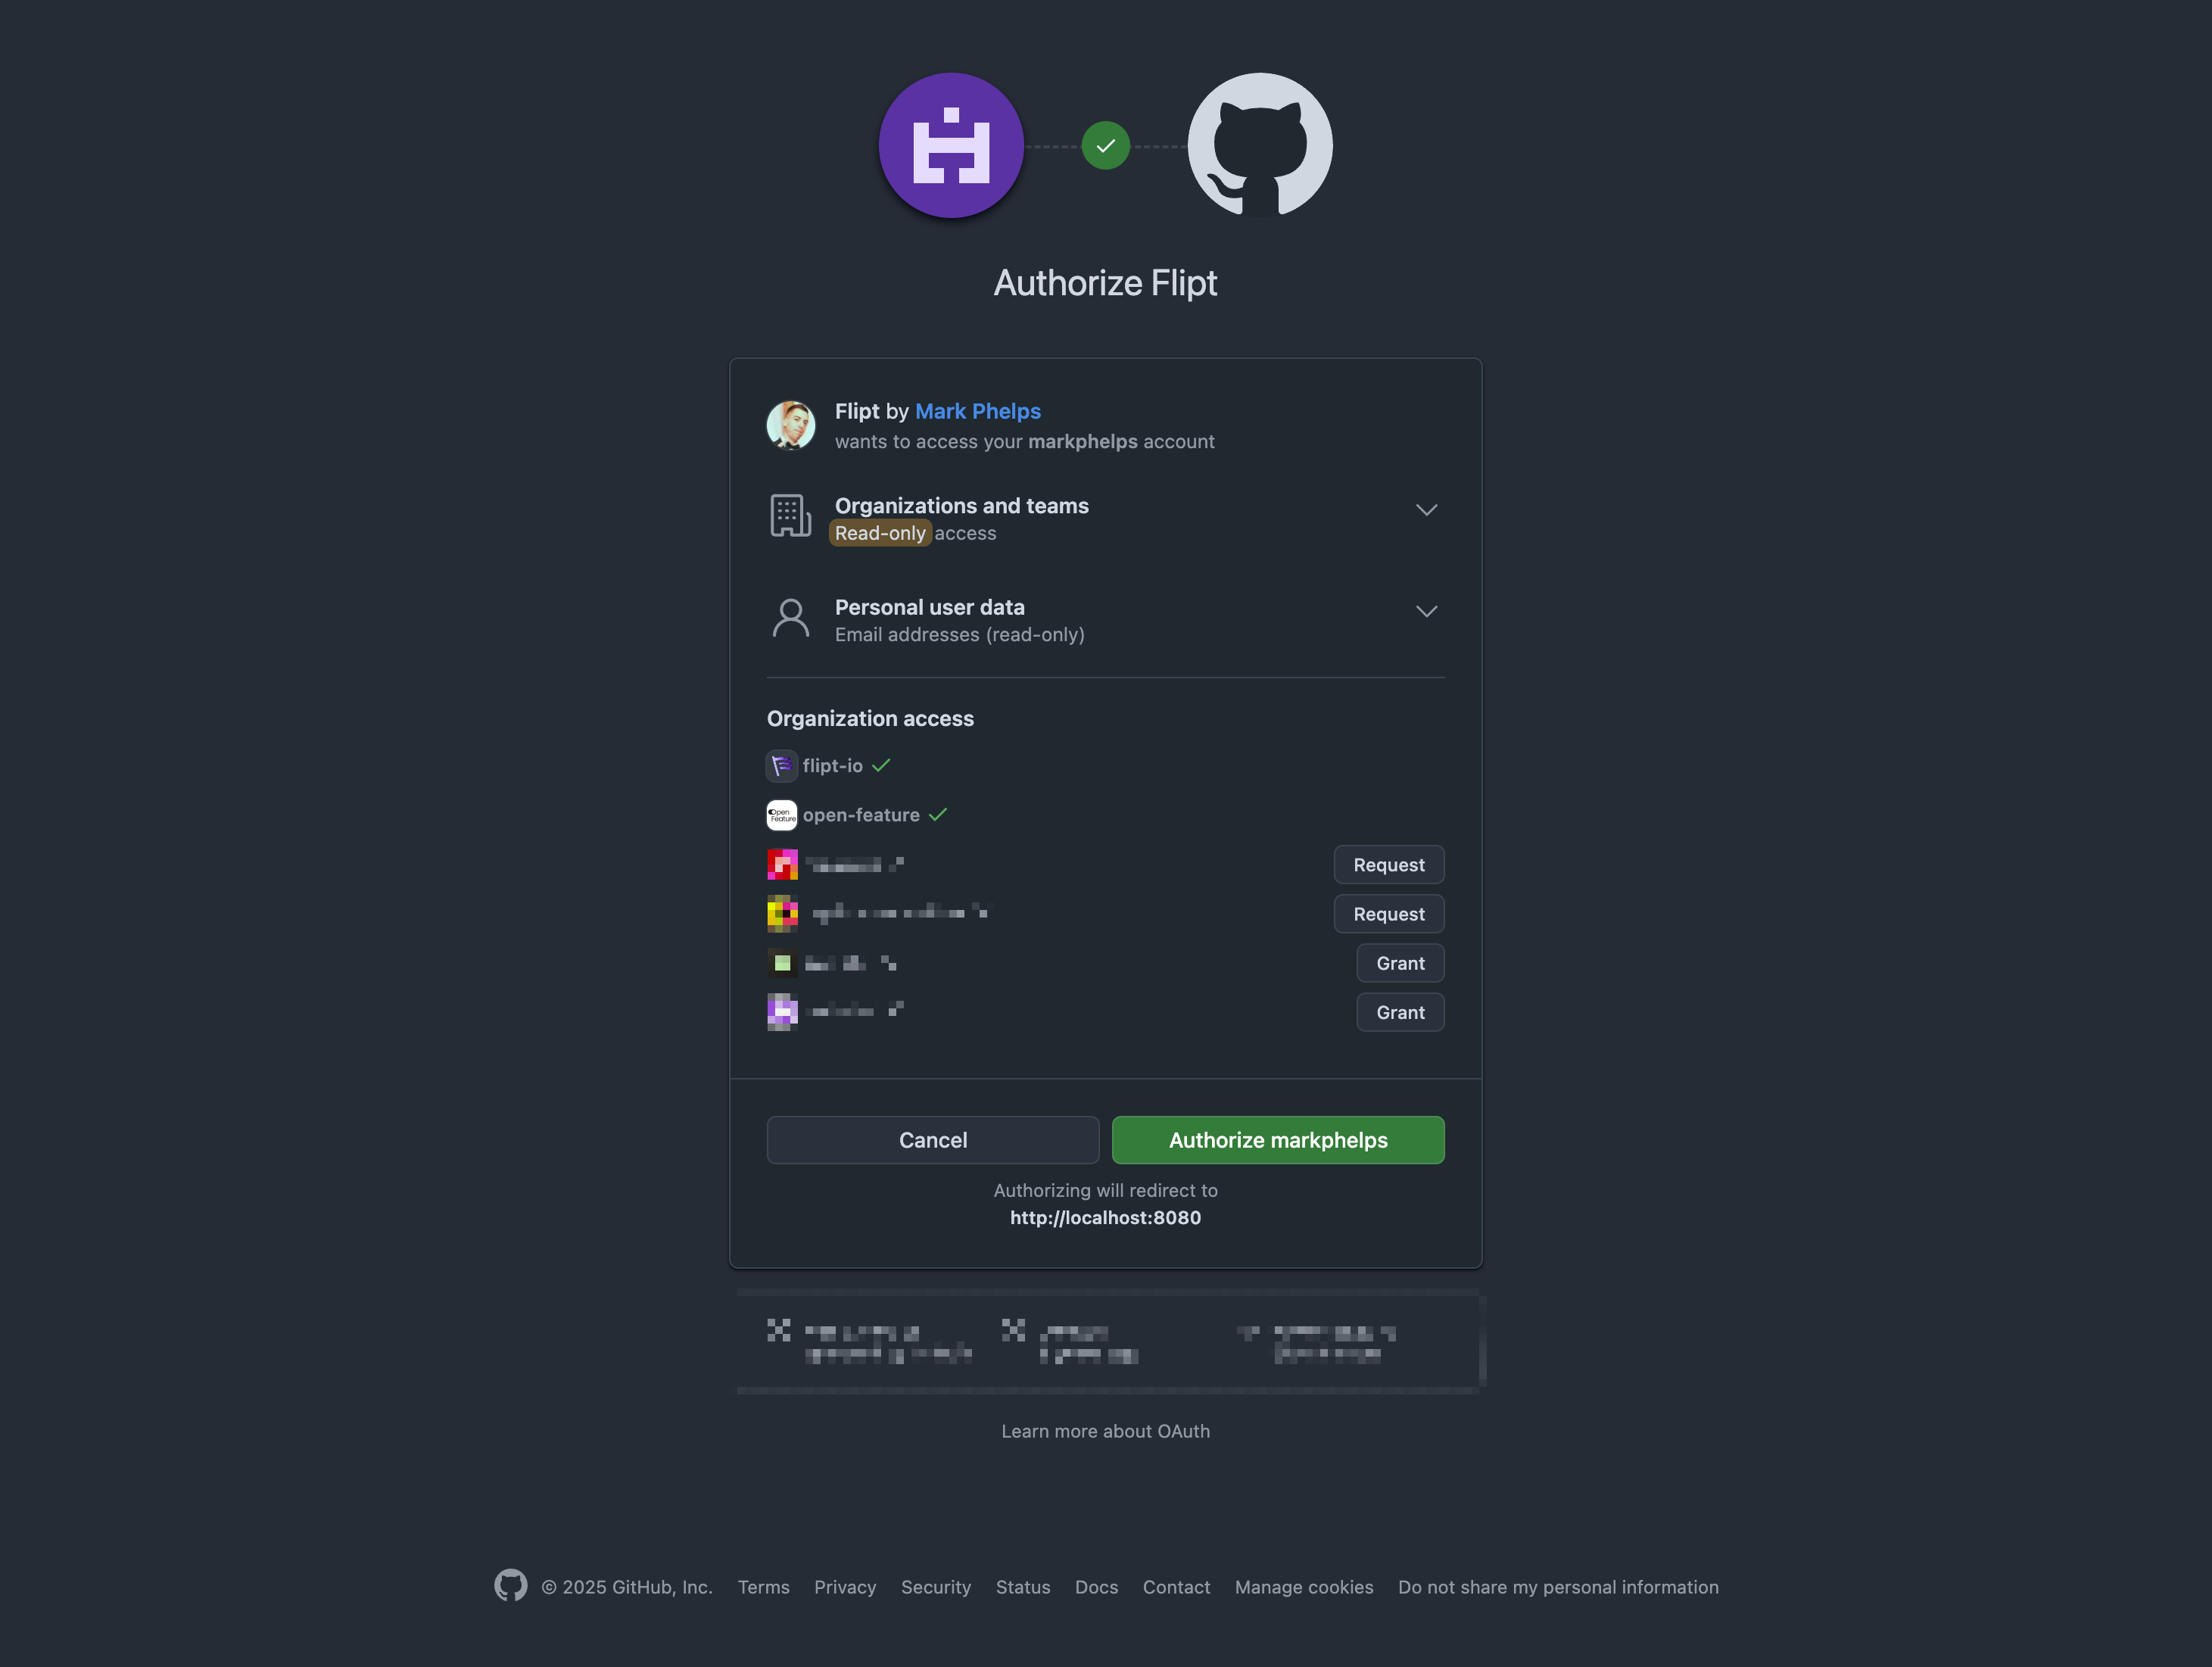
The GitHub authentication method supports the ability to restrict access to a set of GitHub organizations. This is important if you want to limit access to Flipt to only members of a specific organization as opposed to all GitHub users.
To enable this feature, set the `github.allowed_organizations` configuration value to a list of GitHub organizations. For example:
```yaml config.yaml theme={null}
authentication:
required: true
methods:
github:
enabled: true
scopes:
- read:org
allowed_organizations:
- my-org
- my-other-org
```
The `read:org` scope is required to retrieve the list of organizations that
the user is a member of.
Your OAuth application **must have permission** to access the specified organization(s). Without this permission, the GitHub API won't return organization membership information when Flipt verifies access.
For a complete setup guide, see [Login with GitHub](/v2/guides/operations/authentication/login-with-github).
#### Allowed Organizations
The GitHub authentication method supports the ability to restrict access to a set of GitHub organizations. This is important if you want to limit access to Flipt to only members of a specific organization as opposed to all GitHub users.
To enable this feature, set the `github.allowed_organizations` configuration value to a list of GitHub organizations. For example:
```yaml config.yaml theme={null}
authentication:
required: true
methods:
github:
enabled: true
scopes:
- read:org
allowed_organizations:
- my-org
- my-other-org
```
The `read:org` scope is required to retrieve the list of organizations that
the user is a member of.
Your OAuth application **must have permission** to access the specified organization(s). Without this permission, the GitHub API won't return organization membership information when Flipt verifies access.
For a complete setup guide, see [Login with GitHub](/v2/guides/operations/authentication/login-with-github).
 #### Allowed Teams
The GitHub authentication method also supports the ability to restrict access to a set of GitHub teams. This is important if you want to limit access to Flipt to only members of a specific team within an organization as opposed to all members of the organization.
To enable this feature, set the `github.allowed_teams` configuration value to a list of GitHub teams within existing allowed organizations. For example:
```yaml config.yaml theme={null}
authentication:
required: true
methods:
github:
enabled: true
scopes:
- read:org
allowed_organizations:
- my-org
- my-other-org
allowed_teams:
my-org:
- my-team
my-other-org:
- my-other-team
```
The organizations to check for team membership must be included in the
`allowed_organizations` list.
### Kubernetes
The `kubernetes` method provides the ability to exchange Kubernetes service account tokens for client tokens.
```yaml config.yaml theme={null}
authentication:
required: true
methods:
kubernetes:
enabled: true
discovery_url: https://kubernetes.default.svc.cluster.local
ca_path: /var/run/secrets/kubernetes.io/serviceaccount/ca.crt
service_account_token_path: /var/run/secrets/kubernetes.io/serviceaccount/token
```
Once enabled, client tokens can be retrieved by sending a Kubernetes pod's service account token to the `VerifyServiceAccount` operation in the API.
Further explanation for using this method can be found in the [Authentication: Kubernetes](/v1/authentication/methods#kubernetes) documentation.
#### Troubleshooting
**verifying service account: failed to verify signature: fetching keys oidc**
In some managed Kubernetes cluster environments, the default cluster OIDC provider is replaced with the platform's managed alternative.
For example, EKS clusters leverage this so that they can issue service account tokens which can assume the capabilities of AWS IAM roles.
In this situation, the default OIDC discovery URL isn't appropriate for fetching key material from.
Instead, you should locate your clusters OIDC URL and use that instead.
Your cluster's OIDC URL will vary between Kubernetes providers. For example,
here is some documentation which should help for EKS: [EKS troubleshoot OIDC
and IRSA](https://repost.aws/knowledge-center/eks-troubleshoot-oidc-and-irsa).
It's also important to note that custom OIDC providers likely will use HTTPS which has been signed with certificates not authorized by the cluster TLS certificate authority.
In this situation, you can override the `kubernetes` auth providers `ca_path` field with relevant key material.
The `flipt` distributed Docker image has valid and trusted certificates in `/etc/ssl/certs/ca-certificates.crt`, which can be appropriate if your OIDC provider has certificates granted by a valid public certificate authority.
```yaml example-config-for-eks.yaml theme={null}
authentication:
required: true
methods:
kubernetes:
enabled: true
discovery_url: https://oidc.eks.us-west-2.amazonaws.com/id/EXAMPLED539D4633E53DE1B716D3041E # note: yours will be different
ca_path: /etc/ssl/certs/ca-certificates.crt # this can be enough if your OIDC provider TLS certificates have been signed by a public certificate authority
```
See [this issue](https://github.com/flipt-io/flipt/issues/2942) for more context.
### JSON Web Token
The `jwt` method provides the ability to authenticate with Flipt using an externally issued JSON Web Token. This method is useful for integrating with other authentication systems that can issue JWTs (e.g. [Auth0](https://auth0.com/docs/tokens/json-web-tokens)) or by generating your own signed JWTs on the fly.
Flipt supports asymmetrically signed JWTs using the following algorithms:
* RS256
* RS512
* ES256
* ES512
* EdDSA
This means that the JWT must be signed using a private key leveraging one of these algorithms and Flipt must be configured with the corresponding public key.
Flipt supports key verification using the following methods:
* [JWKS](https://auth0.com/docs/secure/tokens/json-web-tokens/json-web-key-sets) URL (JSON Web Key Set URL)
* PEM (Privacy Enhanced Mail) encoded public key
These methods are mutually exclusive, meaning that only one of them can be
configured at a time.
#### JWKS URL
The `jwks_url` configuration value is a URL that points to a JWKS (JSON Web Key Set) endpoint. This endpoint must return a JSON object that contains a list of public keys that can be used to verify the JWT signature.
```yaml config.yaml theme={null}
authentication:
required: true
methods:
jwt:
enabled: true
jwks_url: https://auth0.com/.well-known/jwks.json
```
#### PEM Encoded Public Key
The `public_key_file` configuration value is the path to a PEM encoded public key that can be used to verify the JWT signature.
```yaml config.yaml theme={null}
authentication:
required: true
methods:
jwt:
enabled: true
public_key_file: /path/to/public_key.pem
```
#### Claim Validation
Flipt supports validating the following claims:
* `iss` (issuer)
* `aud` (audience)
* `sub` (subject)
* `exp` (expiration time)
* `nbf` (not before)
* `iat` (issued at)
The `exp`, `nbf`, and `iat` claims are validated by default.
To enable claim validation, configure the values in the `validate_claims` configuration option to the expected values.
```yaml config.yaml theme={null}
authentication:
required: true
methods:
jwt:
enabled: true
validate_claims:
issuer: https://auth0.com/
subject: user@domain.com
audiences: https://flipt.io/, https://flipt.com/ # at least one audience must match
```
#### Claims Mapping
By default, Flipt extracts user attributes from JWT claims using predefined paths within the JWT payload. The default mappings are:
* `email` from `/user/email`
* `name` from `/user/name`
* `sub` from `/user/sub`
* `picture` from `/user/image`
* `role` from `/user/role`
You can customize these mappings using the `claims_mapping` configuration option. This allows you to specify [JSON Pointer](https://datatracker.ietf.org/doc/html/rfc6901) expressions to extract user attributes from different locations in the JWT payload.
The custom mappings are merged with the default mappings, so you can override specific attributes while keeping the defaults for others.
Only the predefined attribute names (`email`, `name`, `sub`, `picture`,
`role`) are supported in claims mapping. Custom attribute names are not
allowed to ensure compatibility with consuming code.
```yaml config.yaml theme={null}
authentication:
required: true
methods:
jwt:
enabled: true
claims_mapping:
email: "/user/email" # Override default (same path)
name: "/profile/displayName" # Override default (custom path)
sub: "/user_id" # Override default (custom path)
```
With this configuration:
* `email` is extracted from `/user/email` (default behavior)
* `name` is extracted from `/profile/displayName` (custom override)
* `sub` is extracted from `/user_id` (custom override)
* `picture` is still extracted from `/user/image` (default, not overridden)
* `role` is still extracted from `/user/role` (default, not overridden)
**Example JWT payload:**
```json theme={null}
{
"iss": "https://auth0.com/",
"sub": "auth0|123456",
"user_id": "12345",
"user": {
"email": "user@example.com"
},
"profile": {
"displayName": "John Doe"
}
}
```
The resulting metadata available in Flipt would be:
* `io.flipt.auth.jwt.email`: `user@example.com`
* `io.flipt.auth.jwt.name`: `John Doe`
* `io.flipt.auth.jwt.sub`: `12345`
Invalid JSON Pointer expressions or paths that don't exist in the JWT payload
are silently ignored.
#### Allowed Teams
The GitHub authentication method also supports the ability to restrict access to a set of GitHub teams. This is important if you want to limit access to Flipt to only members of a specific team within an organization as opposed to all members of the organization.
To enable this feature, set the `github.allowed_teams` configuration value to a list of GitHub teams within existing allowed organizations. For example:
```yaml config.yaml theme={null}
authentication:
required: true
methods:
github:
enabled: true
scopes:
- read:org
allowed_organizations:
- my-org
- my-other-org
allowed_teams:
my-org:
- my-team
my-other-org:
- my-other-team
```
The organizations to check for team membership must be included in the
`allowed_organizations` list.
### Kubernetes
The `kubernetes` method provides the ability to exchange Kubernetes service account tokens for client tokens.
```yaml config.yaml theme={null}
authentication:
required: true
methods:
kubernetes:
enabled: true
discovery_url: https://kubernetes.default.svc.cluster.local
ca_path: /var/run/secrets/kubernetes.io/serviceaccount/ca.crt
service_account_token_path: /var/run/secrets/kubernetes.io/serviceaccount/token
```
Once enabled, client tokens can be retrieved by sending a Kubernetes pod's service account token to the `VerifyServiceAccount` operation in the API.
Further explanation for using this method can be found in the [Authentication: Kubernetes](/v1/authentication/methods#kubernetes) documentation.
#### Troubleshooting
**verifying service account: failed to verify signature: fetching keys oidc**
In some managed Kubernetes cluster environments, the default cluster OIDC provider is replaced with the platform's managed alternative.
For example, EKS clusters leverage this so that they can issue service account tokens which can assume the capabilities of AWS IAM roles.
In this situation, the default OIDC discovery URL isn't appropriate for fetching key material from.
Instead, you should locate your clusters OIDC URL and use that instead.
Your cluster's OIDC URL will vary between Kubernetes providers. For example,
here is some documentation which should help for EKS: [EKS troubleshoot OIDC
and IRSA](https://repost.aws/knowledge-center/eks-troubleshoot-oidc-and-irsa).
It's also important to note that custom OIDC providers likely will use HTTPS which has been signed with certificates not authorized by the cluster TLS certificate authority.
In this situation, you can override the `kubernetes` auth providers `ca_path` field with relevant key material.
The `flipt` distributed Docker image has valid and trusted certificates in `/etc/ssl/certs/ca-certificates.crt`, which can be appropriate if your OIDC provider has certificates granted by a valid public certificate authority.
```yaml example-config-for-eks.yaml theme={null}
authentication:
required: true
methods:
kubernetes:
enabled: true
discovery_url: https://oidc.eks.us-west-2.amazonaws.com/id/EXAMPLED539D4633E53DE1B716D3041E # note: yours will be different
ca_path: /etc/ssl/certs/ca-certificates.crt # this can be enough if your OIDC provider TLS certificates have been signed by a public certificate authority
```
See [this issue](https://github.com/flipt-io/flipt/issues/2942) for more context.
### JSON Web Token
The `jwt` method provides the ability to authenticate with Flipt using an externally issued JSON Web Token. This method is useful for integrating with other authentication systems that can issue JWTs (e.g. [Auth0](https://auth0.com/docs/tokens/json-web-tokens)) or by generating your own signed JWTs on the fly.
Flipt supports asymmetrically signed JWTs using the following algorithms:
* RS256
* RS512
* ES256
* ES512
* EdDSA
This means that the JWT must be signed using a private key leveraging one of these algorithms and Flipt must be configured with the corresponding public key.
Flipt supports key verification using the following methods:
* [JWKS](https://auth0.com/docs/secure/tokens/json-web-tokens/json-web-key-sets) URL (JSON Web Key Set URL)
* PEM (Privacy Enhanced Mail) encoded public key
These methods are mutually exclusive, meaning that only one of them can be
configured at a time.
#### JWKS URL
The `jwks_url` configuration value is a URL that points to a JWKS (JSON Web Key Set) endpoint. This endpoint must return a JSON object that contains a list of public keys that can be used to verify the JWT signature.
```yaml config.yaml theme={null}
authentication:
required: true
methods:
jwt:
enabled: true
jwks_url: https://auth0.com/.well-known/jwks.json
```
#### PEM Encoded Public Key
The `public_key_file` configuration value is the path to a PEM encoded public key that can be used to verify the JWT signature.
```yaml config.yaml theme={null}
authentication:
required: true
methods:
jwt:
enabled: true
public_key_file: /path/to/public_key.pem
```
#### Claim Validation
Flipt supports validating the following claims:
* `iss` (issuer)
* `aud` (audience)
* `sub` (subject)
* `exp` (expiration time)
* `nbf` (not before)
* `iat` (issued at)
The `exp`, `nbf`, and `iat` claims are validated by default.
To enable claim validation, configure the values in the `validate_claims` configuration option to the expected values.
```yaml config.yaml theme={null}
authentication:
required: true
methods:
jwt:
enabled: true
validate_claims:
issuer: https://auth0.com/
subject: user@domain.com
audiences: https://flipt.io/, https://flipt.com/ # at least one audience must match
```
#### Claims Mapping
By default, Flipt extracts user attributes from JWT claims using predefined paths within the JWT payload. The default mappings are:
* `email` from `/user/email`
* `name` from `/user/name`
* `sub` from `/user/sub`
* `picture` from `/user/image`
* `role` from `/user/role`
You can customize these mappings using the `claims_mapping` configuration option. This allows you to specify [JSON Pointer](https://datatracker.ietf.org/doc/html/rfc6901) expressions to extract user attributes from different locations in the JWT payload.
The custom mappings are merged with the default mappings, so you can override specific attributes while keeping the defaults for others.
Only the predefined attribute names (`email`, `name`, `sub`, `picture`,
`role`) are supported in claims mapping. Custom attribute names are not
allowed to ensure compatibility with consuming code.
```yaml config.yaml theme={null}
authentication:
required: true
methods:
jwt:
enabled: true
claims_mapping:
email: "/user/email" # Override default (same path)
name: "/profile/displayName" # Override default (custom path)
sub: "/user_id" # Override default (custom path)
```
With this configuration:
* `email` is extracted from `/user/email` (default behavior)
* `name` is extracted from `/profile/displayName` (custom override)
* `sub` is extracted from `/user_id` (custom override)
* `picture` is still extracted from `/user/image` (default, not overridden)
* `role` is still extracted from `/user/role` (default, not overridden)
**Example JWT payload:**
```json theme={null}
{
"iss": "https://auth0.com/",
"sub": "auth0|123456",
"user_id": "12345",
"user": {
"email": "user@example.com"
},
"profile": {
"displayName": "John Doe"
}
}
```
The resulting metadata available in Flipt would be:
* `io.flipt.auth.jwt.email`: `user@example.com`
* `io.flipt.auth.jwt.name`: `John Doe`
* `io.flipt.auth.jwt.sub`: `12345`
Invalid JSON Pointer expressions or paths that don't exist in the JWT payload
are silently ignored.