> ## Documentation Index
> Fetch the complete documentation index at: https://docs.flipt.io/llms.txt
> Use this file to discover all available pages before exploring further.
# Getting Started
> This document describes how to get started with Flipt.
This document will walk you through creating your
first flag, segment, set of rules, and finally using the evaluation console to
simulate an evaluation request from your applications.
For more information on any of the concepts described, please see the
[Concepts](/v1/concepts) documentation.
## Setup
Before getting started, make sure the Flipt server is up and running on your
host on your chosen ports. See [Installation](/v1/installation) for more.
```console Binary theme={null}
curl -fsSL https://get.flipt.io/install | sh
```
```console Docker theme={null}
docker run -d \
-p 8080:8080 \
-p 9000:9000 \
-v $HOME/flipt:/var/opt/flipt \
docker.flipt.io/flipt/flipt:latest
```
```console Kubernetes/Helm theme={null}
helm repo add flipt https://helm.flipt.io
helm install flipt flipt/flipt
```
```console Homebrew theme={null}
brew install flipt-io/brew/flipt
```
In this example, we'll use the default location of [http://localhost:8080](http://localhost:8080).
## Flags and Variants
First, we'll create a flag and variants that we will use to evaluate against.
### Create a Flag
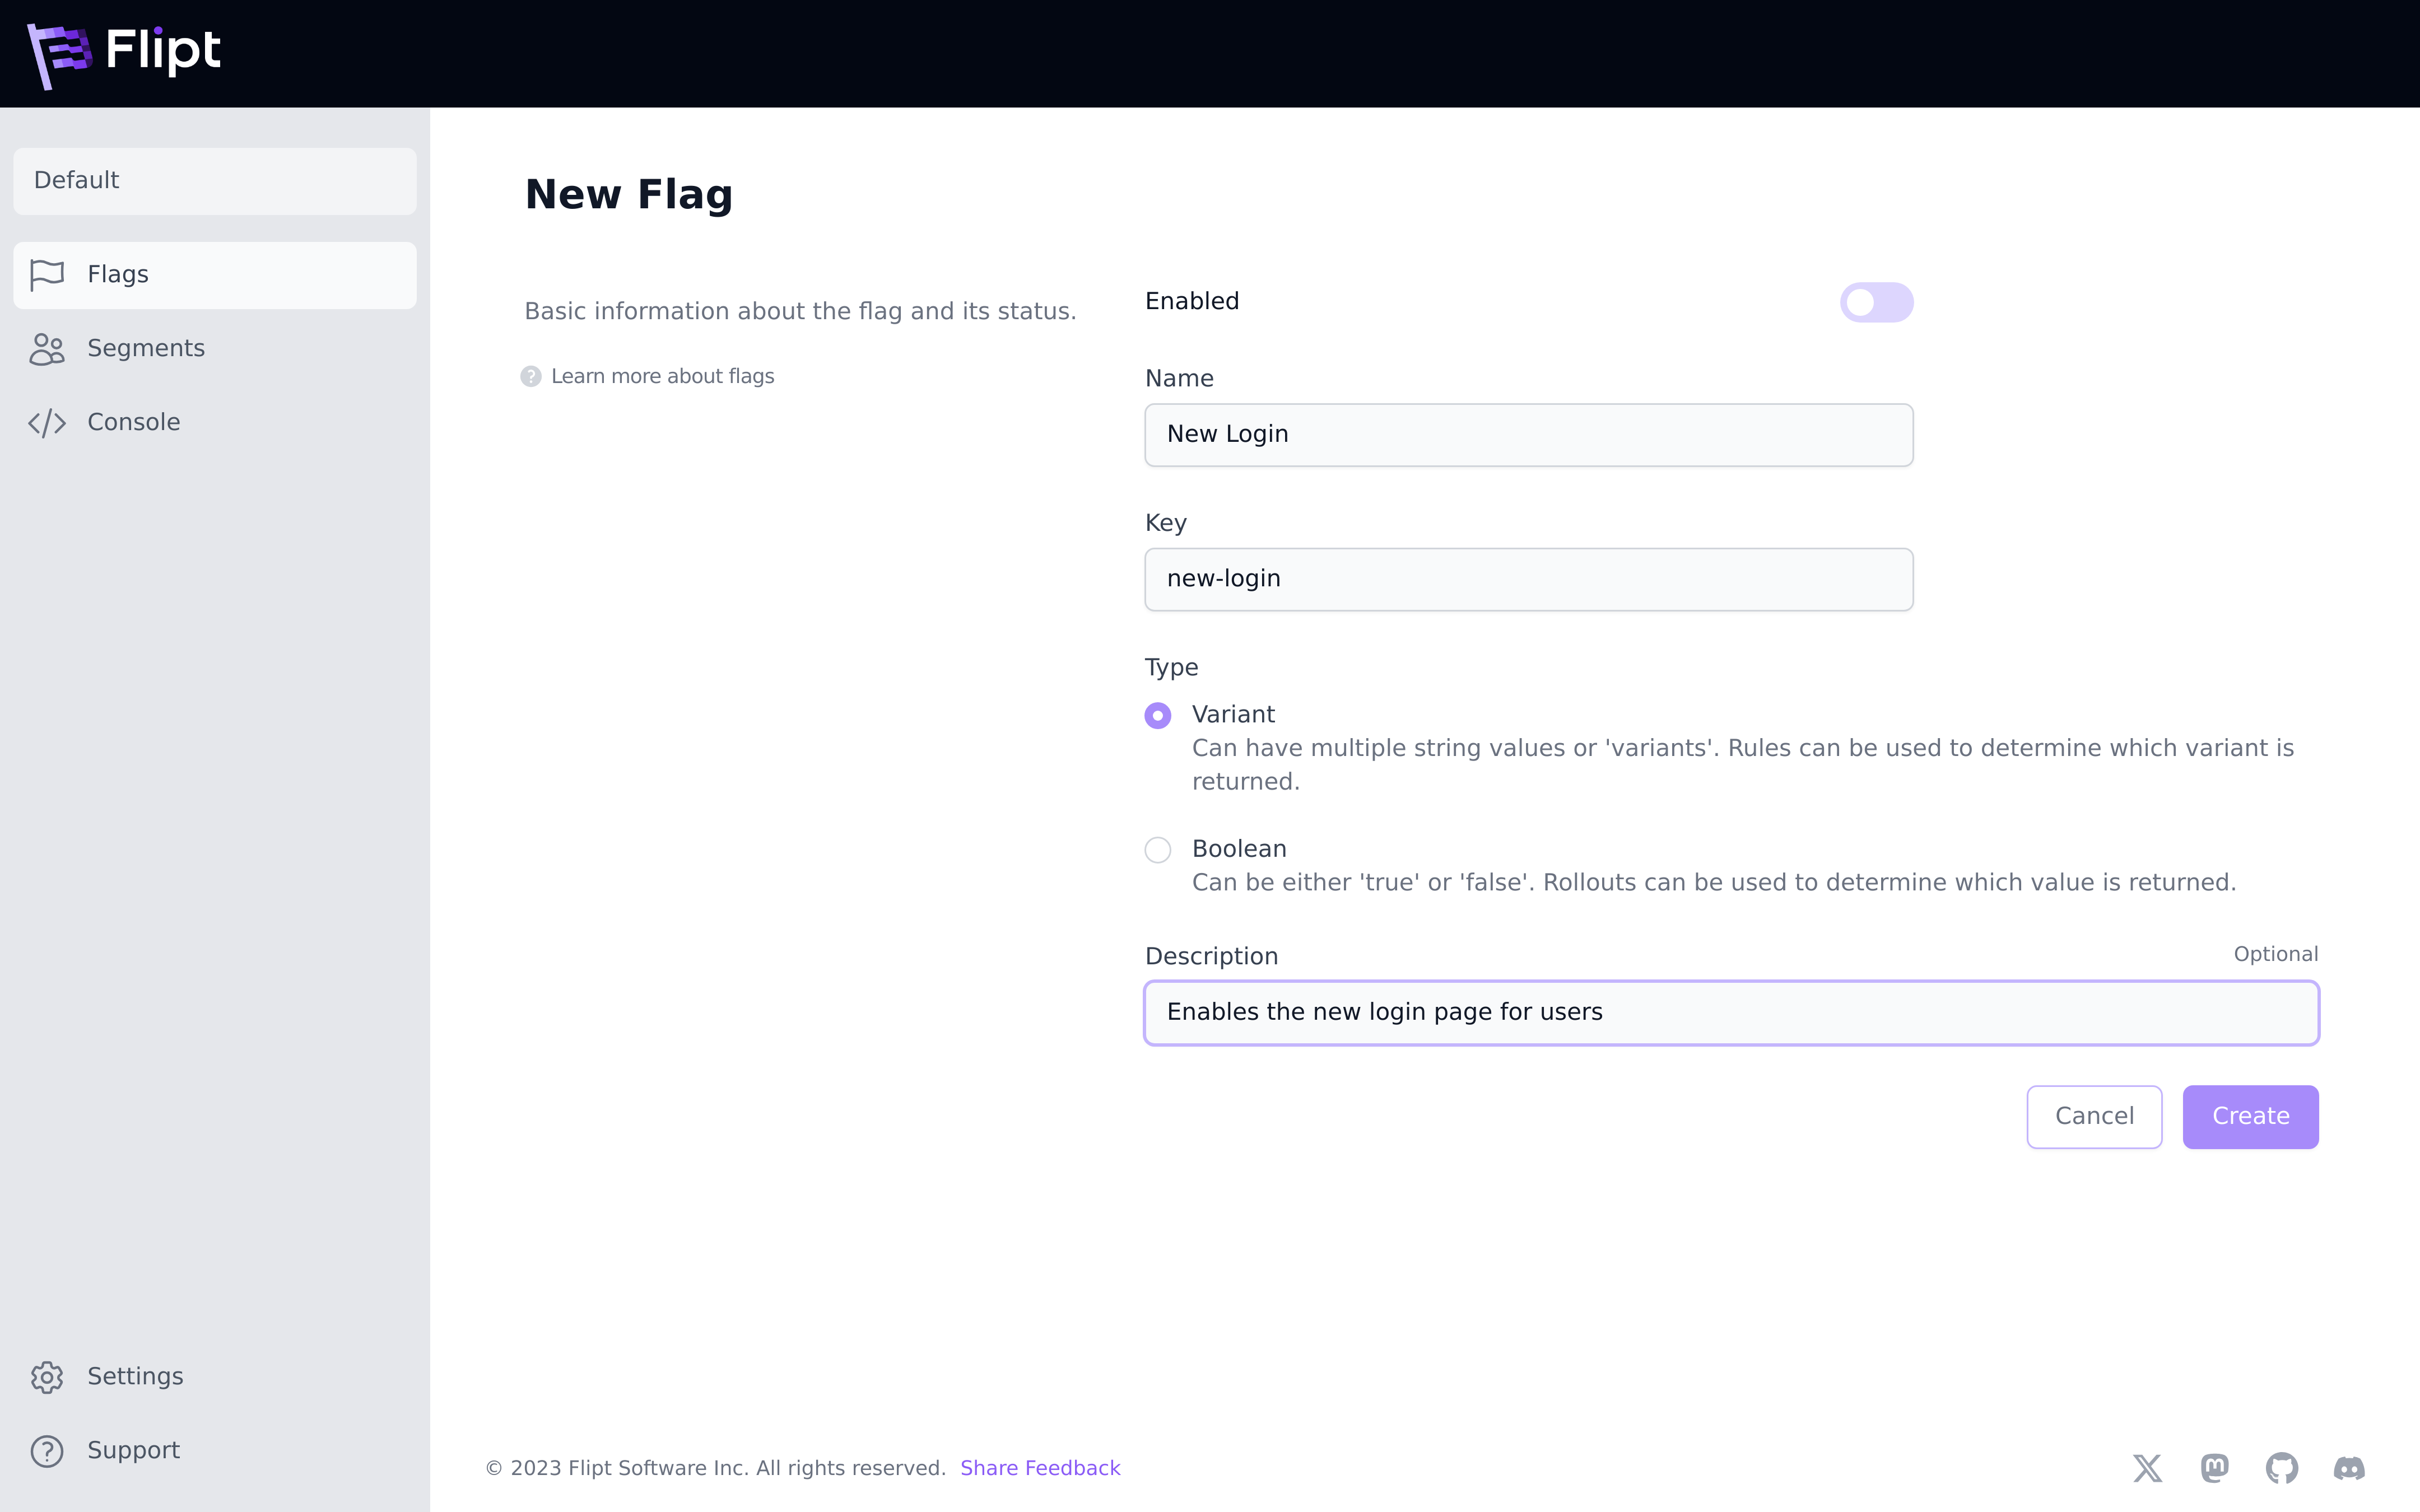
A flag is the basic entity in Flipt. Flags can represent features in your
applications that you want to enable/disable for your users.
To create a flag:
1. Open the UI at [http://localhost:8080](http://localhost:8080).
2. Click `New Flag`.
3. Populate the details of the flag as shown.
4. Click `Enabled` so the flag will be enabled once created.
5. Click `Create`.
 ### Create Variants
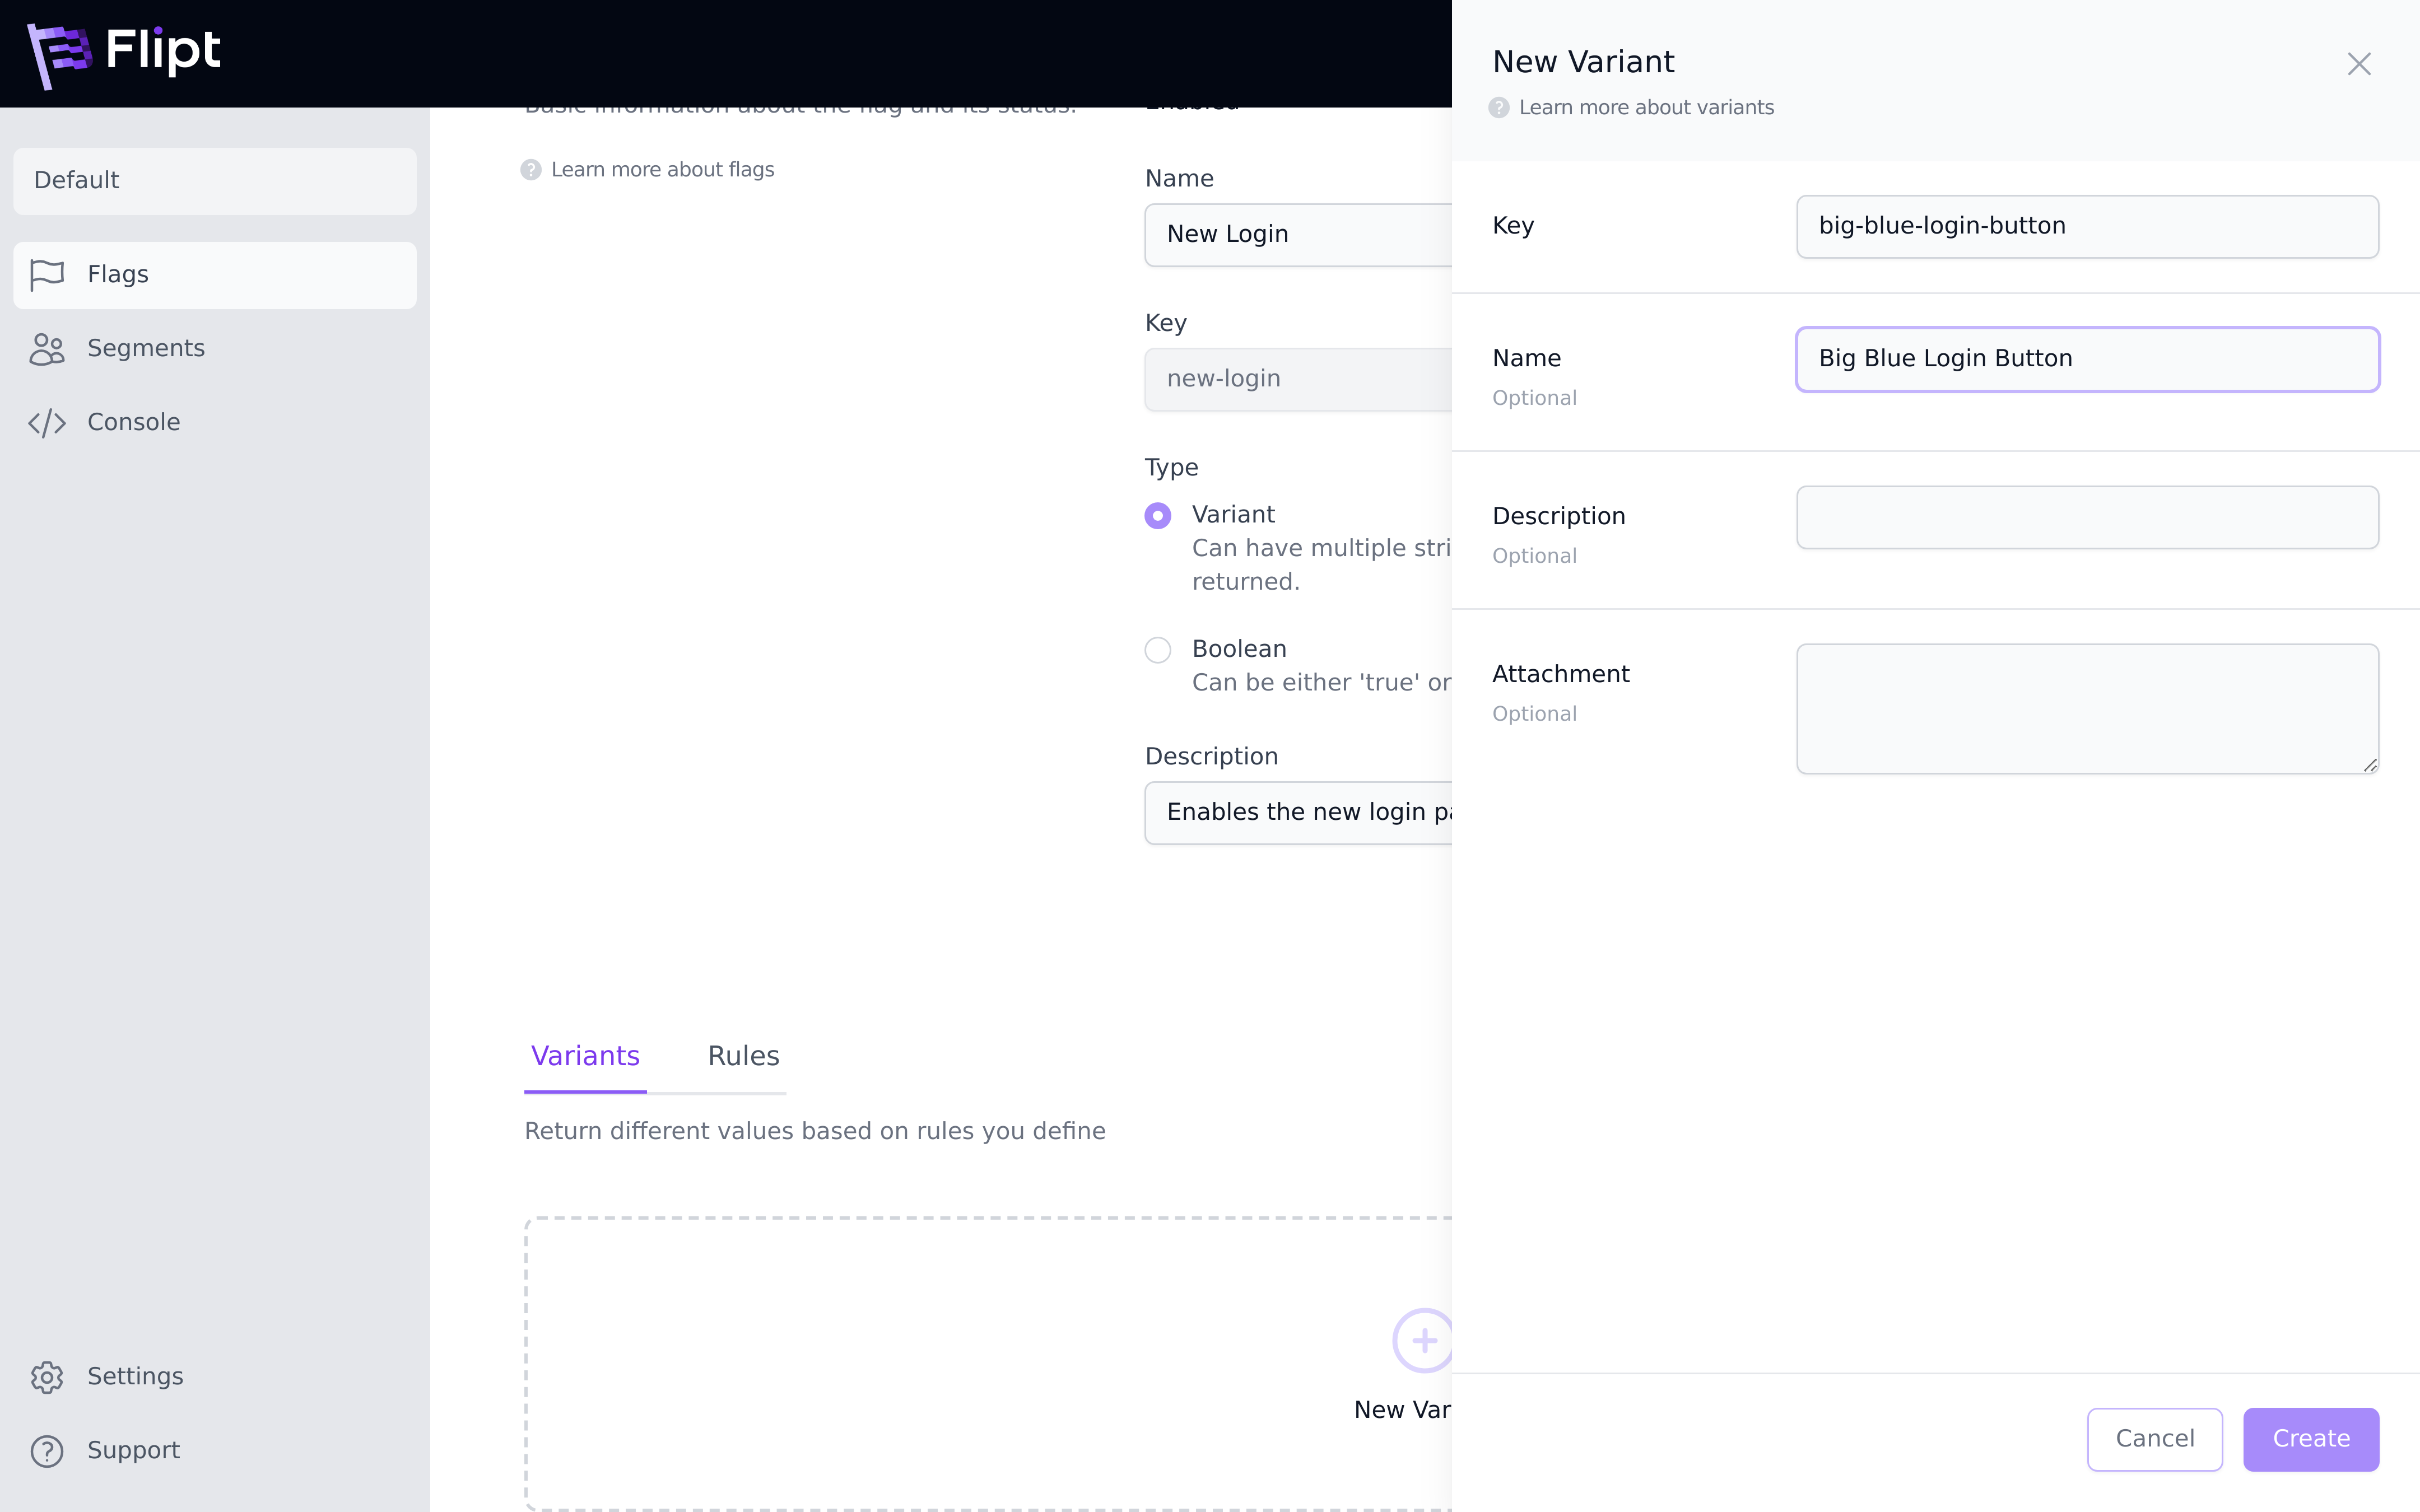
Variants allow you to return different values for your flags based on rules that
you define.
To create a variant:
1. On the Flag Details page for the new flag you created, click `New Variant`.
2. Populate the details of the variant as shown.
3. Click `Create`.
4. Create one more variant populating the information as you wish.
### Create Variants
Variants allow you to return different values for your flags based on rules that
you define.
To create a variant:
1. On the Flag Details page for the new flag you created, click `New Variant`.
2. Populate the details of the variant as shown.
3. Click `Create`.
4. Create one more variant populating the information as you wish.
 Click `Flags` in the navigation menu and you should now see your newly created
flag in the list.
## Segments and Constraints
Next, we'll create a segment with a constraint that will be used to determine the
reach of your flag.
### Create a Segment
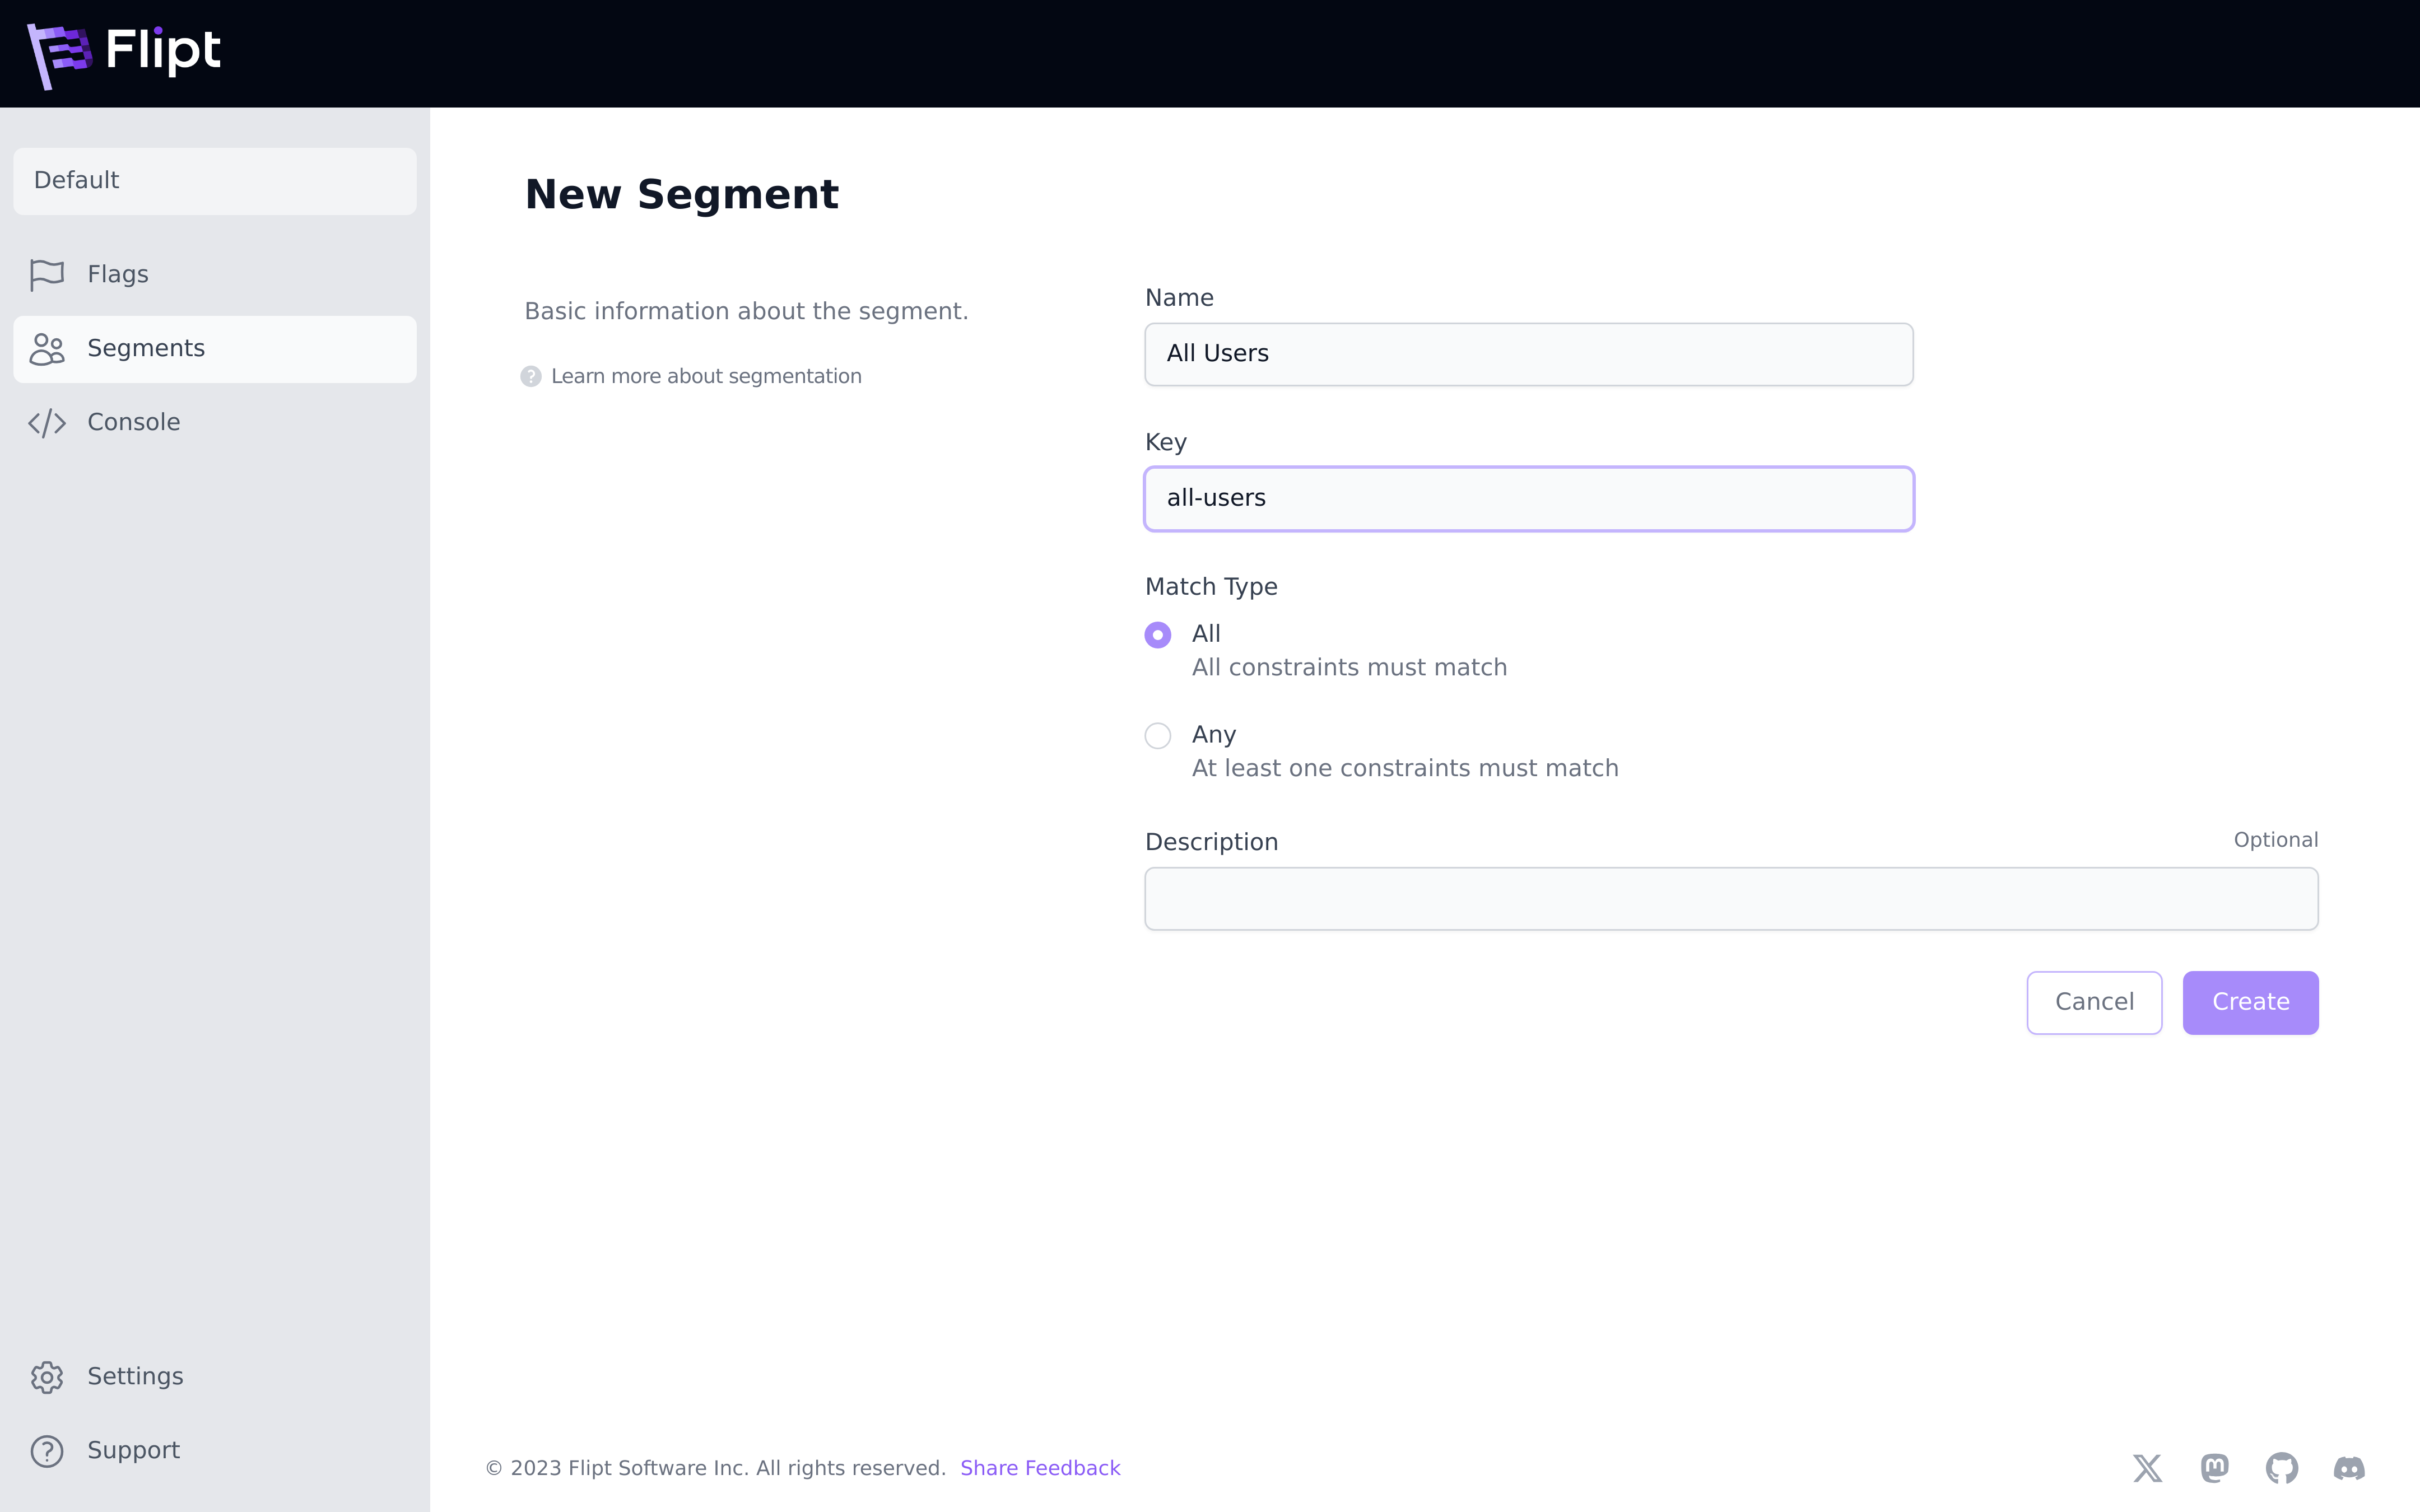
Segments are used to split your user base into subsets.
To create a segment:
1. From the navigation click `Segments`.
2. Click `New Segment`.
3. Populate the details of the segment as shown.
4. Click `Create`.
Click `Flags` in the navigation menu and you should now see your newly created
flag in the list.
## Segments and Constraints
Next, we'll create a segment with a constraint that will be used to determine the
reach of your flag.
### Create a Segment
Segments are used to split your user base into subsets.
To create a segment:
1. From the navigation click `Segments`.
2. Click `New Segment`.
3. Populate the details of the segment as shown.
4. Click `Create`.
 ### Create a Constraint
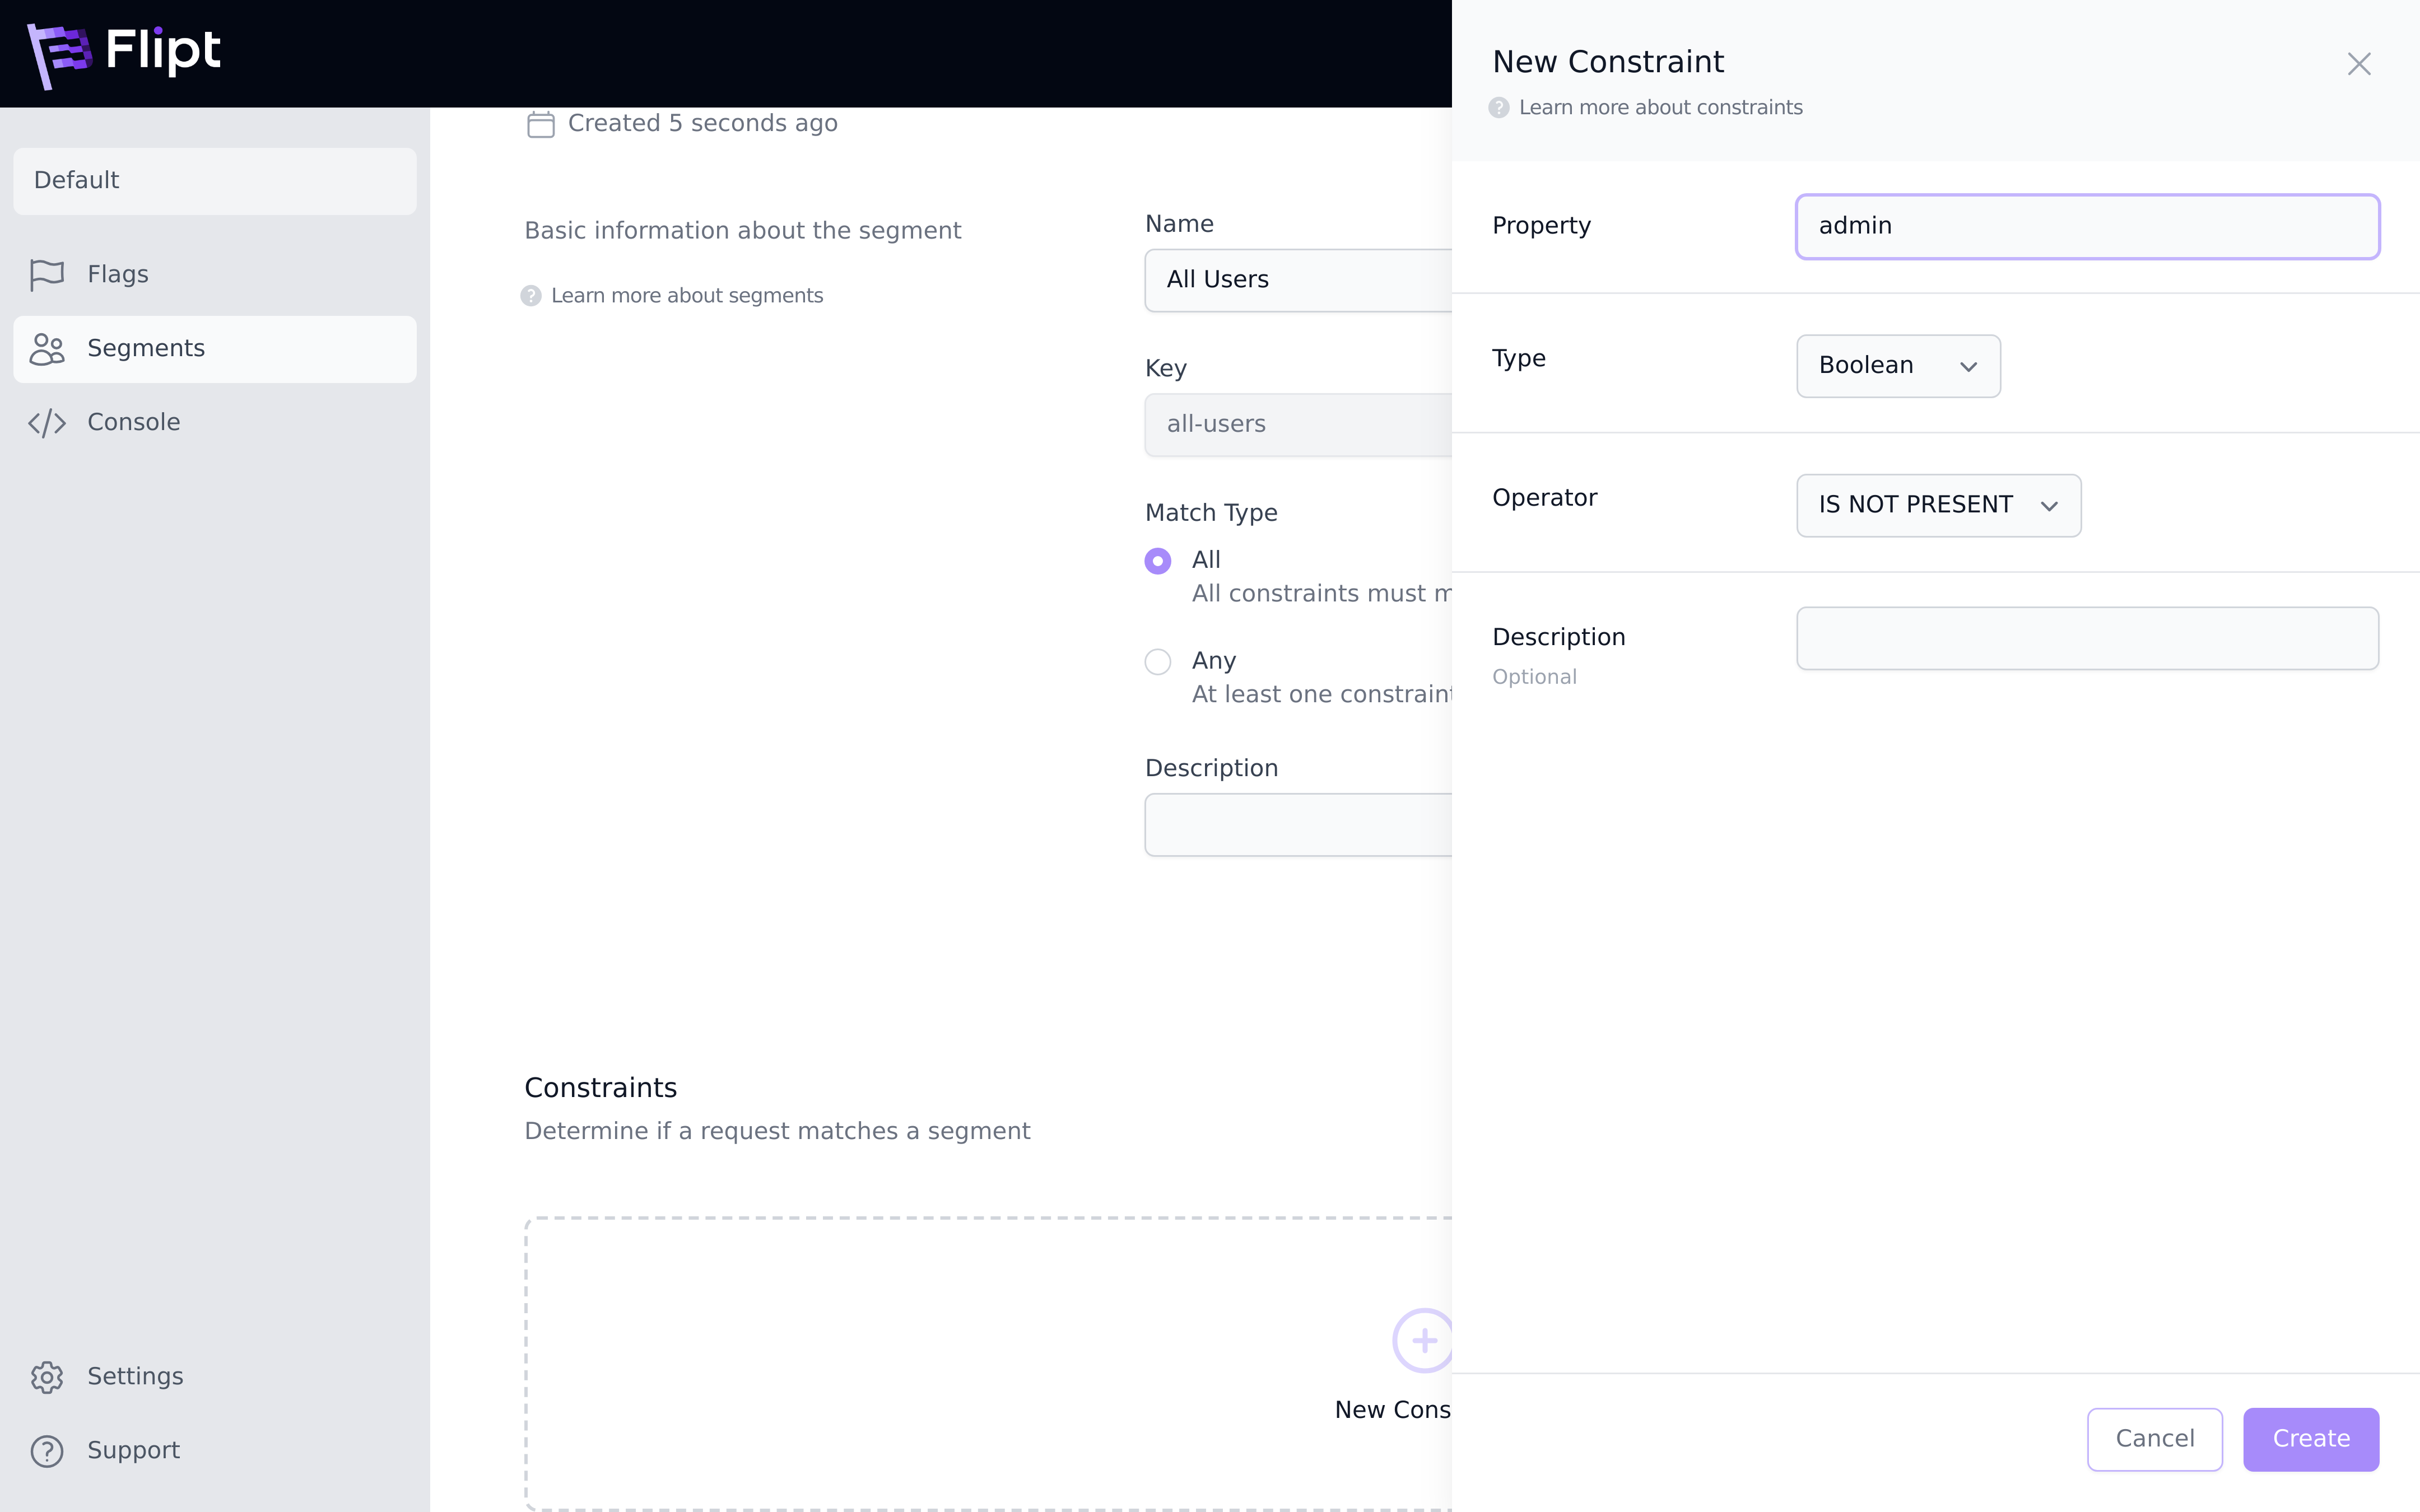
Constraints are used to target a specific segment.
Constraints aren't required to match a segment. A segment with no constraints
will match every request by default.
To create a constraint:
1. On the Segment Details page for the new segment you created, click
`New Constraint`.
2. Populate the details of the constraint as shown.
3. Click `Create`.
### Create a Constraint
Constraints are used to target a specific segment.
Constraints aren't required to match a segment. A segment with no constraints
will match every request by default.
To create a constraint:
1. On the Segment Details page for the new segment you created, click
`New Constraint`.
2. Populate the details of the constraint as shown.
3. Click `Create`.
 Click `Segments` in the navigation menu and you should now see your newly
created segment in the list.
## Rules and Distributions
Finally, we'll create a rule defining a distribution for your flag and variants.
Rules allow you to define which variant gets returned when you
evaluate a specific flag that falls into a given segment.
### Create a Rule
To create a rule:
1. Go back to the flag you created at the beginning.
2. Scroll down and click the `Rules` tab.
3. Click `New Rule`.
4. Next to `Segment` choose or search for the segment you created earlier.
5. Next to `Type` choose `Multi-Variate`.
6. You should see the two variants that you created earlier, with a percentage
of `50%` each.
7. Click `Create`.
Click `Segments` in the navigation menu and you should now see your newly
created segment in the list.
## Rules and Distributions
Finally, we'll create a rule defining a distribution for your flag and variants.
Rules allow you to define which variant gets returned when you
evaluate a specific flag that falls into a given segment.
### Create a Rule
To create a rule:
1. Go back to the flag you created at the beginning.
2. Scroll down and click the `Rules` tab.
3. Click `New Rule`.
4. Next to `Segment` choose or search for the segment you created earlier.
5. Next to `Type` choose `Multi-Variate`.
6. You should see the two variants that you created earlier, with a percentage
of `50%` each.
7. Click `Create`.
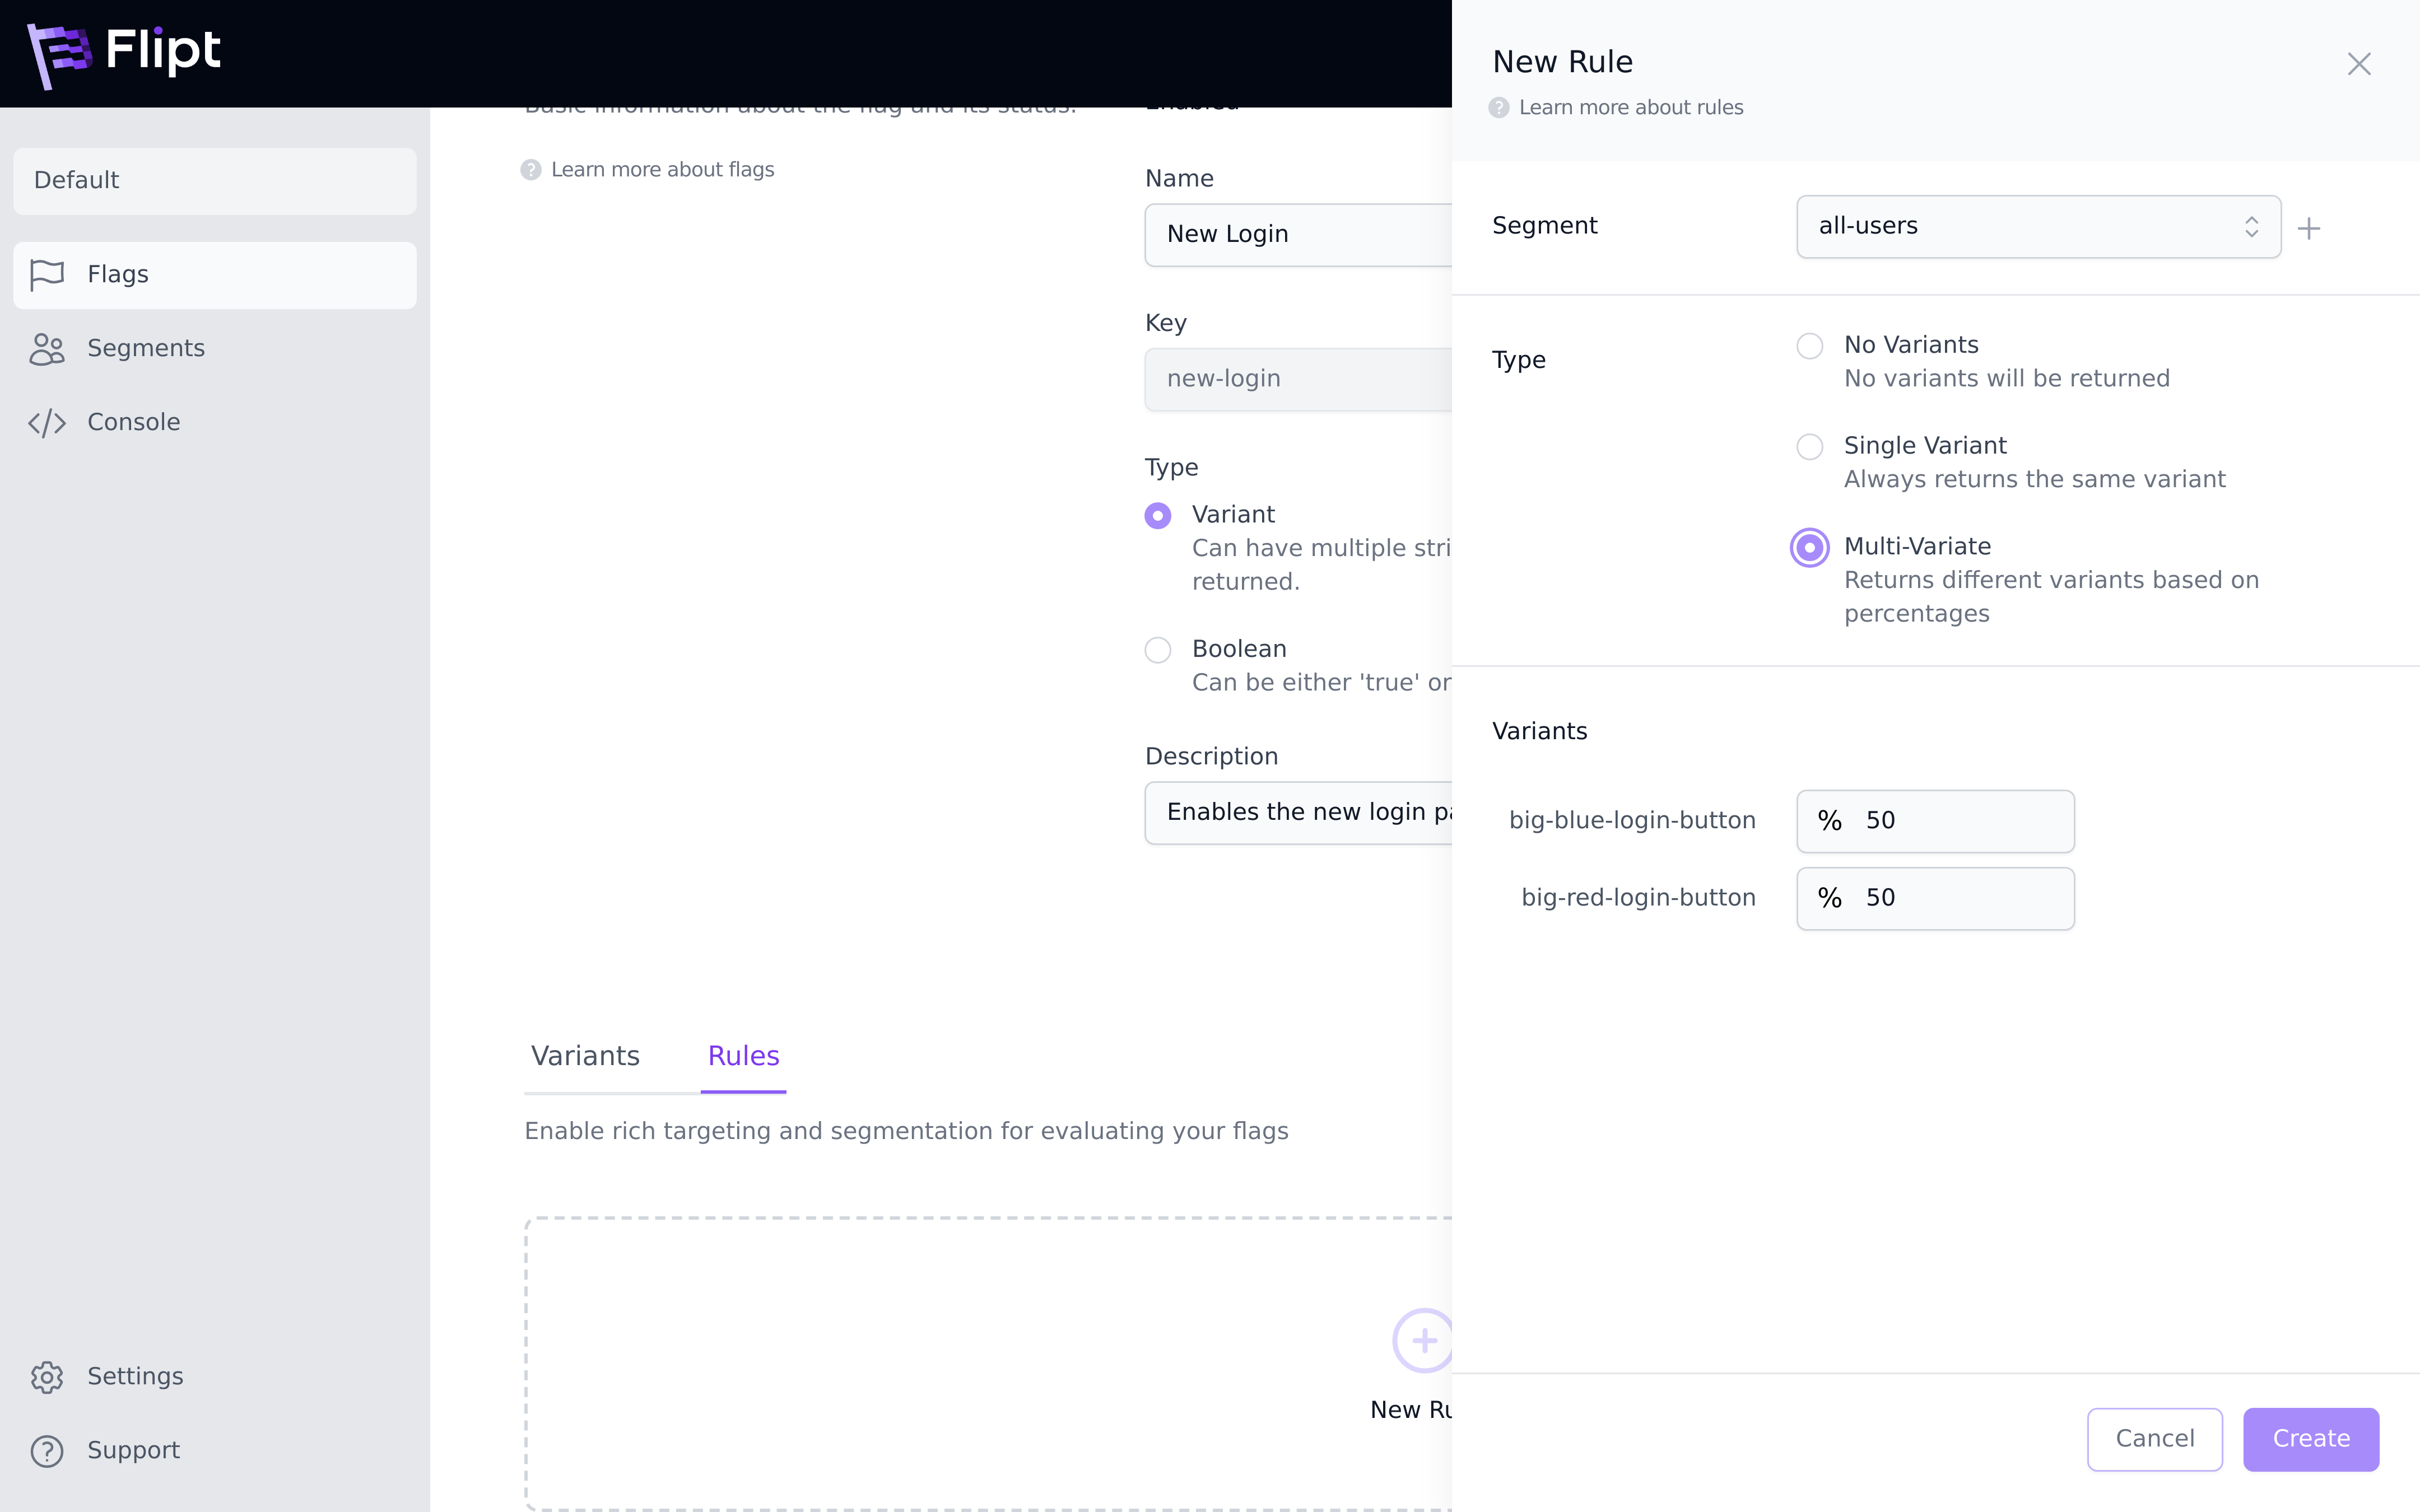 A distribution is a way of assigning a percentage for which entities evaluated
get a specific variant. The higher the percentage assigned, the more likely it
is that any entity will get that specific variant.
You could just as easily have picked `Single Variant` instead of
`Multi-Variate` when setting up your rule. This would effectively mean you
have a single distribution, a variant with `100%` chance of being returned.
## Evaluation Console
After creating the above flag, segment and targeting rule, you're now ready to
test how this would work in your application.
The Flipt UI contains an Evaluation Console to allow you to experiment
with different requests to see how they would be evaluated.
The main ideas behind how evaluation works are described in more detail in the
[Concepts](/v1/concepts#evaluation) documentation.
To test evaluation:
1. Navigate to the `Console` page from the main navigation.
2. Select or search for the flag you created earlier.
3. Notice that the `Entity ID` field is pre-populated with a random UUID. This represents
the ID that you would use to uniquely identify entities (ex: users) that you
want to test against your flags.
4. Click `Evaluate`.
5. Note the pane to the right has been populated with the evaluation
response from the server, informing you that this request would match the
segment that you created earlier, and return one of the variants defined.
6. Experiment with different values for the `Request Context` and `Entity ID` fields.
A distribution is a way of assigning a percentage for which entities evaluated
get a specific variant. The higher the percentage assigned, the more likely it
is that any entity will get that specific variant.
You could just as easily have picked `Single Variant` instead of
`Multi-Variate` when setting up your rule. This would effectively mean you
have a single distribution, a variant with `100%` chance of being returned.
## Evaluation Console
After creating the above flag, segment and targeting rule, you're now ready to
test how this would work in your application.
The Flipt UI contains an Evaluation Console to allow you to experiment
with different requests to see how they would be evaluated.
The main ideas behind how evaluation works are described in more detail in the
[Concepts](/v1/concepts#evaluation) documentation.
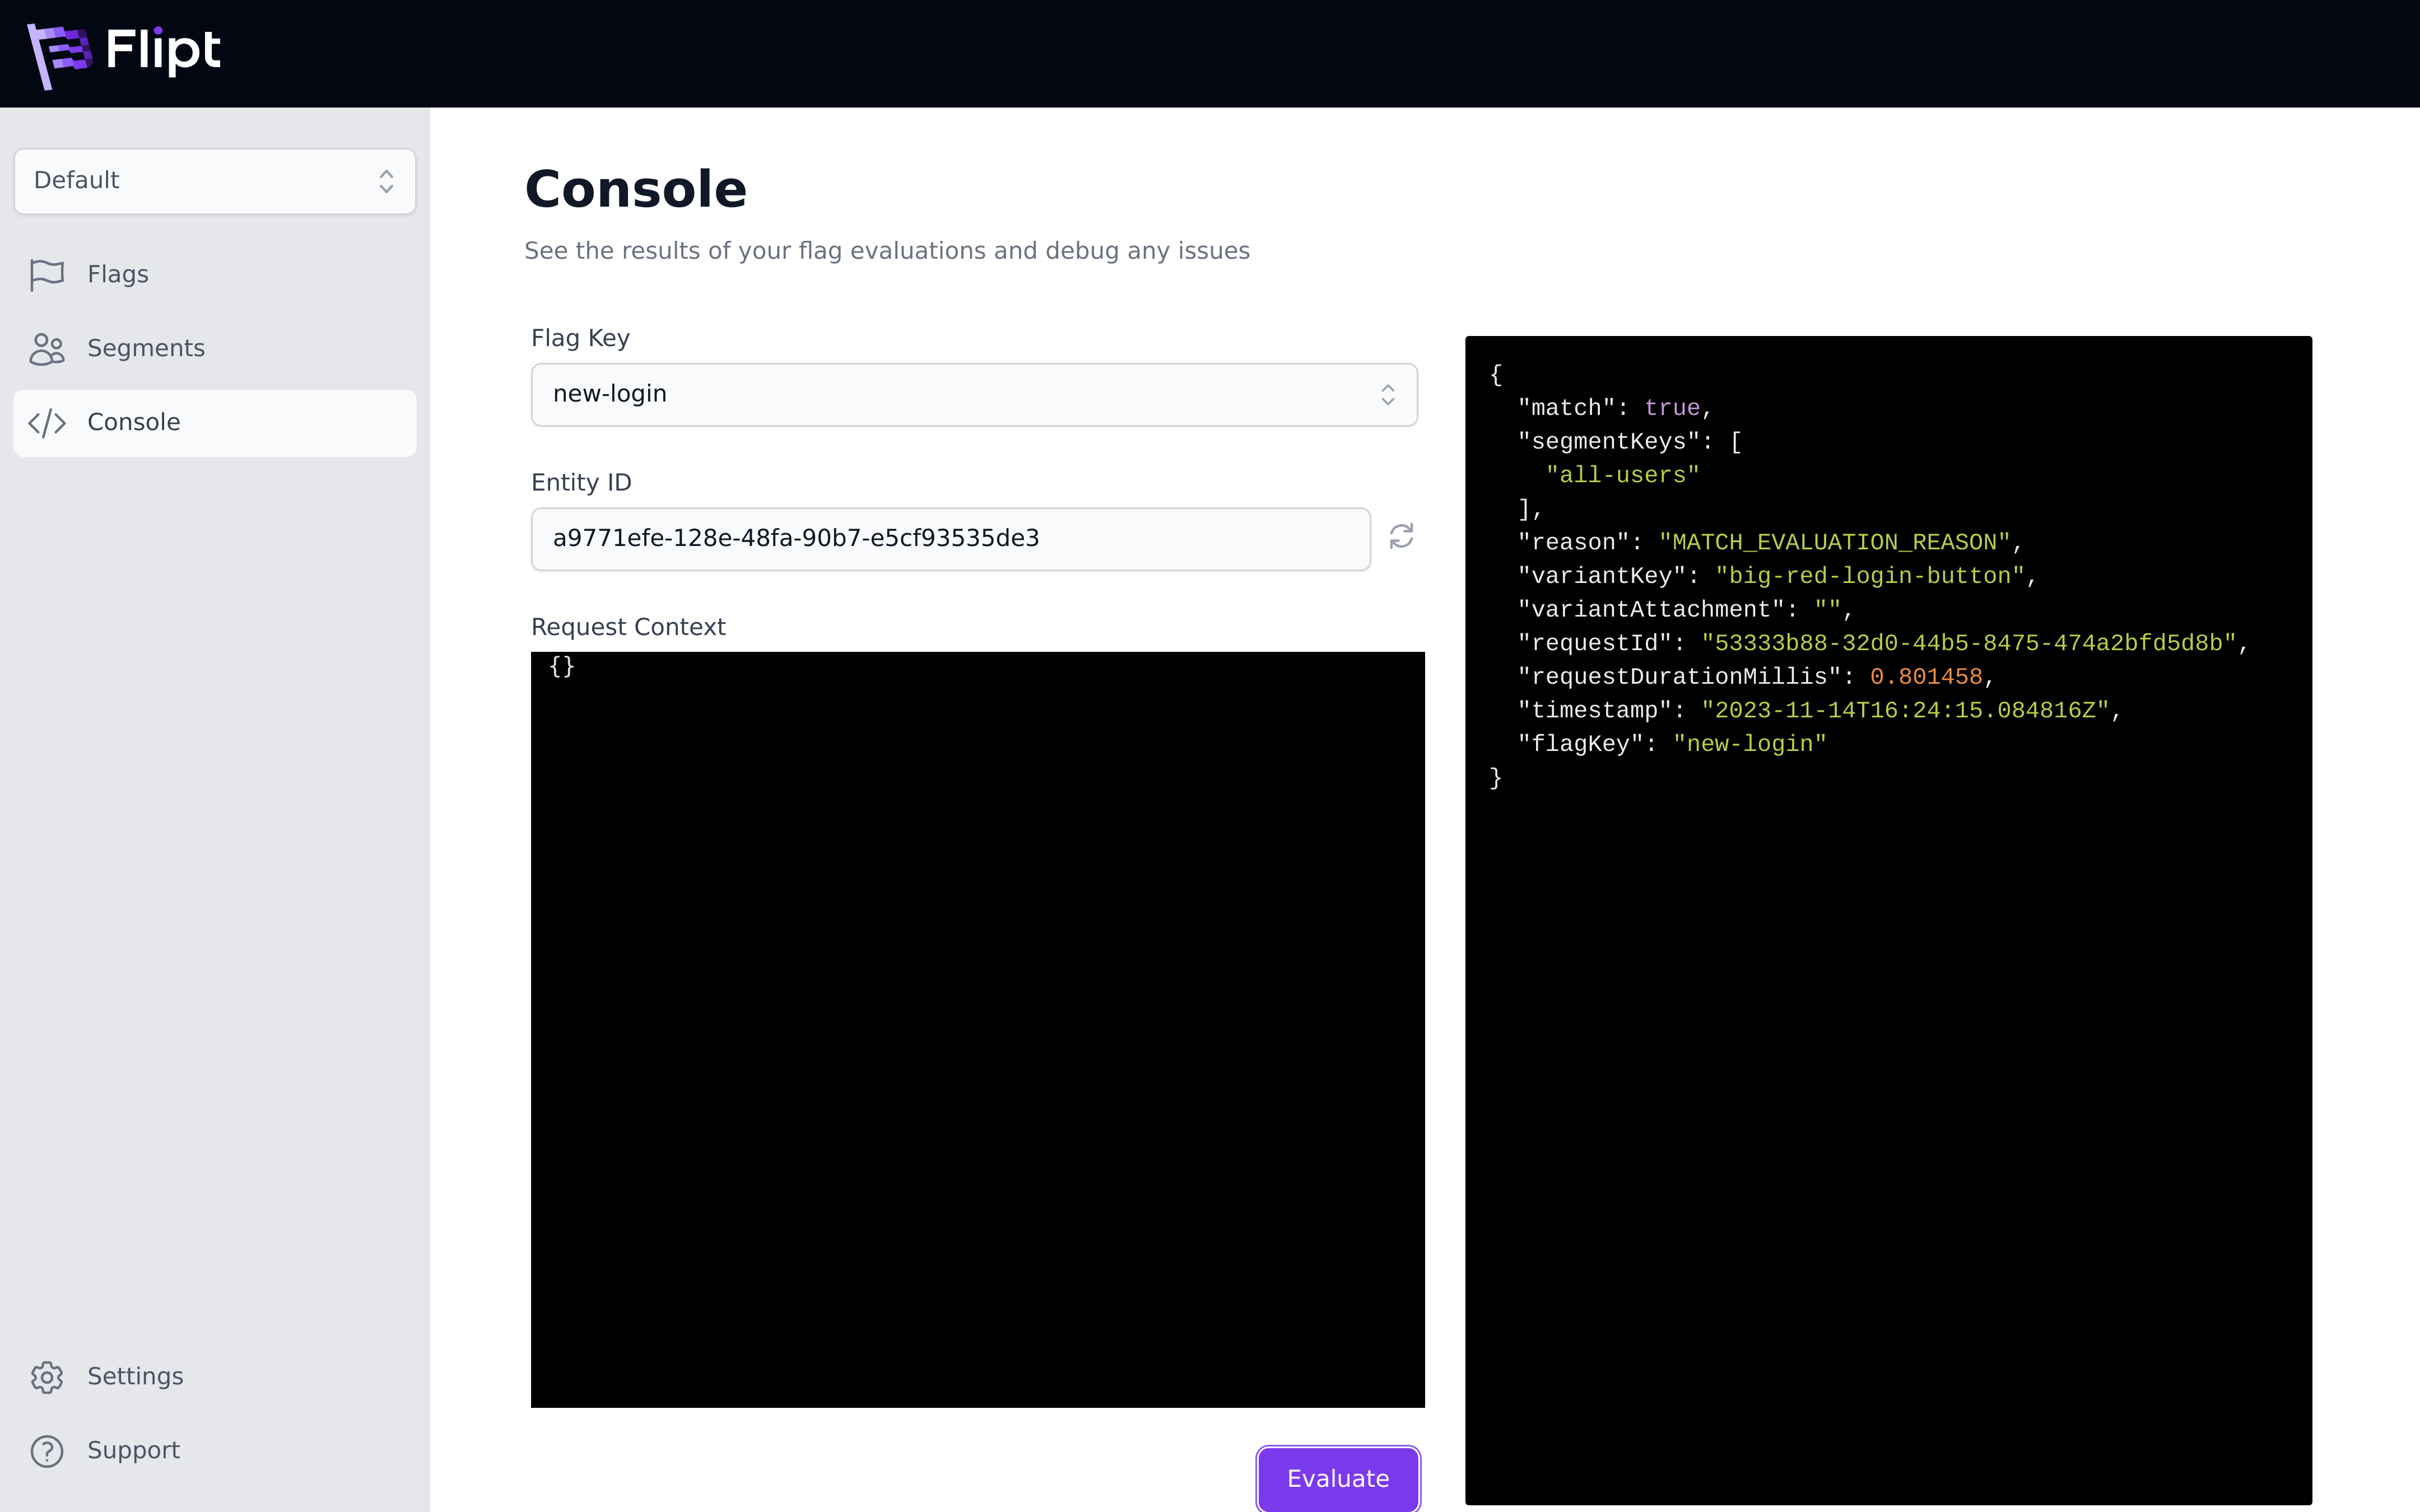
To test evaluation:
1. Navigate to the `Console` page from the main navigation.
2. Select or search for the flag you created earlier.
3. Notice that the `Entity ID` field is pre-populated with a random UUID. This represents
the ID that you would use to uniquely identify entities (ex: users) that you
want to test against your flags.
4. Click `Evaluate`.
5. Note the pane to the right has been populated with the evaluation
response from the server, informing you that this request would match the
segment that you created earlier, and return one of the variants defined.
6. Experiment with different values for the `Request Context` and `Entity ID` fields.
 That's it! You're now ready to integrate Flipt into your applications and start
defining your flags and segments that will enable you to seamlessly rollout
new features to your users while reducing risk.
That's it! You're now ready to integrate Flipt into your applications and start
defining your flags and segments that will enable you to seamlessly rollout
new features to your users while reducing risk.
