> ## Documentation Index
> Fetch the complete documentation index at: https://docs.flipt.io/llms.txt
> Use this file to discover all available pages before exploring further.
# Role-Based Access Control with Keycloak
> Configure and use role-based access control (RBAC) with Flipt, Keycloak, and OPA.
As described in the [Authorization Overview](/v1/authorization/overview), Flipt supports the ability to secure its core API routes with authorization in a flexible and extensible way.
This guide will cover how to configure and use role-based access control (RBAC) with Flipt with a Rego policy configured for an imaginary organization using Keycloak for authentication.
Role-based access control (RBAC) is not a feature of Flipt itself but rather a
pattern that can be implemented using Flipt's authorization system via OPA.
## What You'll Learn
* 🔒 How to set up Keycloak for authorization
* 🔑 How to create a Rego policy for RBAC with Flipt
* ⚙️ How to configure Flipt to use the policy for authorization
## Prerequisites
For this guide, you will need:
* [Docker](https://www.docker.com/)
* Follow the [Login with Keycloak guide](/v1/guides/operation/authentication/login-with-keycloak) to set up Keycloak for authentication
## Setting Up Keycloak
To set up Keycloak for authorization, you'll first need to create a new realm, client, and user.
### 1. Follow the Login with Keycloak Guide
Follow the [Login with Keycloak guide](/v1/guides/operation/authentication/login-with-keycloak) to set up Keycloak for authentication.
This guide will walk you through setting up Keycloak and creating a realm, client, and user that you will use for this guide.
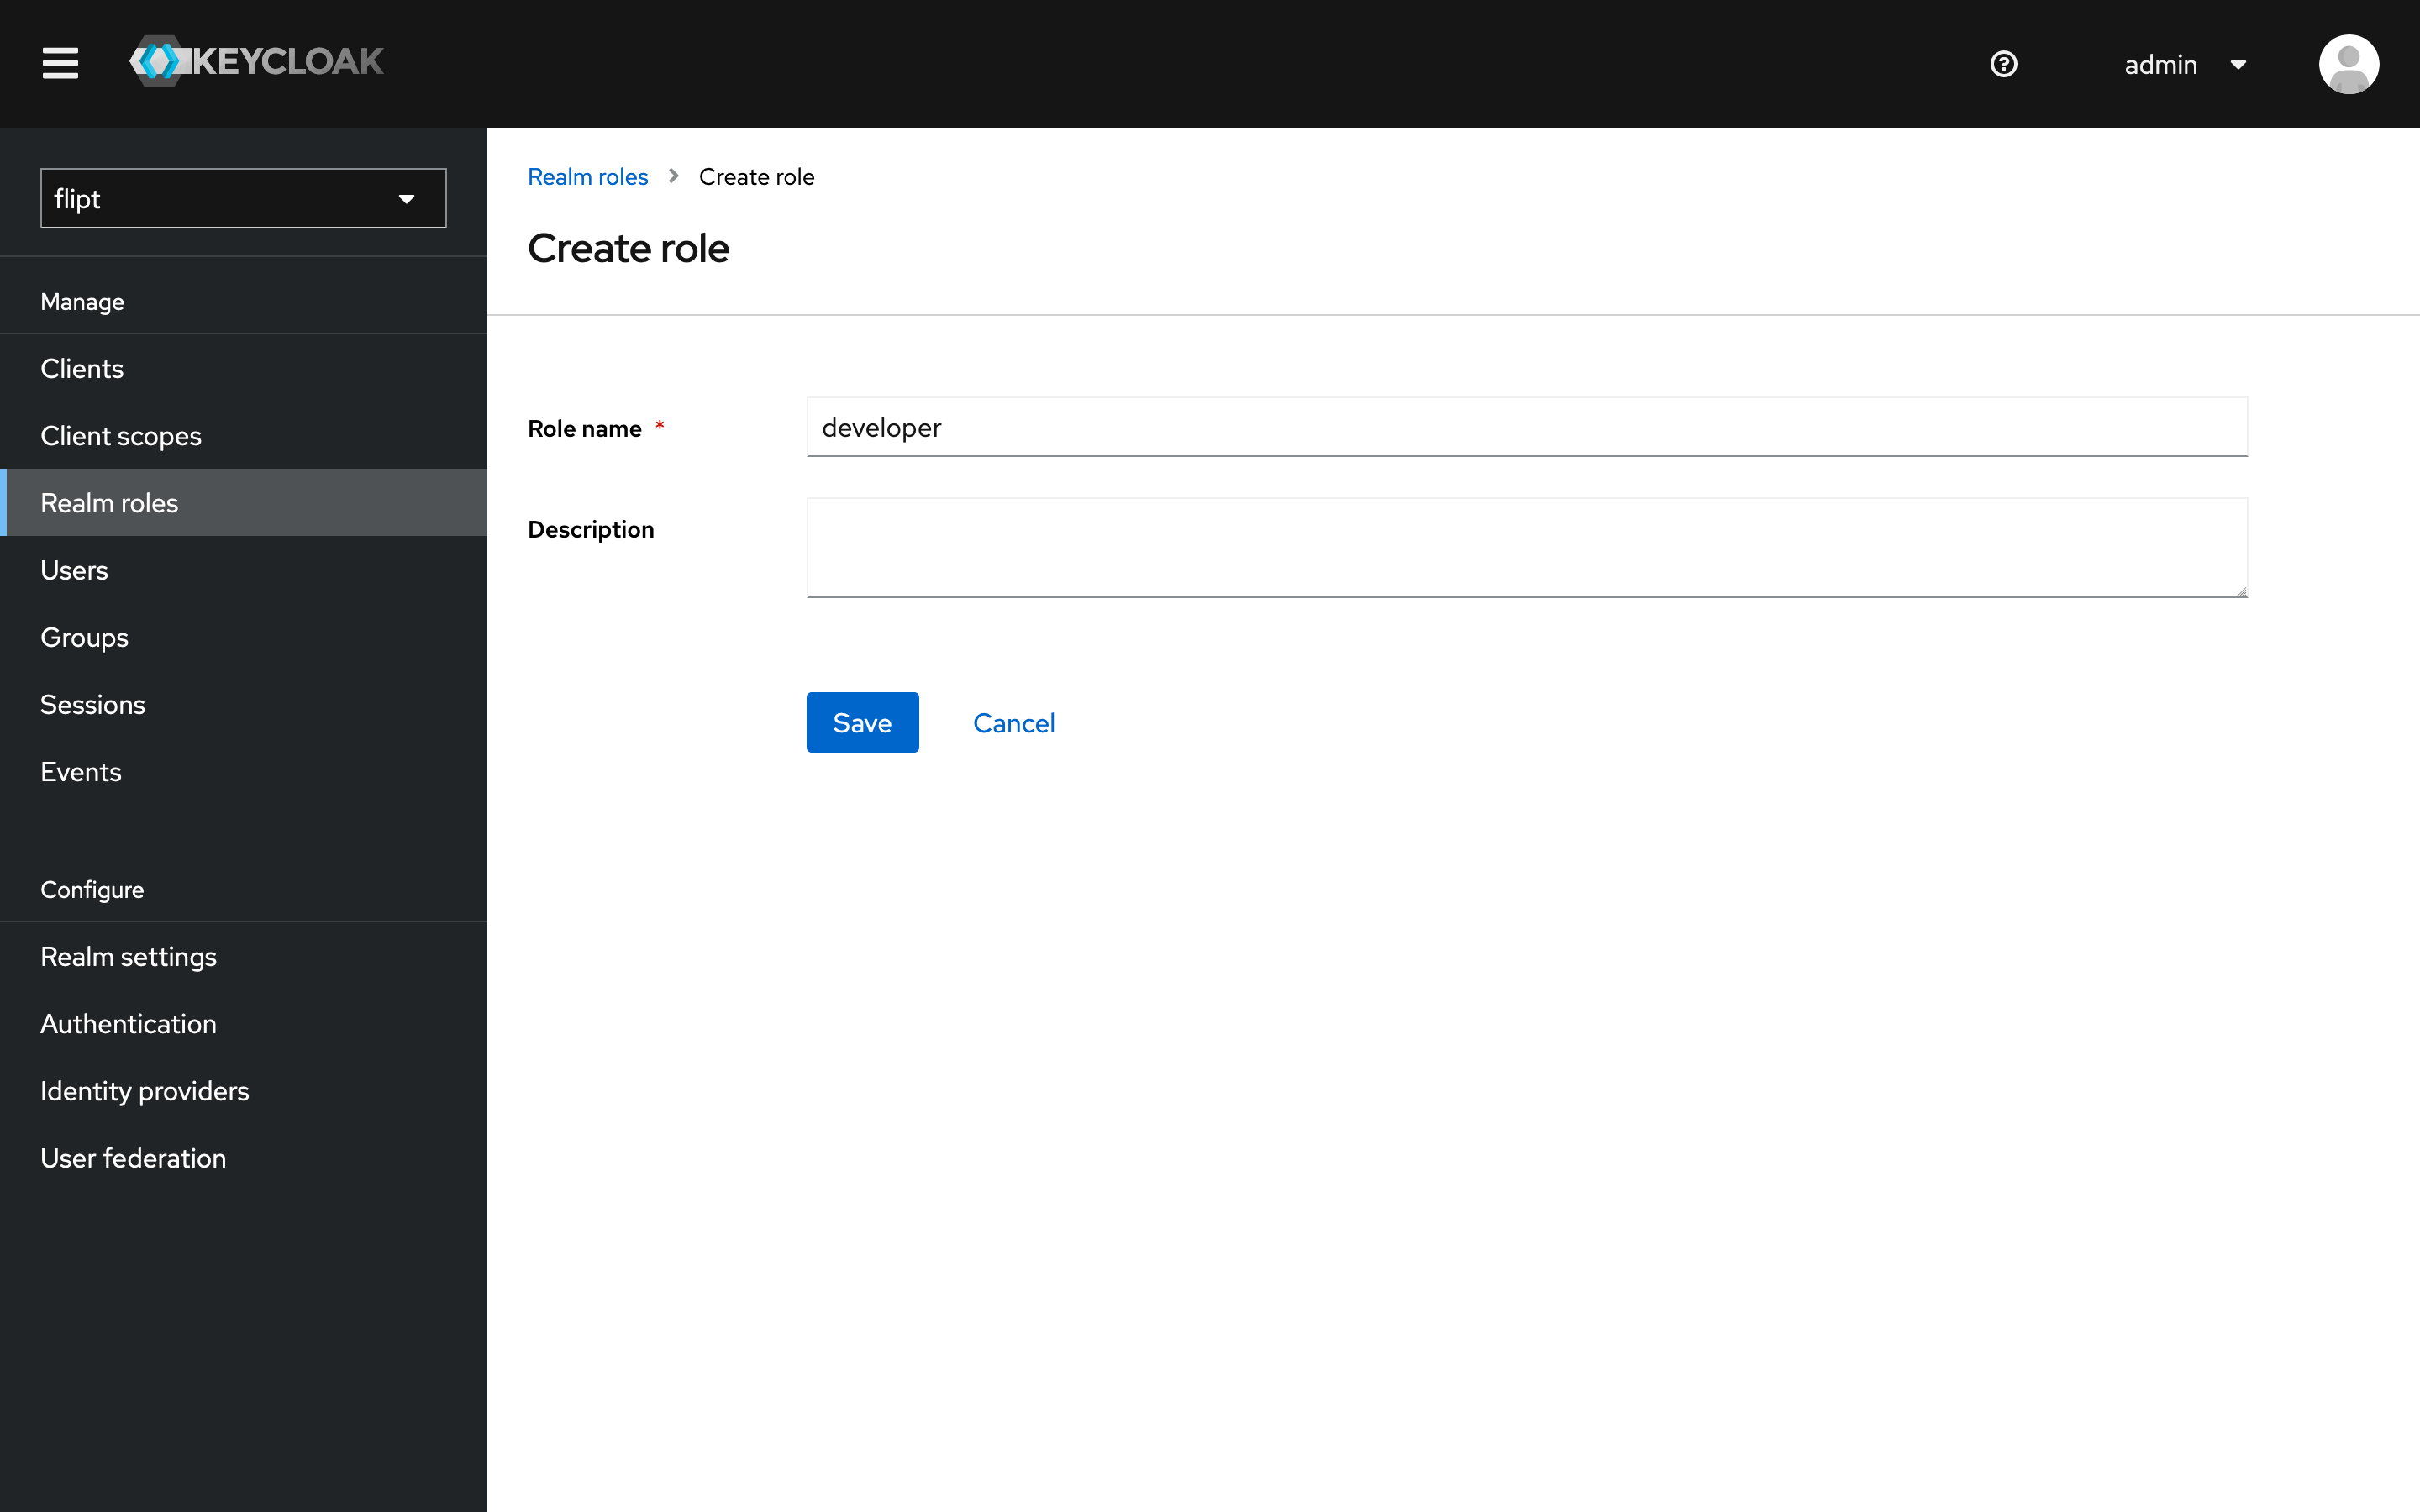
 ### 2. Create a Realm Role
1. Login to Keycloak as an admin user.
2. Click on the `Realm Roles` tab.
3. Click `Create Role`.
4. Enter `developer` as the role name and description and click `Save`.
### 2. Create a Realm Role
1. Login to Keycloak as an admin user.
2. Click on the `Realm Roles` tab.
3. Click `Create Role`.
4. Enter `developer` as the role name and description and click `Save`.
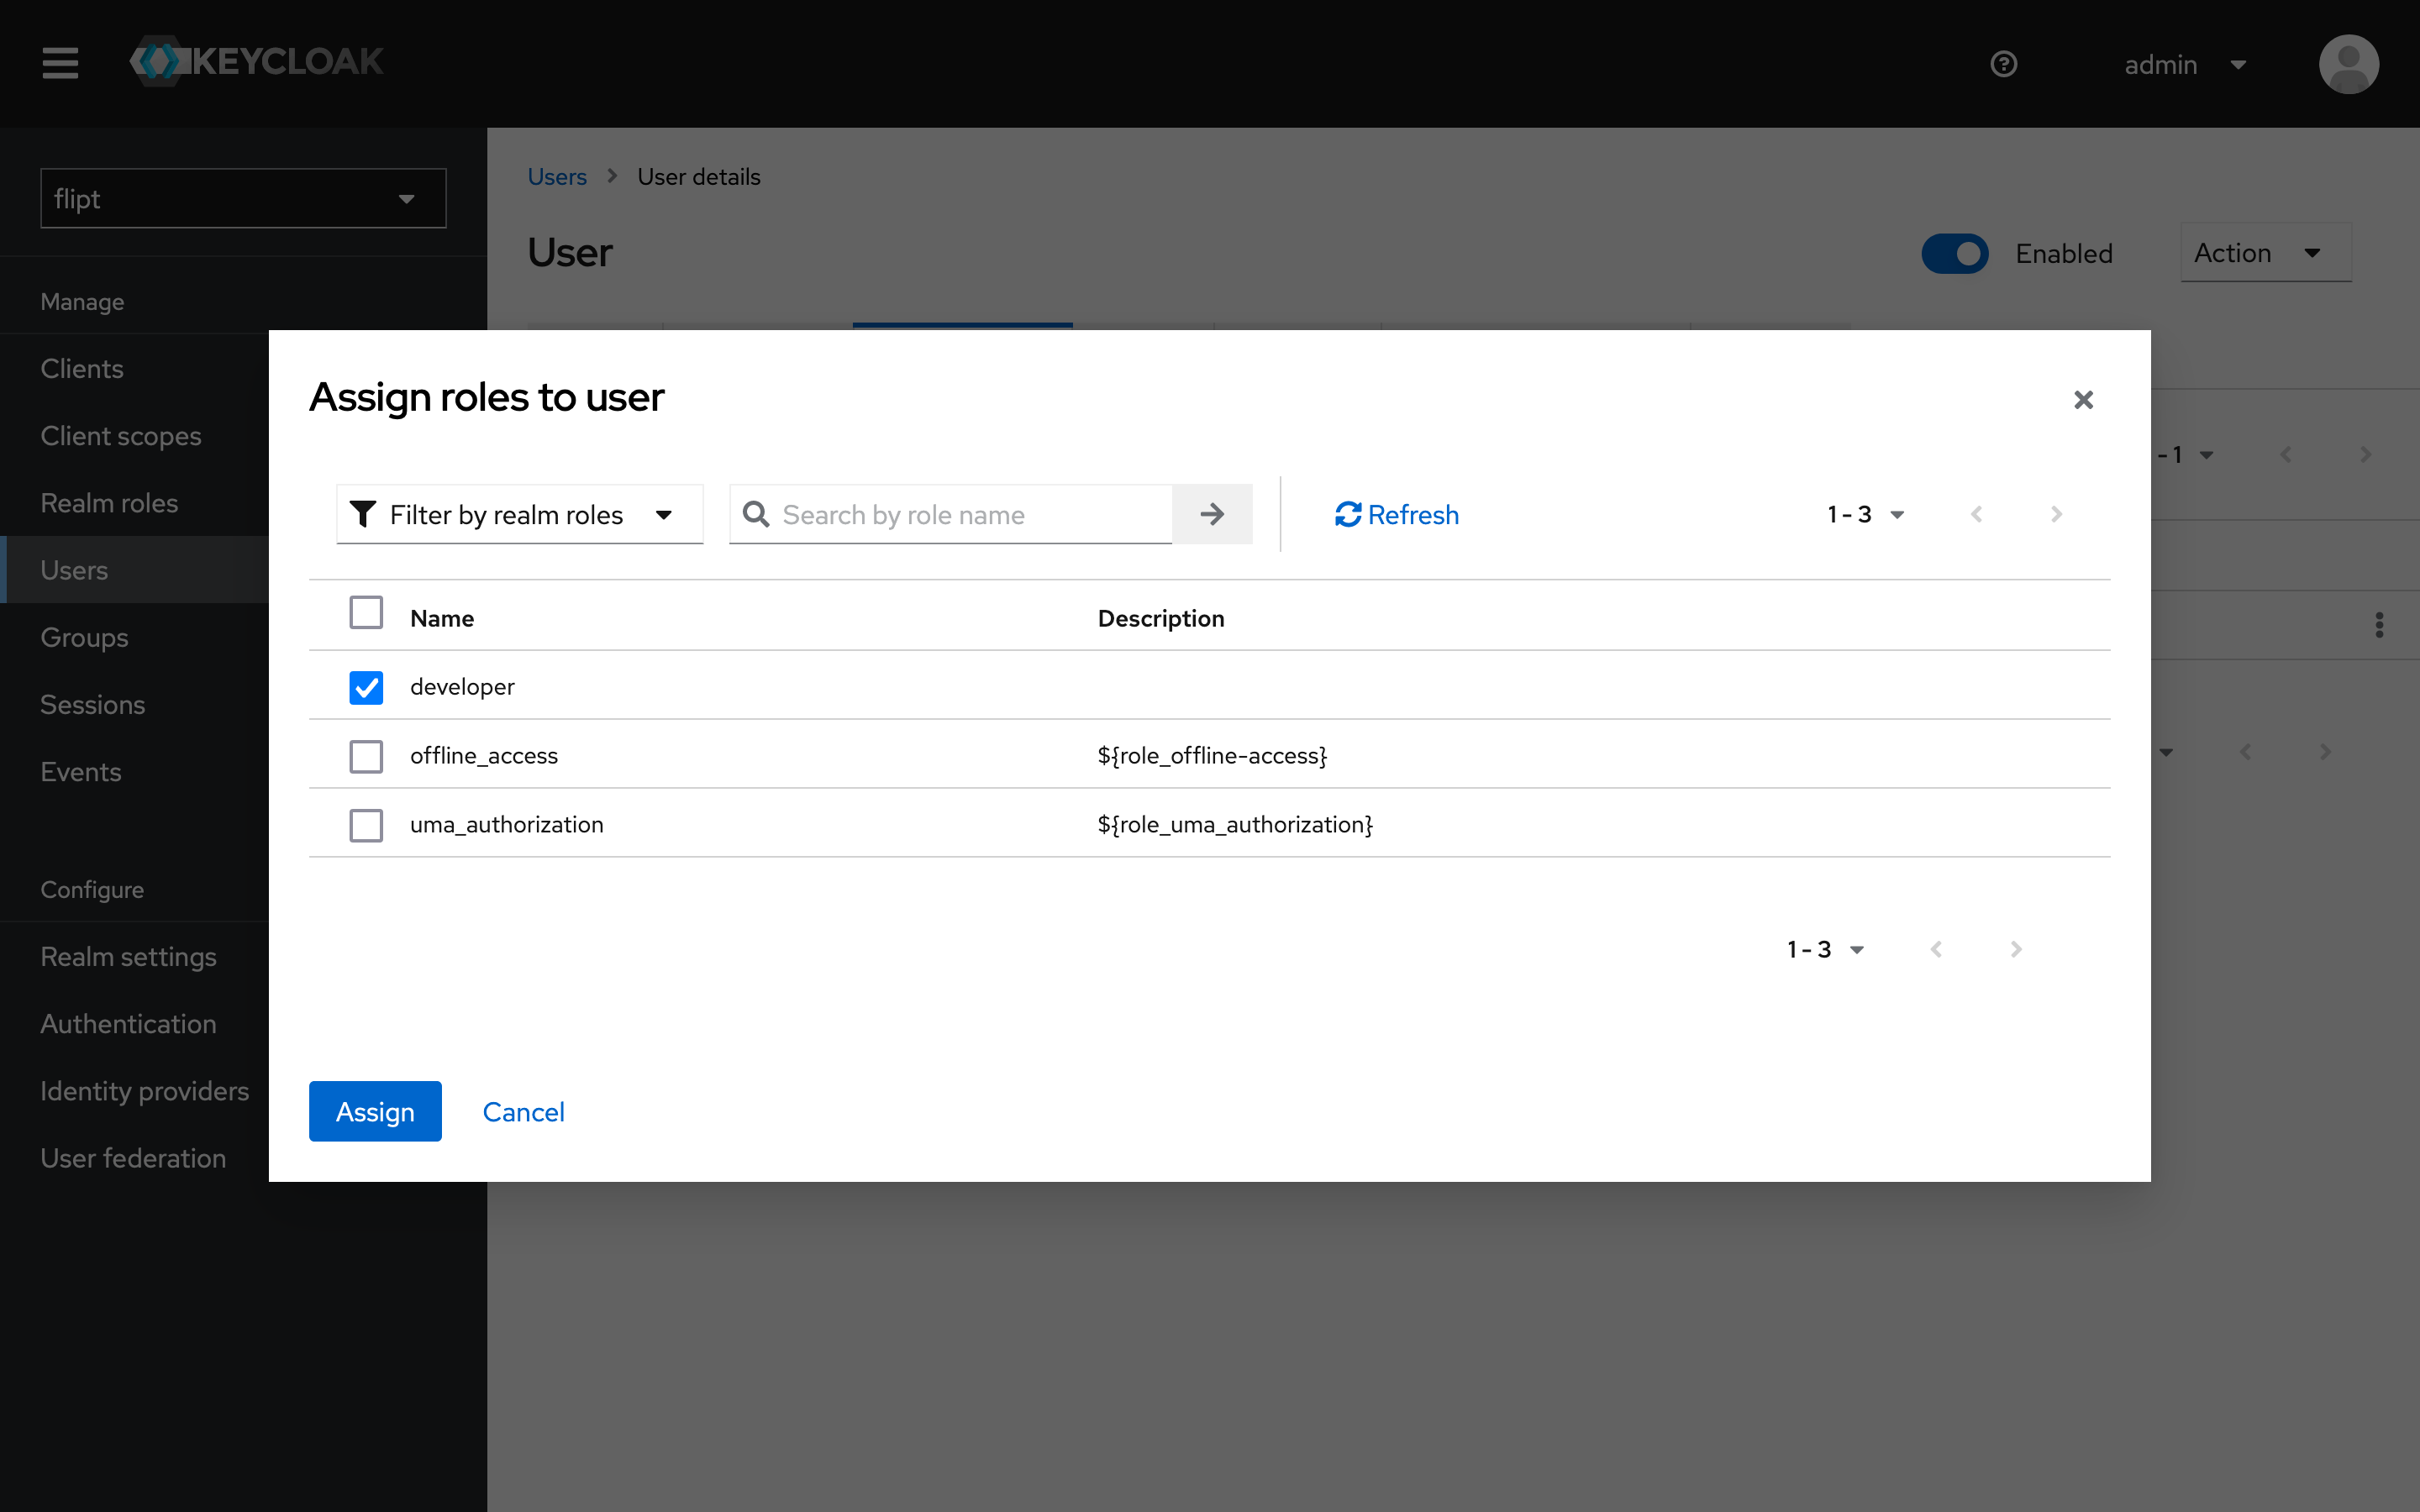
 ### 3. Assign the Role to a User
1. Click on the `Users` tab.
2. Click on the `user` user.
3. Click on the `Role Mappings` tab.
4. Click `Assign Role`.
5. Select the `developer` role and click `Assign`.
### 3. Assign the Role to a User
1. Click on the `Users` tab.
2. Click on the `user` user.
3. Click on the `Role Mappings` tab.
4. Click `Assign Role`.
5. Select the `developer` role and click `Assign`.
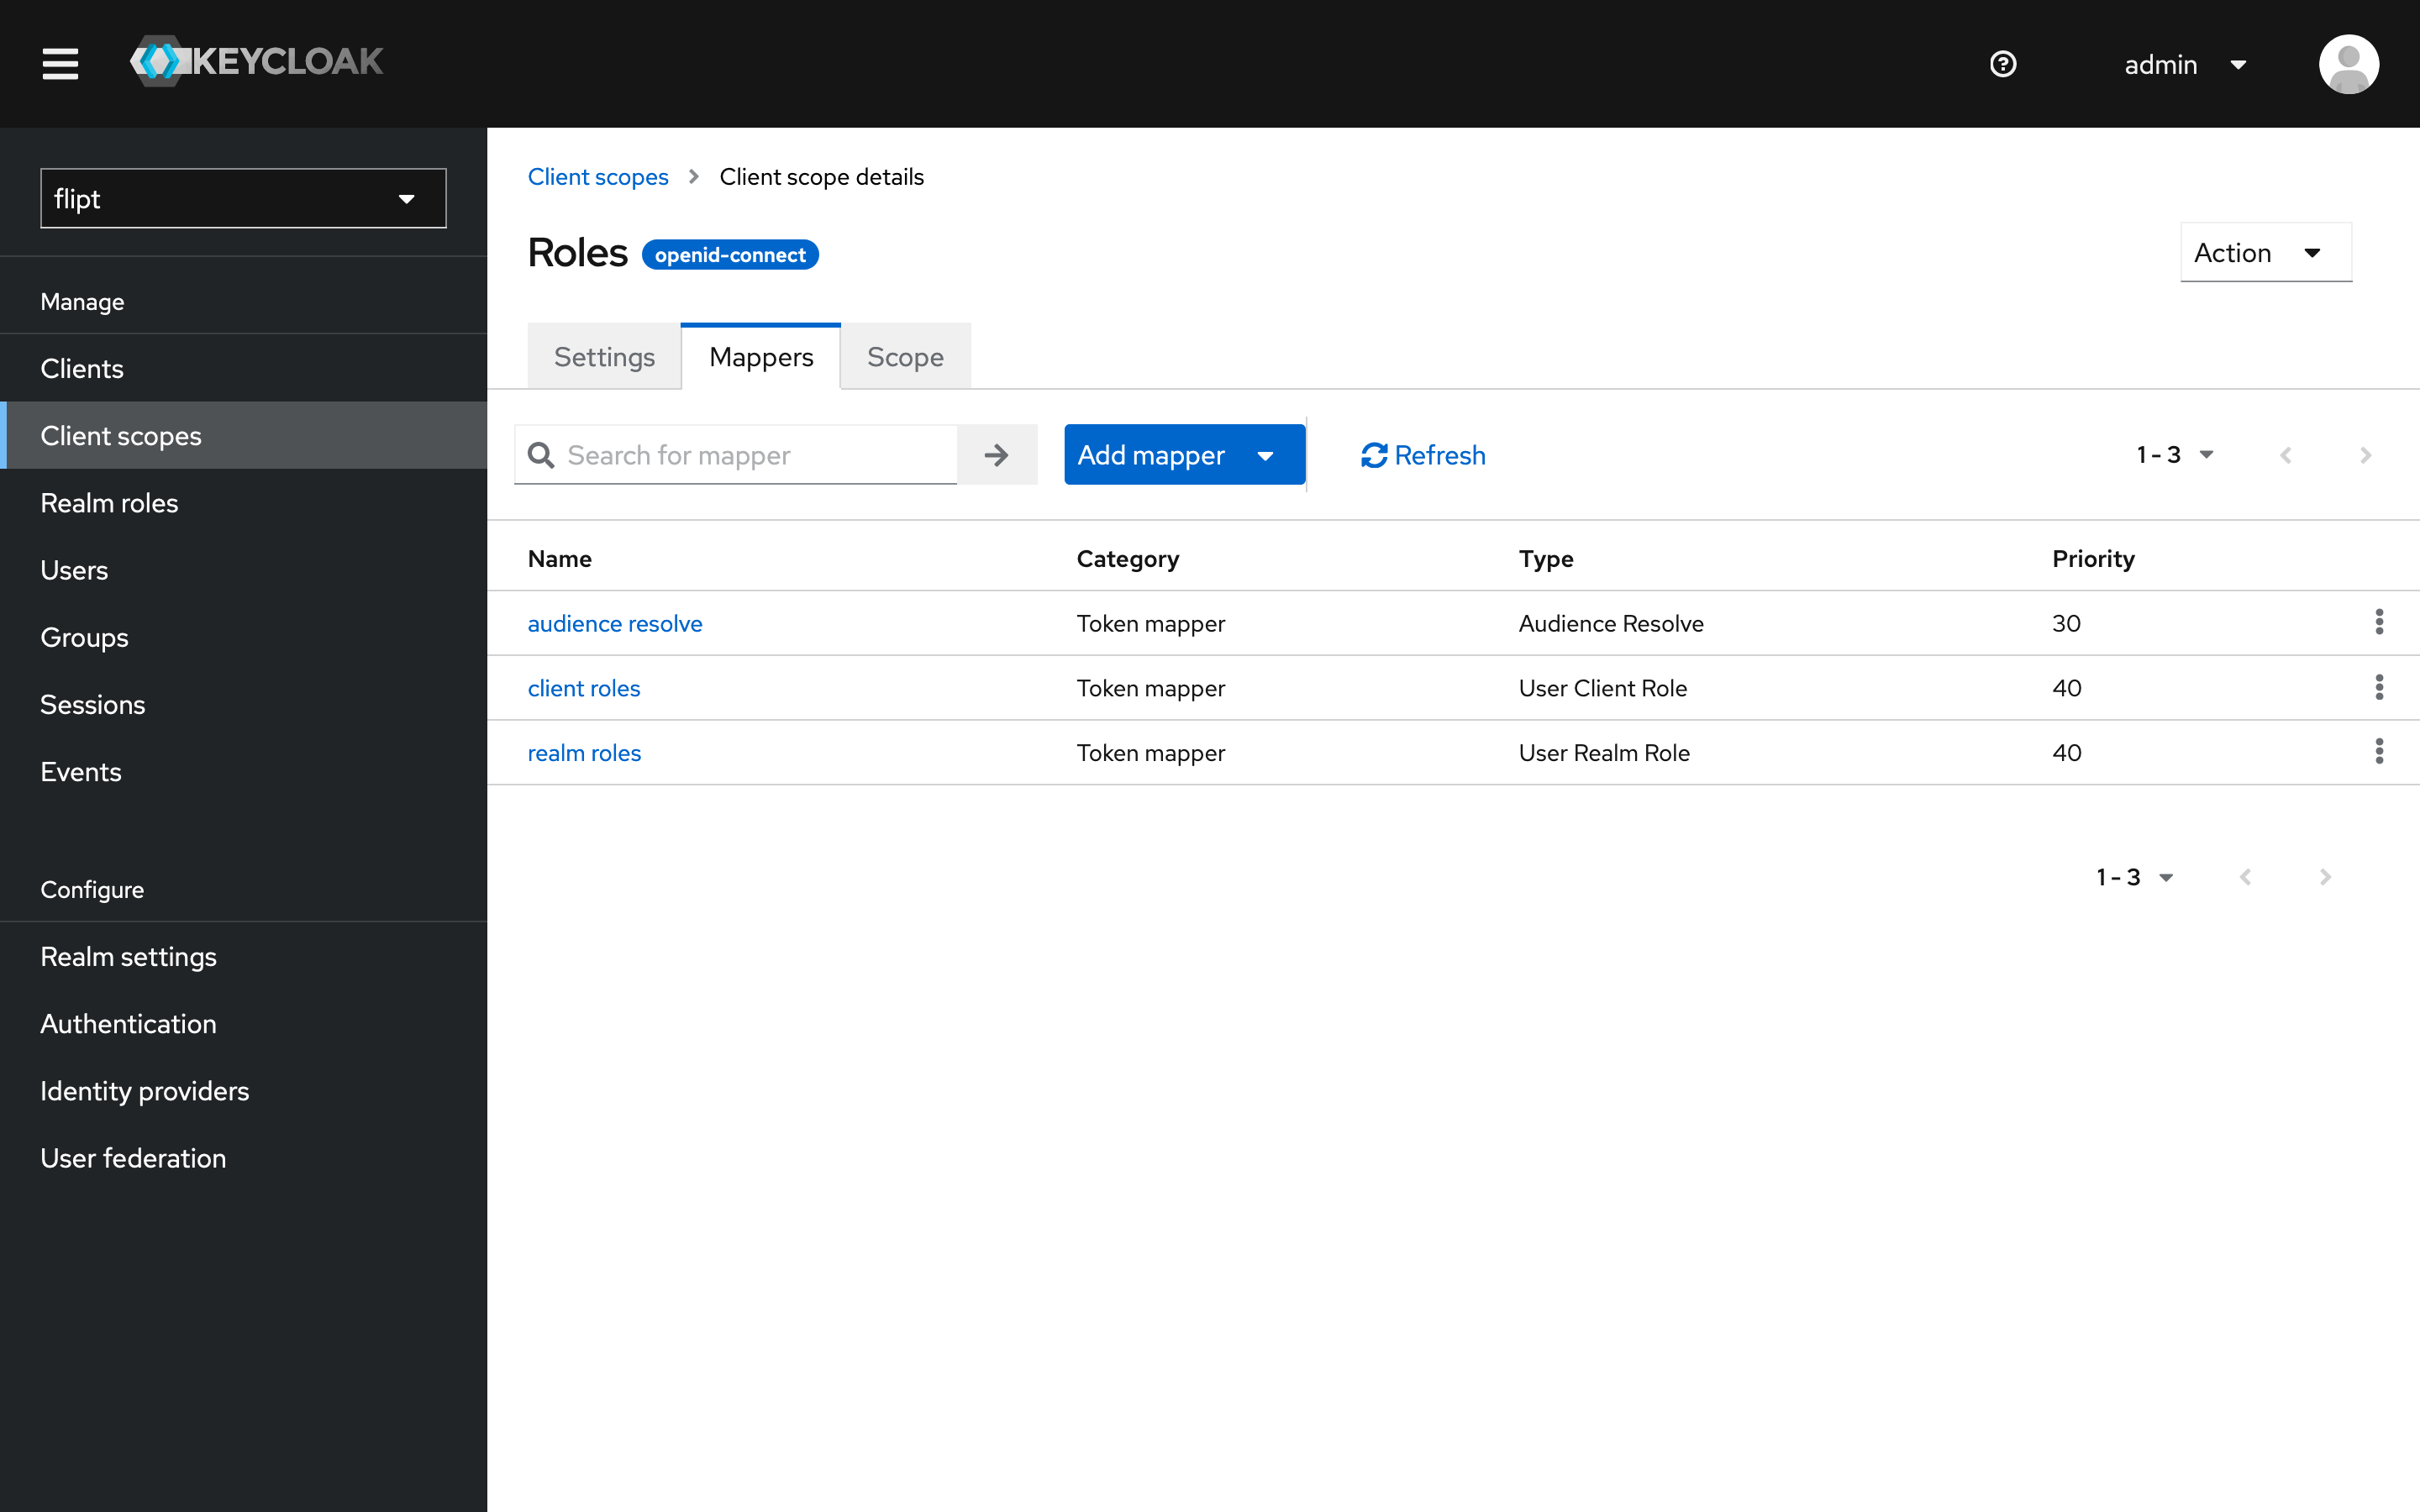
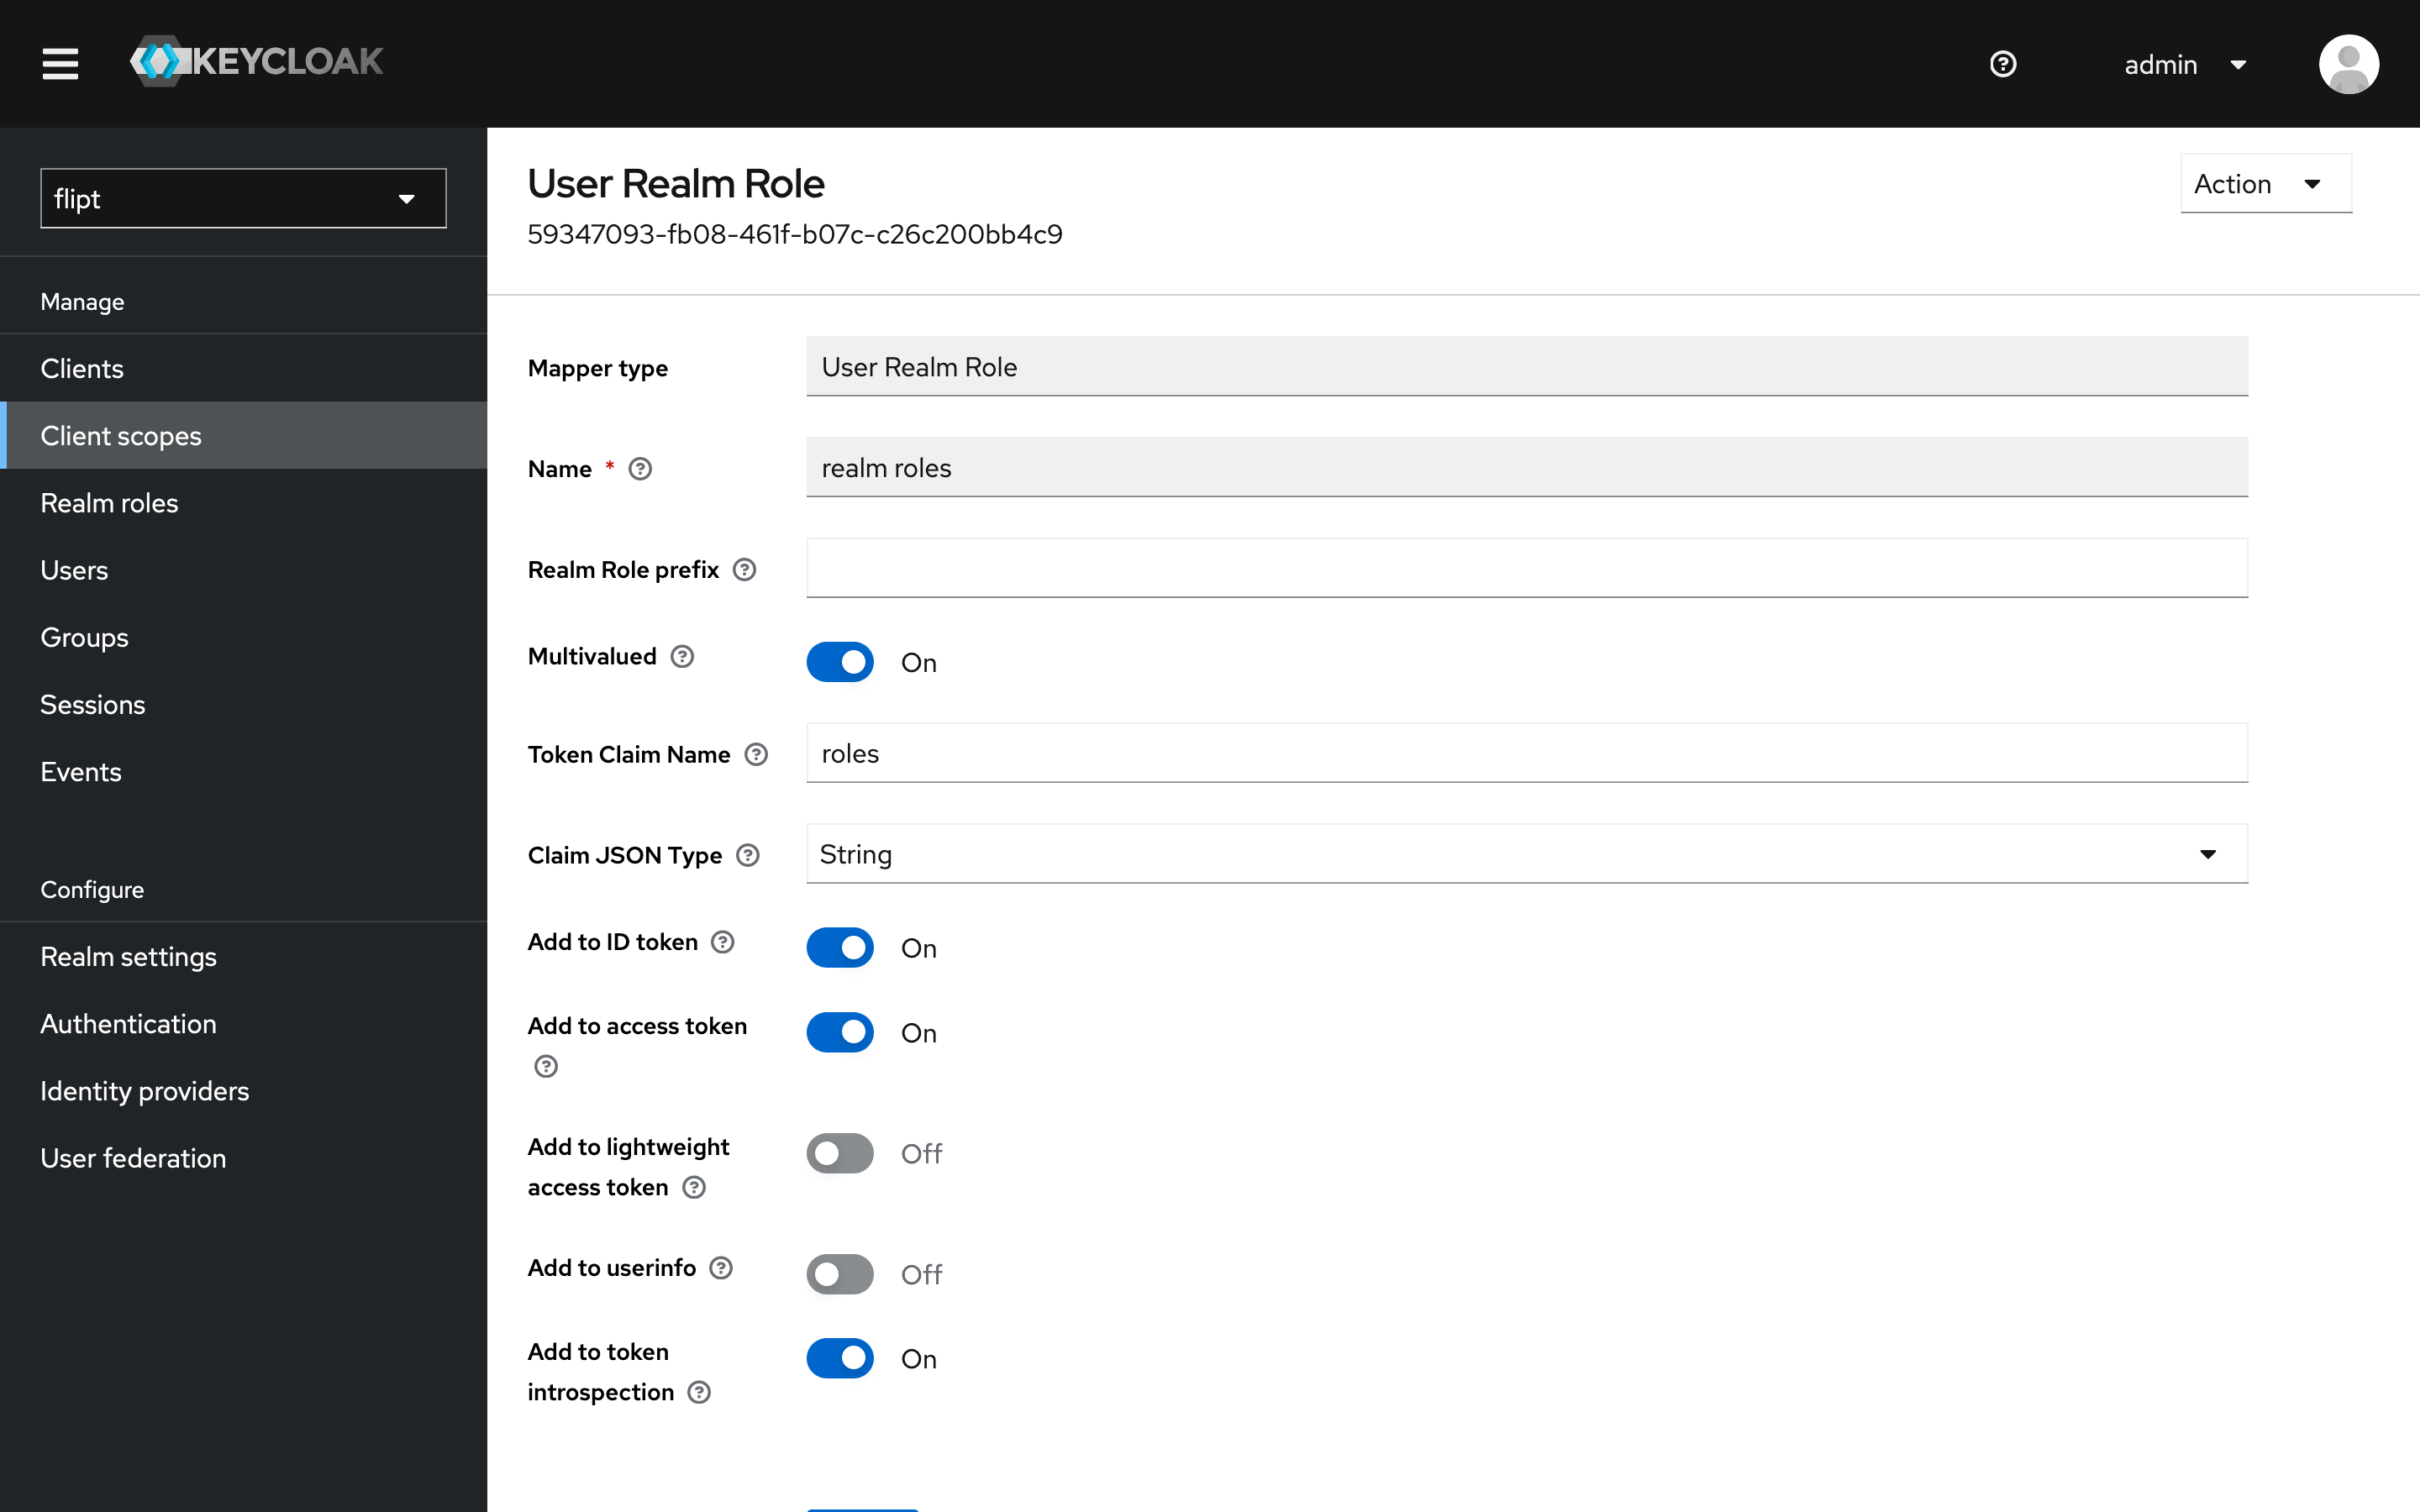
 ### 4. Map Client Scopes
Map the `roles` scope to the `flipt` client:
1. Click on the `Clients Scopes` tab.
2. Click on `roles` in the list of client scopes.
3. Click on the `Mappers` tab.
4. Click on `realm roles` in the list of mappers.
### 4. Map Client Scopes
Map the `roles` scope to the `flipt` client:
1. Click on the `Clients Scopes` tab.
2. Click on `roles` in the list of client scopes.
3. Click on the `Mappers` tab.
4. Click on `realm roles` in the list of mappers.
 5. Set the `Token Claim Name` field to something short like `roles`.
6. Set the `Claim JSON Type` field to `String`.
7. Toggle on `Add to ID token`.
8. Click `Save`.
5. Set the `Token Claim Name` field to something short like `roles`.
6. Set the `Claim JSON Type` field to `String`.
7. Toggle on `Add to ID token`.
8. Click `Save`.
 ## Configuring RBAC in Flipt
To configure RBAC with Flipt, you will need to define a Rego policy that enforces the roles and permissions for your organization.
Here's an example of a simple policy that checks whether a user has the `developer` role:
```rego policy.rego theme={null}
package flipt.authz.v1
import rego.v1
default allow := false
allow if {
claims := json.unmarshal(input.authentication.metadata["io.flipt.auth.claims"])
"developer" in claims.roles
}
```
In this example, the policy checks if the user has the `developer` role. If the user has the `developer` role, the policy will allow the request. Otherwise, the request will be denied.
The `authentication` input is provided by Flipt to OPA and contains the authentication information for the request. This information is specific to the authentication method used to authenticate the request.
More complex policies can be defined to enforce fine-grained access control based on your organization's requirements. For example, you could define policies that check for specific roles and permissions for different resources or actions.
An example policy that allows users with the `developer` role to have full access to the Management API and users with the `viewer` role to have read-only access might look like this:
```rego policy.rego theme={null}
package flipt.authz.v1
import rego.v1
default allow := false
allow if {
claims := json.unmarshal(input.authentication.metadata["io.flipt.auth.claims"])
"developer" in claims.roles
}
allow if {
claims := json.unmarshal(input.authentication.metadata["io.flipt.auth.claims"])
"viewer" in claims.roles
input.request.verb = "read"
}
```
### 1. Write the Rego Policy
1. Create a new file called `policy.rego` with the following content:
```rego policy.rego theme={null}
package flipt.authz.v1
import rego.v1
default allow := false
allow if {
claims := json.unmarshal(input.authentication.metadata["io.flipt.auth.claims"])
"developer" in claims.roles
}
```
### 2. Configure Flipt to Use the Policy
Update the `flipt.yaml` configuration file from the [Login with Keycloak guide](/v1/guides/operation/authentication/login-with-keycloak) to enable authorization and specify the path to the Rego policy file:
```yaml flipt.yaml theme={null}
authentication:
required: true
session:
domain: localhost:8081
methods:
oidc:
enabled: true
providers:
keycloak:
issuer_url: "< issuer URL from Keycloak >"
client_id: "< client ID from Keycloak (e.g., `flipt`) >"
client_secret: "< client secret from Keycloak >"
redirect_address: "http://localhost:8081"
authorization:
required: true
backend: local
local:
policy:
path: "policy.rego"
```
### 3. Run Flipt
You can now start your Flipt instance using the following command:
```sh theme={null}
docker run -it --rm \
-p 8080:8080 \
-v "$(pwd)/config.yml:/config.yml" \
-v "$(pwd)/policy.rego:/policy.rego" \
flipt/flipt:latest ./flipt --config /config.yml
```
## Testing the Policy
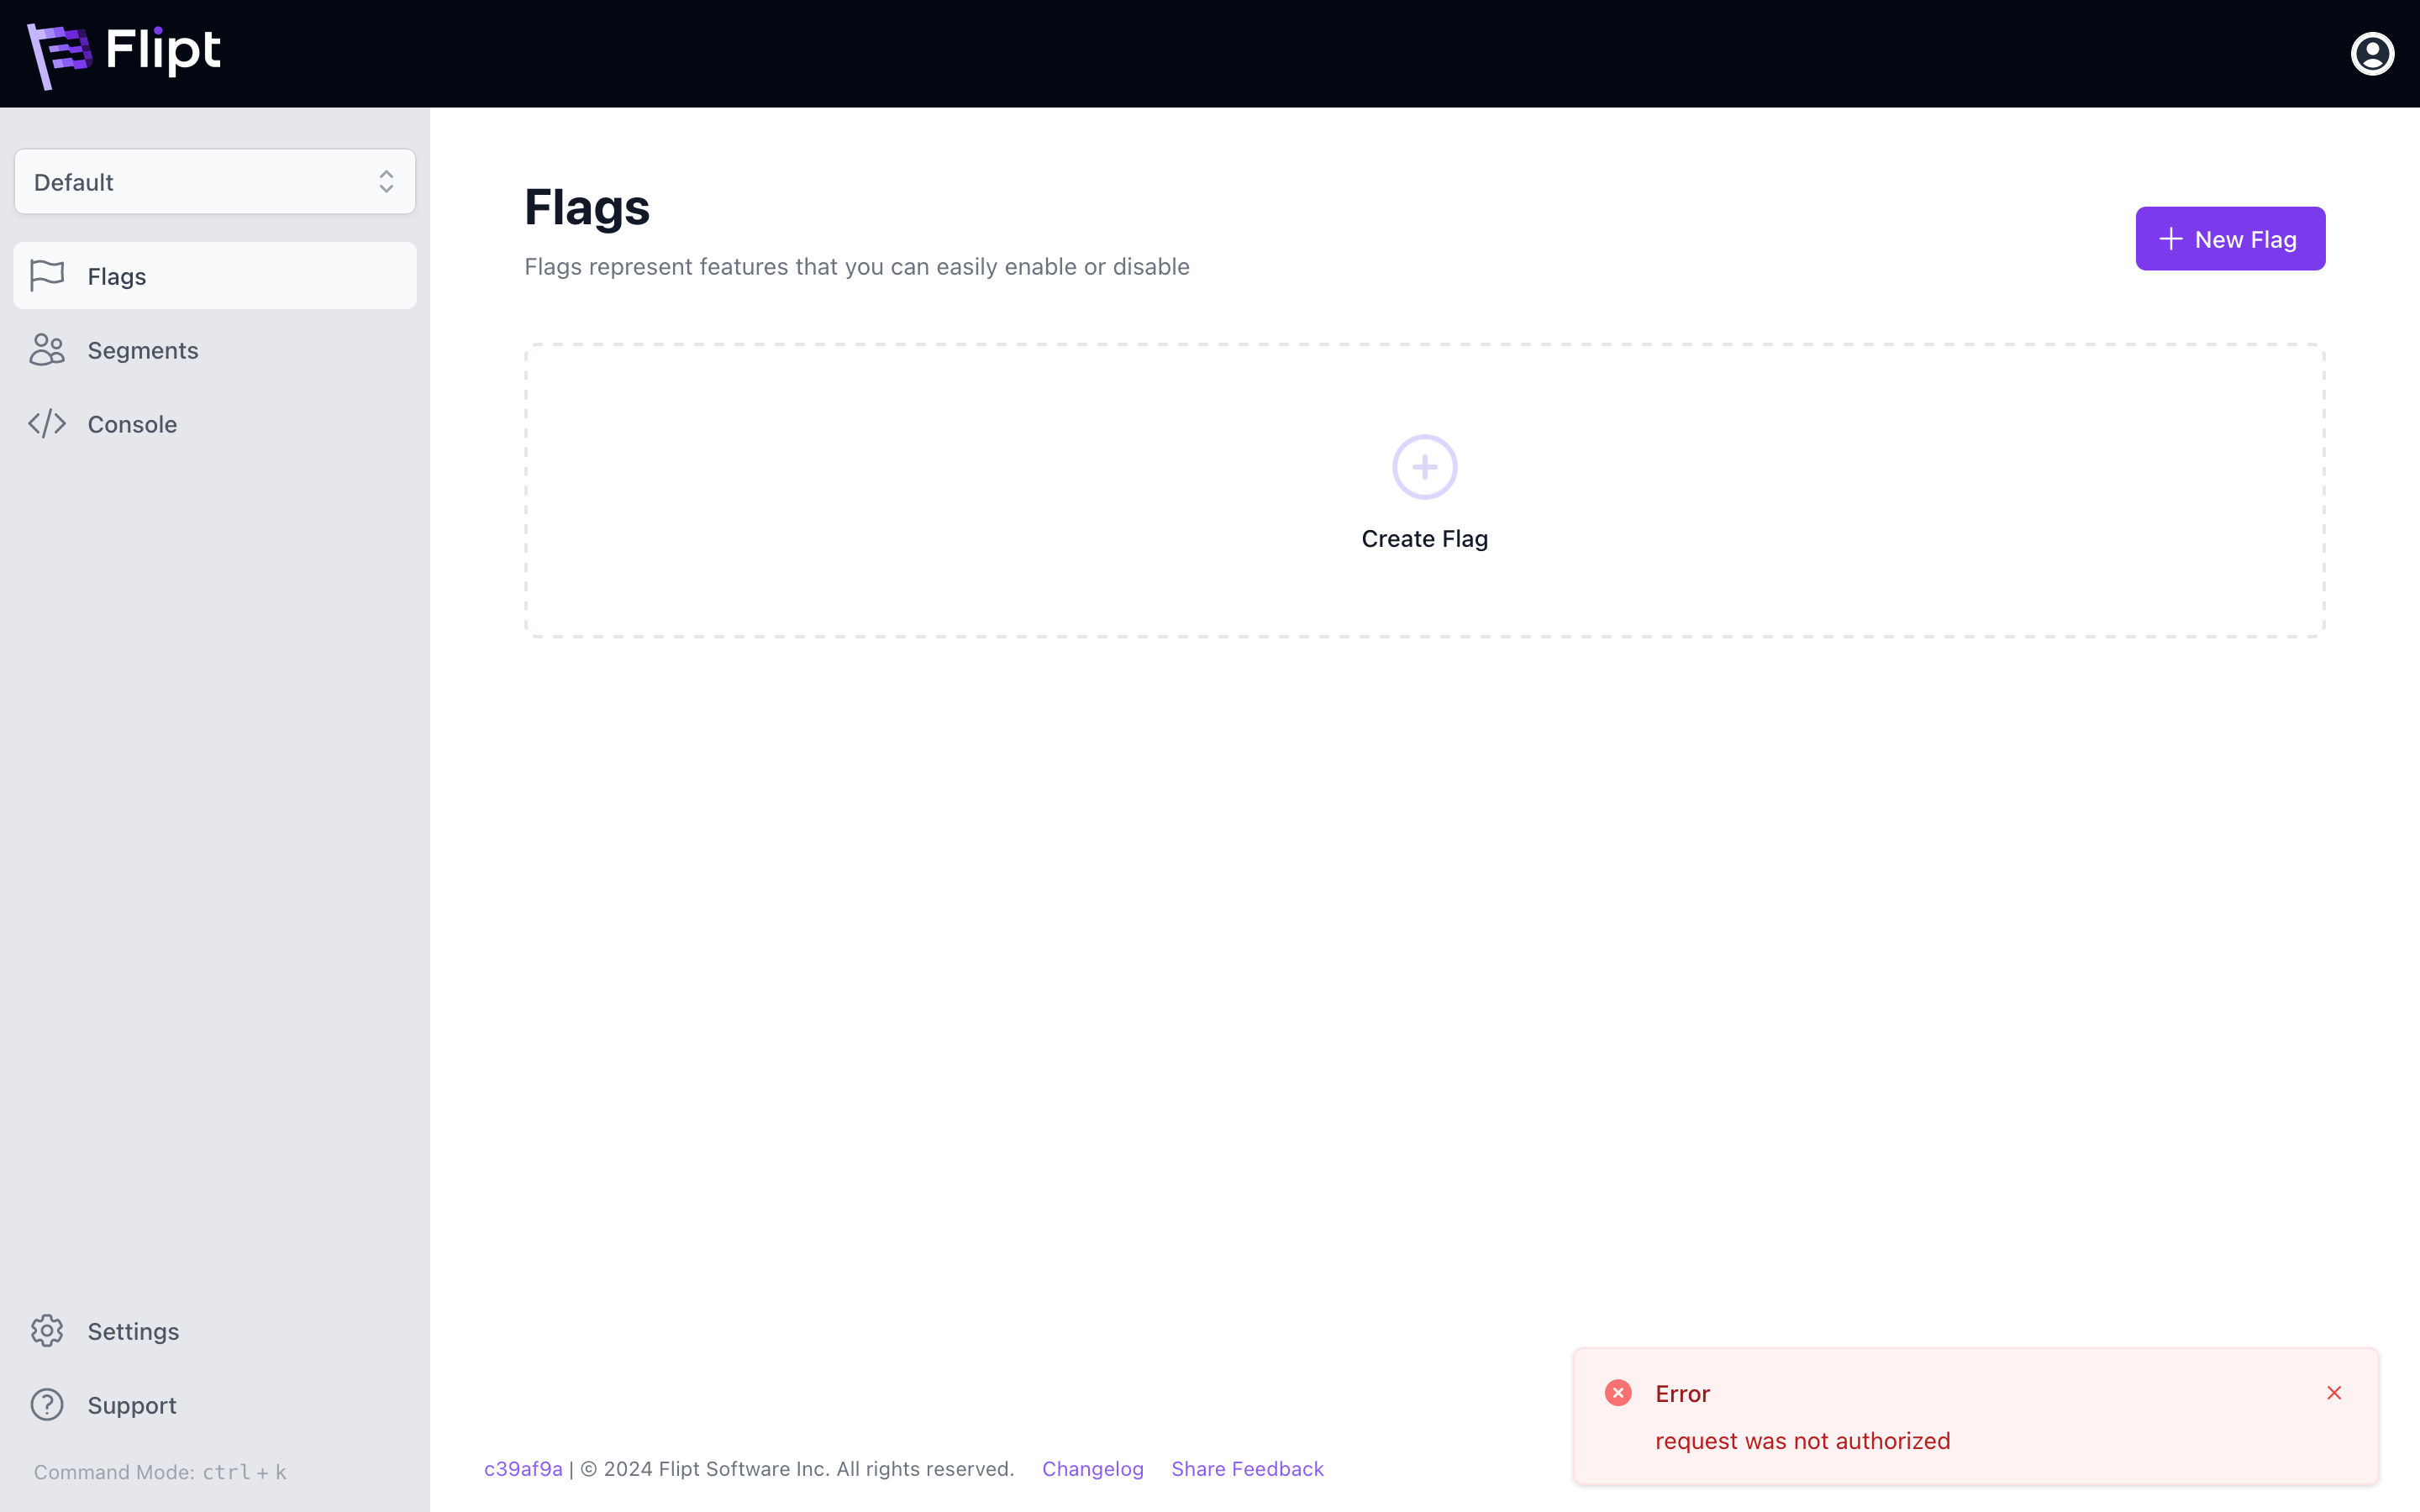
To test the policy, login to Flipt using the user you created in Keycloak. If the user has the `developer` role, they should be able to access the Flipt Management API.
You can create a new user in Keycloak that does not have the `developer` role to test that the policy is working as expected.
If the user does not have the `developer` role, they should receive an error message in the UI or API response.
## Configuring RBAC in Flipt
To configure RBAC with Flipt, you will need to define a Rego policy that enforces the roles and permissions for your organization.
Here's an example of a simple policy that checks whether a user has the `developer` role:
```rego policy.rego theme={null}
package flipt.authz.v1
import rego.v1
default allow := false
allow if {
claims := json.unmarshal(input.authentication.metadata["io.flipt.auth.claims"])
"developer" in claims.roles
}
```
In this example, the policy checks if the user has the `developer` role. If the user has the `developer` role, the policy will allow the request. Otherwise, the request will be denied.
The `authentication` input is provided by Flipt to OPA and contains the authentication information for the request. This information is specific to the authentication method used to authenticate the request.
More complex policies can be defined to enforce fine-grained access control based on your organization's requirements. For example, you could define policies that check for specific roles and permissions for different resources or actions.
An example policy that allows users with the `developer` role to have full access to the Management API and users with the `viewer` role to have read-only access might look like this:
```rego policy.rego theme={null}
package flipt.authz.v1
import rego.v1
default allow := false
allow if {
claims := json.unmarshal(input.authentication.metadata["io.flipt.auth.claims"])
"developer" in claims.roles
}
allow if {
claims := json.unmarshal(input.authentication.metadata["io.flipt.auth.claims"])
"viewer" in claims.roles
input.request.verb = "read"
}
```
### 1. Write the Rego Policy
1. Create a new file called `policy.rego` with the following content:
```rego policy.rego theme={null}
package flipt.authz.v1
import rego.v1
default allow := false
allow if {
claims := json.unmarshal(input.authentication.metadata["io.flipt.auth.claims"])
"developer" in claims.roles
}
```
### 2. Configure Flipt to Use the Policy
Update the `flipt.yaml` configuration file from the [Login with Keycloak guide](/v1/guides/operation/authentication/login-with-keycloak) to enable authorization and specify the path to the Rego policy file:
```yaml flipt.yaml theme={null}
authentication:
required: true
session:
domain: localhost:8081
methods:
oidc:
enabled: true
providers:
keycloak:
issuer_url: "< issuer URL from Keycloak >"
client_id: "< client ID from Keycloak (e.g., `flipt`) >"
client_secret: "< client secret from Keycloak >"
redirect_address: "http://localhost:8081"
authorization:
required: true
backend: local
local:
policy:
path: "policy.rego"
```
### 3. Run Flipt
You can now start your Flipt instance using the following command:
```sh theme={null}
docker run -it --rm \
-p 8080:8080 \
-v "$(pwd)/config.yml:/config.yml" \
-v "$(pwd)/policy.rego:/policy.rego" \
flipt/flipt:latest ./flipt --config /config.yml
```
## Testing the Policy
To test the policy, login to Flipt using the user you created in Keycloak. If the user has the `developer` role, they should be able to access the Flipt Management API.
You can create a new user in Keycloak that does not have the `developer` role to test that the policy is working as expected.
If the user does not have the `developer` role, they should receive an error message in the UI or API response.
 ## Conclusion
In this guide, you learned how to configure and use role-based access control (RBAC) with Flipt using a Rego policy and Keycloak for authentication.
By defining a Rego policy that enforces the roles and permissions for your organization, you can secure your Flipt instance and control access to your feature data with fine-grained permissions and infinite flexibility.
For more information on Flipt's authorization system and how to configure and use it, see the [Authorization Overview](/v1/authorization/overview).
In the future, we plan to provide more examples and best practices for using Flipt's authorization system with different authentication providers and use cases. If you have any feedback or suggestions for how we can improve this guide, please let us know!
## Conclusion
In this guide, you learned how to configure and use role-based access control (RBAC) with Flipt using a Rego policy and Keycloak for authentication.
By defining a Rego policy that enforces the roles and permissions for your organization, you can secure your Flipt instance and control access to your feature data with fine-grained permissions and infinite flexibility.
For more information on Flipt's authorization system and how to configure and use it, see the [Authorization Overview](/v1/authorization/overview).
In the future, we plan to provide more examples and best practices for using Flipt's authorization system with different authentication providers and use cases. If you have any feedback or suggestions for how we can improve this guide, please let us know!