> ## Documentation Index
> Fetch the complete documentation index at: https://docs.flipt.io/llms.txt
> Use this file to discover all available pages before exploring further.
# Login with Google
> Configuring Flipt to enable login with Google via OIDC
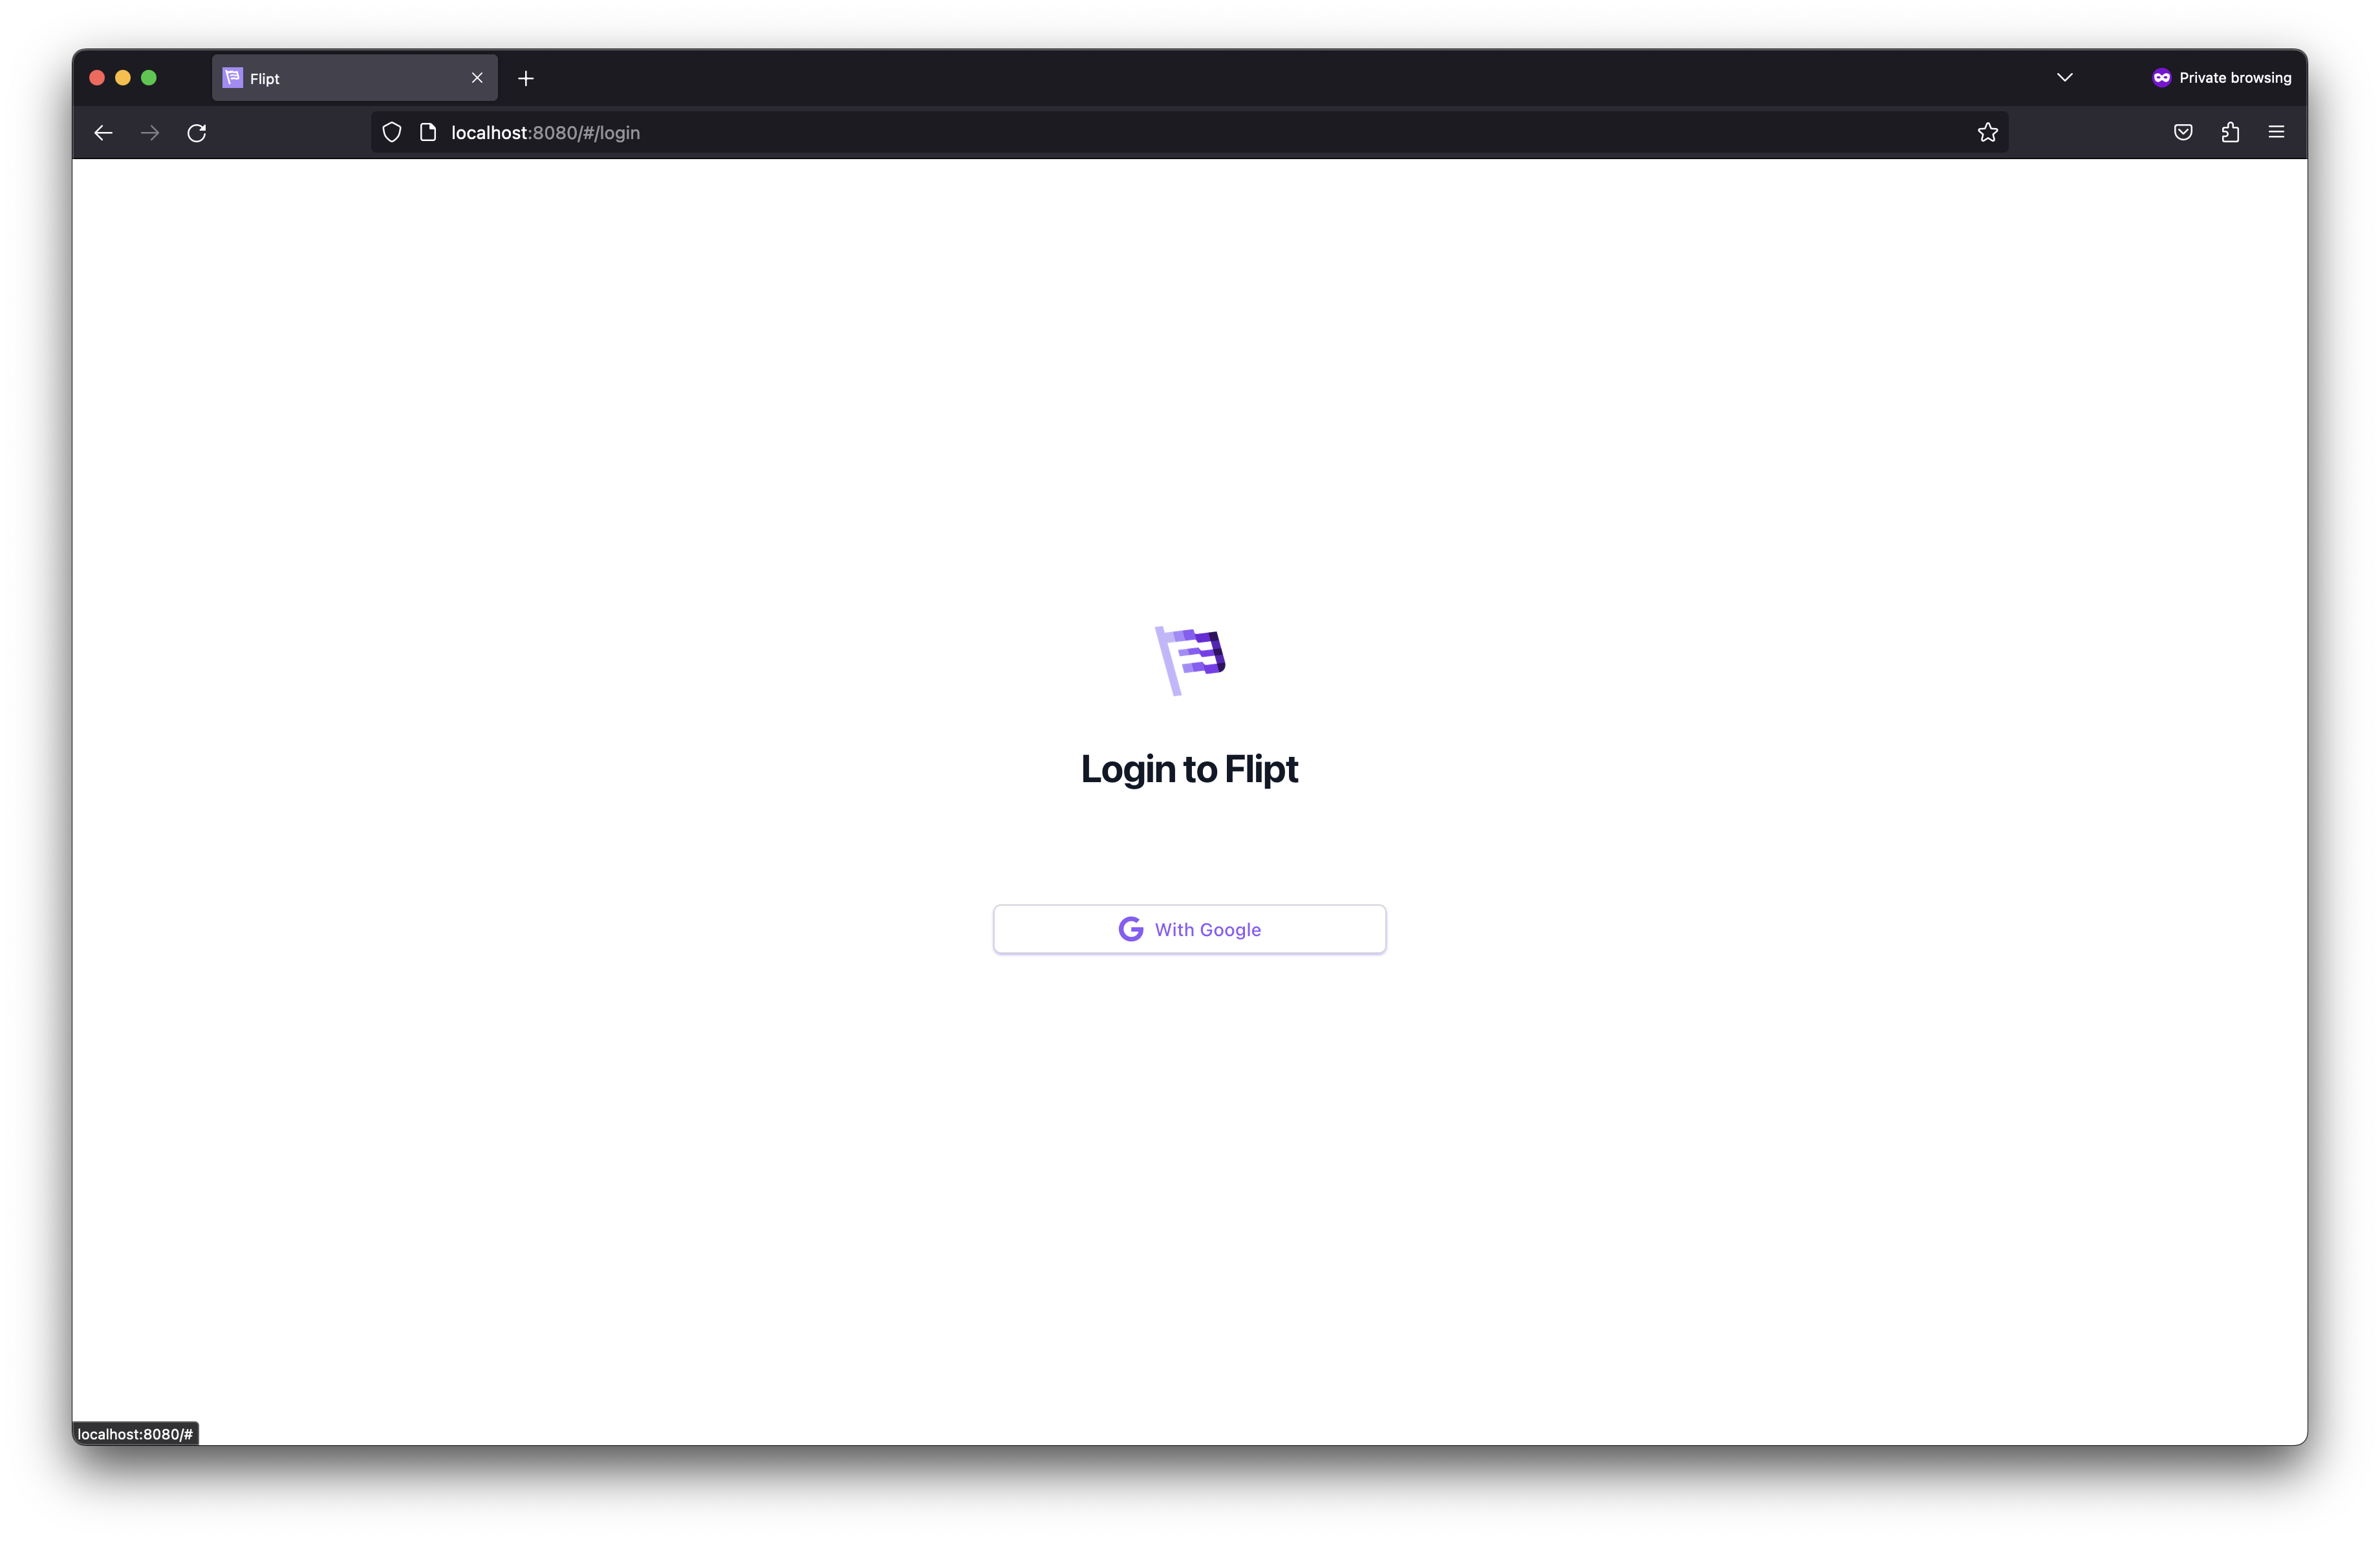 In a production environment it's often important to control who has access to your systems and feature flagging is no different.
Flipt ships with built-in mechanisms and configuration for service-to-Flipt and user-to-Flipt authentication.
For service-to-Flipt authentication, Flipt supports static token and Kubernetes-based authentication methods.
However, neither of these methods is appropriate for browser sessions and the UI.
To solve this, Flipt supports [OpenID Connect](/v1/authentication/methods#openid-connect) (OIDC) as a session-compatible authentication method.
OIDC is an open standard supported by many existing platforms such as Google, Okta, Auth0, GitLab, and many more.
## What You'll Learn
In this guide, you will learn how to configure Google as an OIDC provider for Flipt.
By the end of this guide, we will have:
* 🔒 Run Flipt and configured it to `require` authentication
* 🔑 Created an OAuth consent screen and client in your Google workspace
* 🔐 Configured Google as an OIDC provider for Flipt
## Prerequisites
For this guide you're going to need the following:
* [Docker](https://www.docker.com/)
* [Google Cloud Account](https://cloud.google.com)
## Brief Explanation of OIDC
OIDC is an extension on top of the OAuth standard for delegated authentication.
OAuth allows Flipt to delegate authentication to an external provider of your choice.
The OIDC extension provides the **Relying Party** (Flipt in this case) with a well-known protocol for requesting identity from an **Identity Provider** (IdP) (Google in this example).
It ensures that we can support a multitude of IdPs through a standard set of configuration parameters.
This means we don't have to add more code to Flipt each time we want to support an additional identity provider.
As long as the provider conforms to the OIDC standard, Flipt can be configured to leverage it.
It also gives Flipt the option to obtain and present user profile pictures and email addresses in the UI.
## Running Flipt
For the purpose of this guide, we will start by configuring and running Flipt with a minimal configuration file.
### 1. Define a Flipt `config.yml`
We're going to create a configuration file named `config.yml` in the current directory.
This file will tell Flipt to increase its logging level to the maximum to aid in debugging.
It will also set authentication as `required = true`.
This is needed to ensure that Flipt enforces its APIs and must be provided with a credential of some sort to gain access.
```yaml config.yml theme={null}
version: "1.0"
log:
level: DEBUG
authentication:
required: true
```
### 2. Run Flipt as a Docker container
In this step, we run Flipt and mount our local `config.yml` file into the running container.
This will start Flipt as a process in the foreground of your current terminal session.
You can stop Flipt by entering `ctrl+C`.
This particular command forwards your localhost port `8080` into the container's localhost port `8080`.
The `8080` port is the default for Flipt's HTTP service and can be changed via the `server` configuration parameter.
```sh theme={null}
docker run -it --rm \
-p 8080:8080 \
-v "$(pwd)/config.yml:/config.yml" \
flipt/flipt:latest ./flipt --config /config.yml
```
### 3. Navigate to the Flipt UI
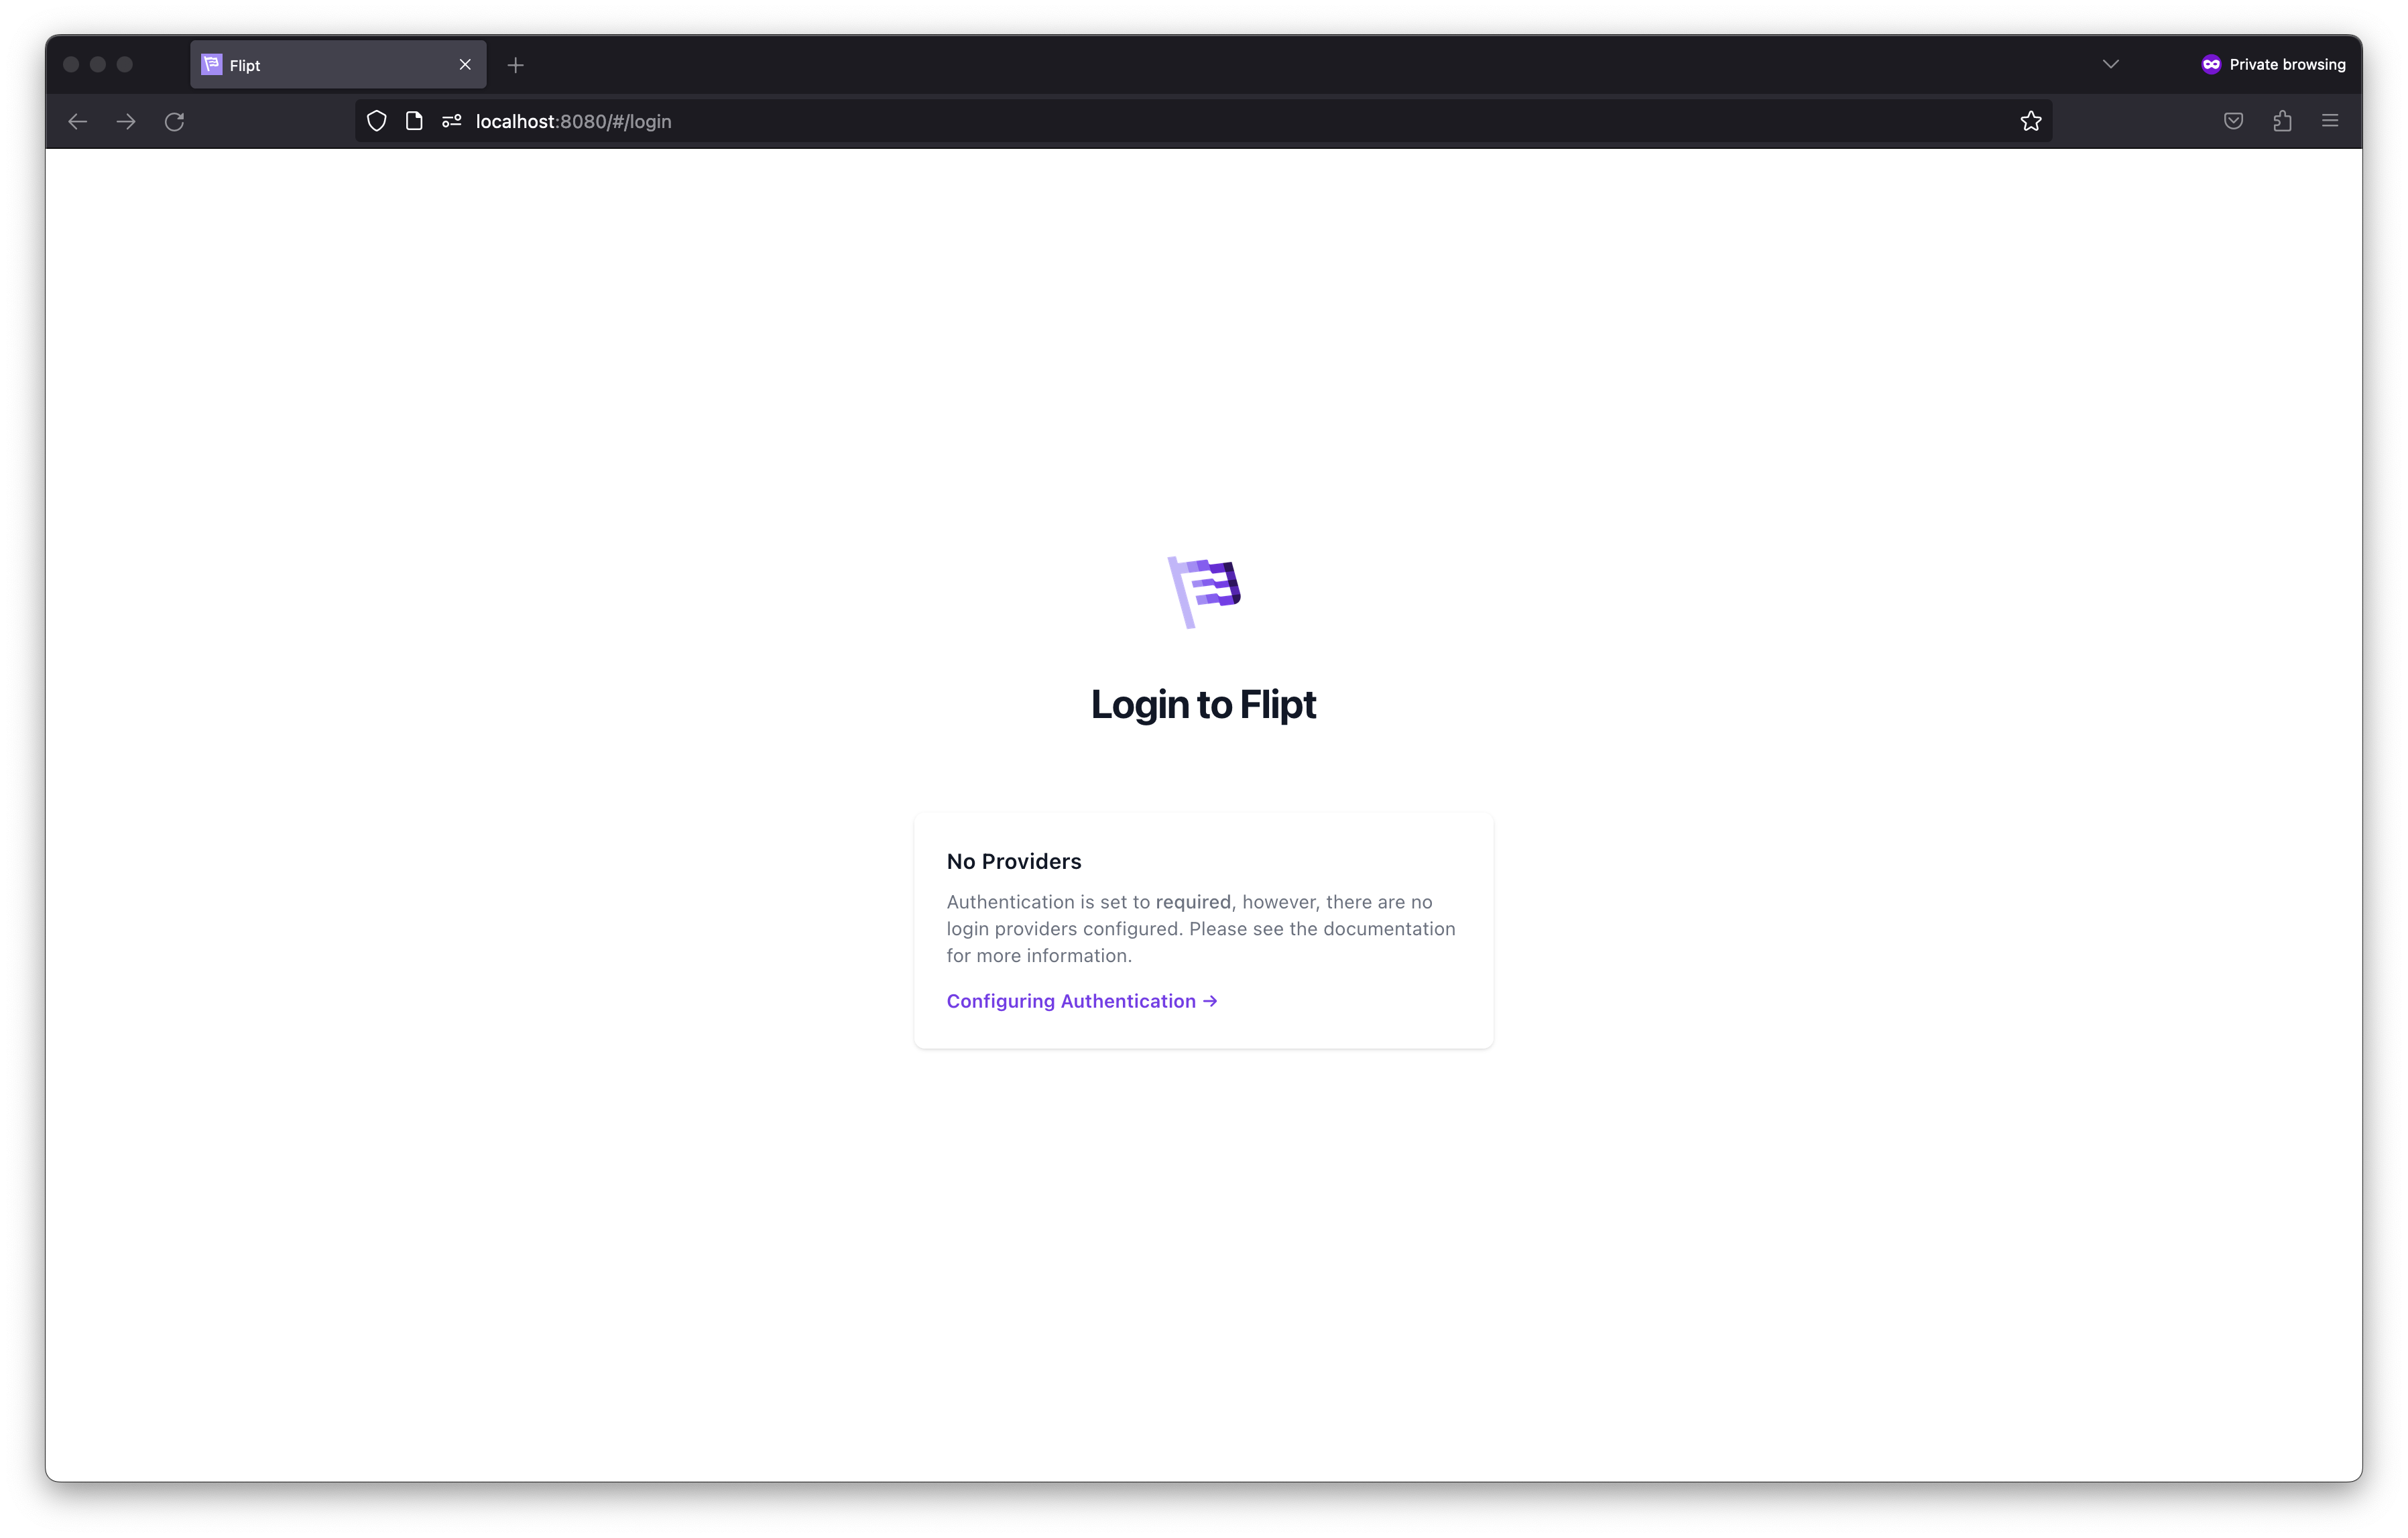
Once you visit Flipt's UI, you should be greeted by a message stating that there are no login providers configured.
As mentioned before, once authentication is required, a session-compatible method is needed to enable login.
We're now going to do that by configuring Google as an OIDC provider for Flipt.
In a production environment it's often important to control who has access to your systems and feature flagging is no different.
Flipt ships with built-in mechanisms and configuration for service-to-Flipt and user-to-Flipt authentication.
For service-to-Flipt authentication, Flipt supports static token and Kubernetes-based authentication methods.
However, neither of these methods is appropriate for browser sessions and the UI.
To solve this, Flipt supports [OpenID Connect](/v1/authentication/methods#openid-connect) (OIDC) as a session-compatible authentication method.
OIDC is an open standard supported by many existing platforms such as Google, Okta, Auth0, GitLab, and many more.
## What You'll Learn
In this guide, you will learn how to configure Google as an OIDC provider for Flipt.
By the end of this guide, we will have:
* 🔒 Run Flipt and configured it to `require` authentication
* 🔑 Created an OAuth consent screen and client in your Google workspace
* 🔐 Configured Google as an OIDC provider for Flipt
## Prerequisites
For this guide you're going to need the following:
* [Docker](https://www.docker.com/)
* [Google Cloud Account](https://cloud.google.com)
## Brief Explanation of OIDC
OIDC is an extension on top of the OAuth standard for delegated authentication.
OAuth allows Flipt to delegate authentication to an external provider of your choice.
The OIDC extension provides the **Relying Party** (Flipt in this case) with a well-known protocol for requesting identity from an **Identity Provider** (IdP) (Google in this example).
It ensures that we can support a multitude of IdPs through a standard set of configuration parameters.
This means we don't have to add more code to Flipt each time we want to support an additional identity provider.
As long as the provider conforms to the OIDC standard, Flipt can be configured to leverage it.
It also gives Flipt the option to obtain and present user profile pictures and email addresses in the UI.
## Running Flipt
For the purpose of this guide, we will start by configuring and running Flipt with a minimal configuration file.
### 1. Define a Flipt `config.yml`
We're going to create a configuration file named `config.yml` in the current directory.
This file will tell Flipt to increase its logging level to the maximum to aid in debugging.
It will also set authentication as `required = true`.
This is needed to ensure that Flipt enforces its APIs and must be provided with a credential of some sort to gain access.
```yaml config.yml theme={null}
version: "1.0"
log:
level: DEBUG
authentication:
required: true
```
### 2. Run Flipt as a Docker container
In this step, we run Flipt and mount our local `config.yml` file into the running container.
This will start Flipt as a process in the foreground of your current terminal session.
You can stop Flipt by entering `ctrl+C`.
This particular command forwards your localhost port `8080` into the container's localhost port `8080`.
The `8080` port is the default for Flipt's HTTP service and can be changed via the `server` configuration parameter.
```sh theme={null}
docker run -it --rm \
-p 8080:8080 \
-v "$(pwd)/config.yml:/config.yml" \
flipt/flipt:latest ./flipt --config /config.yml
```
### 3. Navigate to the Flipt UI
Once you visit Flipt's UI, you should be greeted by a message stating that there are no login providers configured.
As mentioned before, once authentication is required, a session-compatible method is needed to enable login.
We're now going to do that by configuring Google as an OIDC provider for Flipt.
 ## Creating a Google OAuth Client
In order to get Google setup as our IdP, we need:
1. A Google Cloud account
2. To configure our [OAuth consent screen](https://developers.google.com/workspace/guides/configure-oauth-consent)
3. To create a set of [Google OAuth client ID credentials](https://developers.google.com/workspace/guides/create-credentials#oauth-client-id)
Google's documentation will always be the most up-to-date source for how to achieve this.
However, we will go over some of the details and strive to keep this guide up to date.
### 1. Configure your [OAuth Consent Screen](https://developers.google.com/workspace/guides/configure-oauth-consent)
Your consent screen is the page you're navigated to when attempting to login via Google.
This is where you need to configure your consent application name and the *scopes* Flipt can request.
**Flipt requires the scope `openid`.**
You can additionally choose to support both:
* `https://www.googleapis.com/auth/userinfo.email`
* `https://www.googleapis.com/auth/userinfo.profile`
Doing so will allow Flipt to identify the caller in your audit logs by their email address.
As well enabling the UI to present your users Google profile picture.
You will have the option to create your OAuth application as `internal` or
`external`. We recommend `internal` as that way only your internal Google
workspace users can access Flipt.
Make sure to configure the consent screen as per Google's instructions and set the scopes accordingly.
### 2. Create your OAuth Client Credentials
1. Navigate to [Google Console Credentials](https://console.cloud.google.com/apis/credentials).
2. Click `+ Create Credentials`.
This presents us with a few options for credential types:
* API Key
* OAuth client ID
* Service Account
## Creating a Google OAuth Client
In order to get Google setup as our IdP, we need:
1. A Google Cloud account
2. To configure our [OAuth consent screen](https://developers.google.com/workspace/guides/configure-oauth-consent)
3. To create a set of [Google OAuth client ID credentials](https://developers.google.com/workspace/guides/create-credentials#oauth-client-id)
Google's documentation will always be the most up-to-date source for how to achieve this.
However, we will go over some of the details and strive to keep this guide up to date.
### 1. Configure your [OAuth Consent Screen](https://developers.google.com/workspace/guides/configure-oauth-consent)
Your consent screen is the page you're navigated to when attempting to login via Google.
This is where you need to configure your consent application name and the *scopes* Flipt can request.
**Flipt requires the scope `openid`.**
You can additionally choose to support both:
* `https://www.googleapis.com/auth/userinfo.email`
* `https://www.googleapis.com/auth/userinfo.profile`
Doing so will allow Flipt to identify the caller in your audit logs by their email address.
As well enabling the UI to present your users Google profile picture.
You will have the option to create your OAuth application as `internal` or
`external`. We recommend `internal` as that way only your internal Google
workspace users can access Flipt.
Make sure to configure the consent screen as per Google's instructions and set the scopes accordingly.
### 2. Create your OAuth Client Credentials
1. Navigate to [Google Console Credentials](https://console.cloud.google.com/apis/credentials).
2. Click `+ Create Credentials`.
This presents us with a few options for credential types:
* API Key
* OAuth client ID
* Service Account
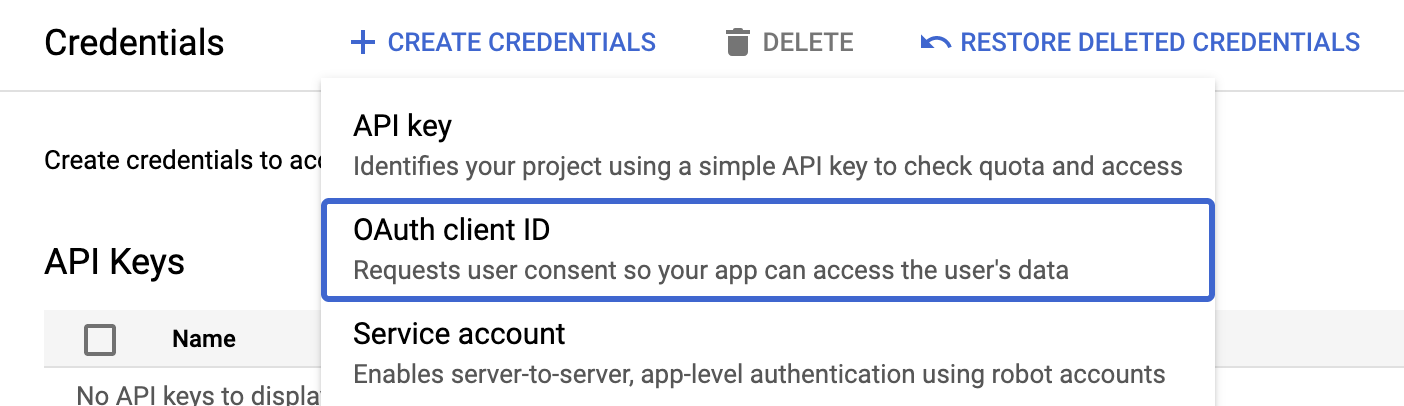 Select the `OAuth client ID` type and you will be taken to an input form (like the one below).
Select the `Web application` option when prompted to select an `Application type`.
Once selected you will be presented with more input options.
Select the `OAuth client ID` type and you will be taken to an input form (like the one below).
Select the `Web application` option when prompted to select an `Application type`.
Once selected you will be presented with more input options.
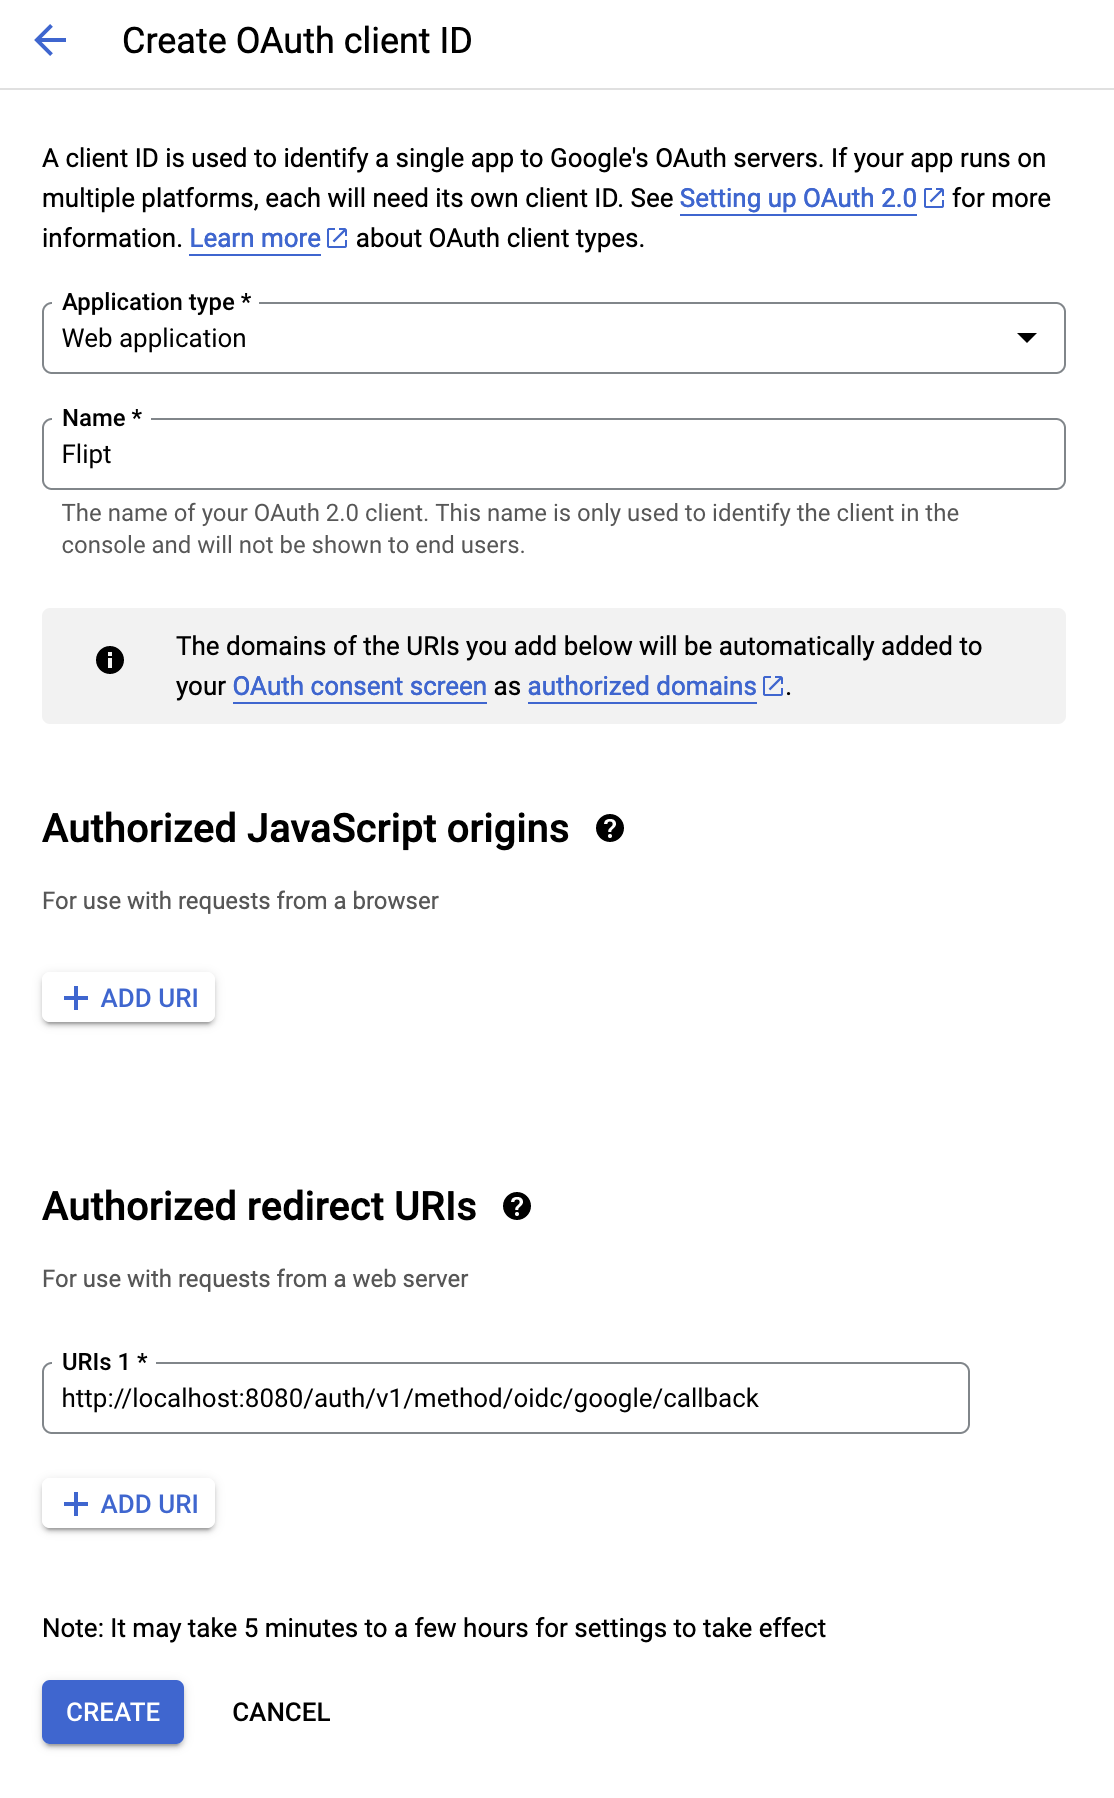 3. Configure the client's name and redirect URL.
As shown in the screenshot, we'll want to enter the following values for the inputs:
* Application type: `Web application`
* Name: `Flipt` (something to identify the purpose of the credentials)
Under the **Authorized redirect URIs** heading select `+ ADD URI`.
> Don't get this confused with *Authorized JavaScript origins*
This will present us with an input box which we will populate with the following value:
```url theme={null}
http://localhost:8080/auth/v1/method/oidc/google/callback
```
The URL `http://localhost:8080/auth/v1/method/oidc/google/callback` is the redirect URL for your local running instance.
In a production environment, you would replace the domain part of the URI with the public address of your Flipt instance.
4. Click `Create`.
This should create your credentials if all your inputs validate correctly.
You should be presented with a modal containing your new client credentials.
3. Configure the client's name and redirect URL.
As shown in the screenshot, we'll want to enter the following values for the inputs:
* Application type: `Web application`
* Name: `Flipt` (something to identify the purpose of the credentials)
Under the **Authorized redirect URIs** heading select `+ ADD URI`.
> Don't get this confused with *Authorized JavaScript origins*
This will present us with an input box which we will populate with the following value:
```url theme={null}
http://localhost:8080/auth/v1/method/oidc/google/callback
```
The URL `http://localhost:8080/auth/v1/method/oidc/google/callback` is the redirect URL for your local running instance.
In a production environment, you would replace the domain part of the URI with the public address of your Flipt instance.
4. Click `Create`.
This should create your credentials if all your inputs validate correctly.
You should be presented with a modal containing your new client credentials.
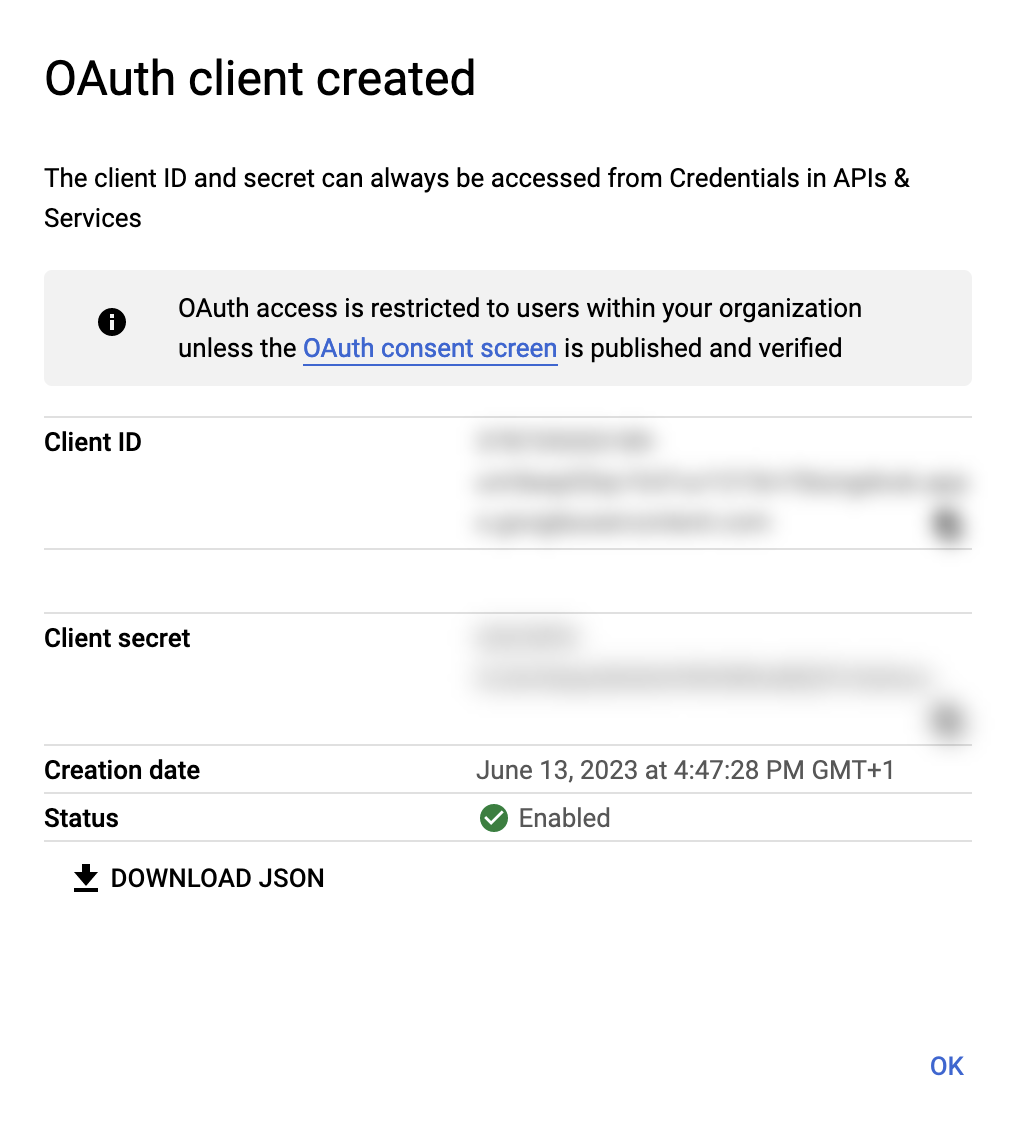 You will need to take note of these values, as you're going to use them in the next step.
## Configuring Flipt With OIDC Credentials
Now that we've an OAuth client configured in our Google Cloud account,
we can begin configuring Flipt to leverage it.
### 1. Add `google` provider to `config.yml`
Open your `config.yml` we created in the [beginning of the guide](#1-define-a-flipt-config-yml).
Now we're going to update your configuration with the details we obtained from Google.
The configuration below does the following for Flipt:
* Enables the OIDC method
* Configures the session domain
* Defines an OIDC provider called `google`
* Adds the specific configuration and credentials for the Google OIDC provider
Your configuration should look something like the following:
```yaml config.yml theme={null}
version: "1.0"
log:
level: DEBUG
authentication:
required: true
session:
domain: localhost:8080
methods:
oidc:
enabled: true
providers:
google:
issuer_url: "https://accounts.google.com"
client_id: "< client ID from Google >"
client_secret: "< client secret from Google >"
redirect_address: "http://localhost:8080"
scopes:
- email
- profile
```
The session domain is required for session-compatible authentication methods.
It's used by Flipt as the domain for storing authentication cookies.
Note that we've enabled the `oidc` method, and it has a section called `providers`.
Each key beneath the `providers` section is unique and can be whatever you want.
However, the name is important as it affects the `redirect_url` generated for the particular provider.
If you change this provider name from `google` to something else, then you will need to update your [OAuth client details](#3-configure-the-oauth-client) in Google Cloud.
For example, changing it from `google` to `gcp` would result in the redirect URI changing like so:
```diff theme={null}
- http://localhost:8080/auth/v1/method/oidc/google/callback
+ http://localhost:8080/auth/v1/method/oidc/gcp/callback
```
Each provider section has a consistent structure.
You're required to provide the `issuer_url`, `client_id`, `client_secret` and `redirect_address`.
The `scopes` section is optional, and allows Flipt the opportunity to obtain additional details on the authenticating caller (e.g. email and profile picture).
### 2. Restart Flipt
You can now stop and start your Flipt instance using the Docker command we described in Section 1.
Once Flipt has restarted you can navigate your browser to the [UI](http://localhost:8080) and attempt a login with Google.
When you click `Login with Google` you should be navigated away to your Google consent screen.
Once you grant consent, you should return to Flipt and be logged into Flipt.
## Production and Beyond
🎉 Congratulations, you've successfully run Flipt and enabled login with Google as the OIDC provider.
You're now equipped with everything you need to get this working in a production environment.
To help you across the finishing line, here are some tips and considerations to keep in mind.
### 1. Custom Flipt Domain
In reality, you're not going to run Flipt on `localhost`.
You're going to host it on some domain name on the public internet or within a VPN.
A few touch points will need to be updated with your new domain. For example, consider the domain `https://flipt.internal.dev`.
1. Update your Google OAuth Client
You will need to update the **redirect URI** of your OAuth client in Google with this domain.
```diff theme={null}
- http://localhost:8080/auth/v1/method/oidc/google/callback
+ https://flipt.internal.dev/auth/v1/method/oidc/google/callback
```
2. Session `domain` and provider `redirect_address`
Now that we're hosting under a new domain, we need to instruct Flipt where to store cookies and what our redirect address is going to be.
```diff config.yml theme={null}
version: "1.0"
log:
level: DEBUG
authentication:
required: true
session:
- domain: localhost:8080
+ domain: flipt.internal.dev
methods:
oidc:
enabled: true
providers:
google:
issuer_url: "https://accounts.google.com"
client_id: "< client ID from Google >"
client_secret: "< client secret from Google >"
- redirect_address: "http://localhost:8080"
+ redirect_address: "https://flipt.internal.dev"
scopes:
- email
- profile
```
### 2. Securing Flipt
1. Enable CSRF protection
Using browser session based authentication puts applications at risk of cross-site request forgery attacks.
Flipt supports automatic CSRF prevention via signed token strings, using a shared signing key.
Check out our [Configuration: Session](/v1/configuration/authentication#session) documentation for details on how to configure this.
2. Move credentials to environment variables
Sometimes for security purposes you don't want to be inserting your sensitive credentials (such as provider `client_secret` or your CSRF `key`) into a configuration file.
Flipt supports defining configuration in its YAML file and as environment variables.
Check out our [Configuration: Environment Variables](/v1/configuration/overview#environment-variables) section for details on how to provide configuration as environment variables.
As a quick example, both the Google provider `client_secret` and the CSRF signing `key` can be presented to Flipt like so:
```sh theme={null}
FLIPT_AUTHENTICATION_METHODS_OIDC_PROVIDERS_GOOGLE_CLIENT_SECRET=< oauth client secret >
FLIPT_AUTHENTICATION_SESSION_CSRF_KEY=< CSRF token signing key >
```
You will need to take note of these values, as you're going to use them in the next step.
## Configuring Flipt With OIDC Credentials
Now that we've an OAuth client configured in our Google Cloud account,
we can begin configuring Flipt to leverage it.
### 1. Add `google` provider to `config.yml`
Open your `config.yml` we created in the [beginning of the guide](#1-define-a-flipt-config-yml).
Now we're going to update your configuration with the details we obtained from Google.
The configuration below does the following for Flipt:
* Enables the OIDC method
* Configures the session domain
* Defines an OIDC provider called `google`
* Adds the specific configuration and credentials for the Google OIDC provider
Your configuration should look something like the following:
```yaml config.yml theme={null}
version: "1.0"
log:
level: DEBUG
authentication:
required: true
session:
domain: localhost:8080
methods:
oidc:
enabled: true
providers:
google:
issuer_url: "https://accounts.google.com"
client_id: "< client ID from Google >"
client_secret: "< client secret from Google >"
redirect_address: "http://localhost:8080"
scopes:
- email
- profile
```
The session domain is required for session-compatible authentication methods.
It's used by Flipt as the domain for storing authentication cookies.
Note that we've enabled the `oidc` method, and it has a section called `providers`.
Each key beneath the `providers` section is unique and can be whatever you want.
However, the name is important as it affects the `redirect_url` generated for the particular provider.
If you change this provider name from `google` to something else, then you will need to update your [OAuth client details](#3-configure-the-oauth-client) in Google Cloud.
For example, changing it from `google` to `gcp` would result in the redirect URI changing like so:
```diff theme={null}
- http://localhost:8080/auth/v1/method/oidc/google/callback
+ http://localhost:8080/auth/v1/method/oidc/gcp/callback
```
Each provider section has a consistent structure.
You're required to provide the `issuer_url`, `client_id`, `client_secret` and `redirect_address`.
The `scopes` section is optional, and allows Flipt the opportunity to obtain additional details on the authenticating caller (e.g. email and profile picture).
### 2. Restart Flipt
You can now stop and start your Flipt instance using the Docker command we described in Section 1.
Once Flipt has restarted you can navigate your browser to the [UI](http://localhost:8080) and attempt a login with Google.
When you click `Login with Google` you should be navigated away to your Google consent screen.
Once you grant consent, you should return to Flipt and be logged into Flipt.
## Production and Beyond
🎉 Congratulations, you've successfully run Flipt and enabled login with Google as the OIDC provider.
You're now equipped with everything you need to get this working in a production environment.
To help you across the finishing line, here are some tips and considerations to keep in mind.
### 1. Custom Flipt Domain
In reality, you're not going to run Flipt on `localhost`.
You're going to host it on some domain name on the public internet or within a VPN.
A few touch points will need to be updated with your new domain. For example, consider the domain `https://flipt.internal.dev`.
1. Update your Google OAuth Client
You will need to update the **redirect URI** of your OAuth client in Google with this domain.
```diff theme={null}
- http://localhost:8080/auth/v1/method/oidc/google/callback
+ https://flipt.internal.dev/auth/v1/method/oidc/google/callback
```
2. Session `domain` and provider `redirect_address`
Now that we're hosting under a new domain, we need to instruct Flipt where to store cookies and what our redirect address is going to be.
```diff config.yml theme={null}
version: "1.0"
log:
level: DEBUG
authentication:
required: true
session:
- domain: localhost:8080
+ domain: flipt.internal.dev
methods:
oidc:
enabled: true
providers:
google:
issuer_url: "https://accounts.google.com"
client_id: "< client ID from Google >"
client_secret: "< client secret from Google >"
- redirect_address: "http://localhost:8080"
+ redirect_address: "https://flipt.internal.dev"
scopes:
- email
- profile
```
### 2. Securing Flipt
1. Enable CSRF protection
Using browser session based authentication puts applications at risk of cross-site request forgery attacks.
Flipt supports automatic CSRF prevention via signed token strings, using a shared signing key.
Check out our [Configuration: Session](/v1/configuration/authentication#session) documentation for details on how to configure this.
2. Move credentials to environment variables
Sometimes for security purposes you don't want to be inserting your sensitive credentials (such as provider `client_secret` or your CSRF `key`) into a configuration file.
Flipt supports defining configuration in its YAML file and as environment variables.
Check out our [Configuration: Environment Variables](/v1/configuration/overview#environment-variables) section for details on how to provide configuration as environment variables.
As a quick example, both the Google provider `client_secret` and the CSRF signing `key` can be presented to Flipt like so:
```sh theme={null}
FLIPT_AUTHENTICATION_METHODS_OIDC_PROVIDERS_GOOGLE_CLIENT_SECRET=< oauth client secret >
FLIPT_AUTHENTICATION_SESSION_CSRF_KEY=< CSRF token signing key >
```