What are References in Flipt?
References are a way to pass additional information to Flipt during an evaluation request. This allows you to serve different flag states based on the reference when using our Git backend. References are especially useful when using Flipt in preview environments. You can use references to serve a different Git branch for each preview environment keeping your main branch safe from untested configurations.What Are Preview Environments?
Preview environments are a way to create a temporary environment for a pull request. This allows you to test your changes in a production-like environment before merging your code. This is especially useful for testing changes that require a full build and deploy cycle. In this guide, we’re going to demonstrate how to leverage Flipt in preview environments to test changes in a production-like environment, without affecting your production users.What You’ll Learn
In this guide you will learn how to:- 🏁 Setup Flipt to work in a preview environment
- 🚀 Create a preview environment for a pull request that modifies a feature flag in our declarative format
- 🌲 Add, commit, and push the change to a preview branch
- 🧪 Test the change in the preview environment
- 🎉 Merge the pull request and deploy the change to production
Our Example Application
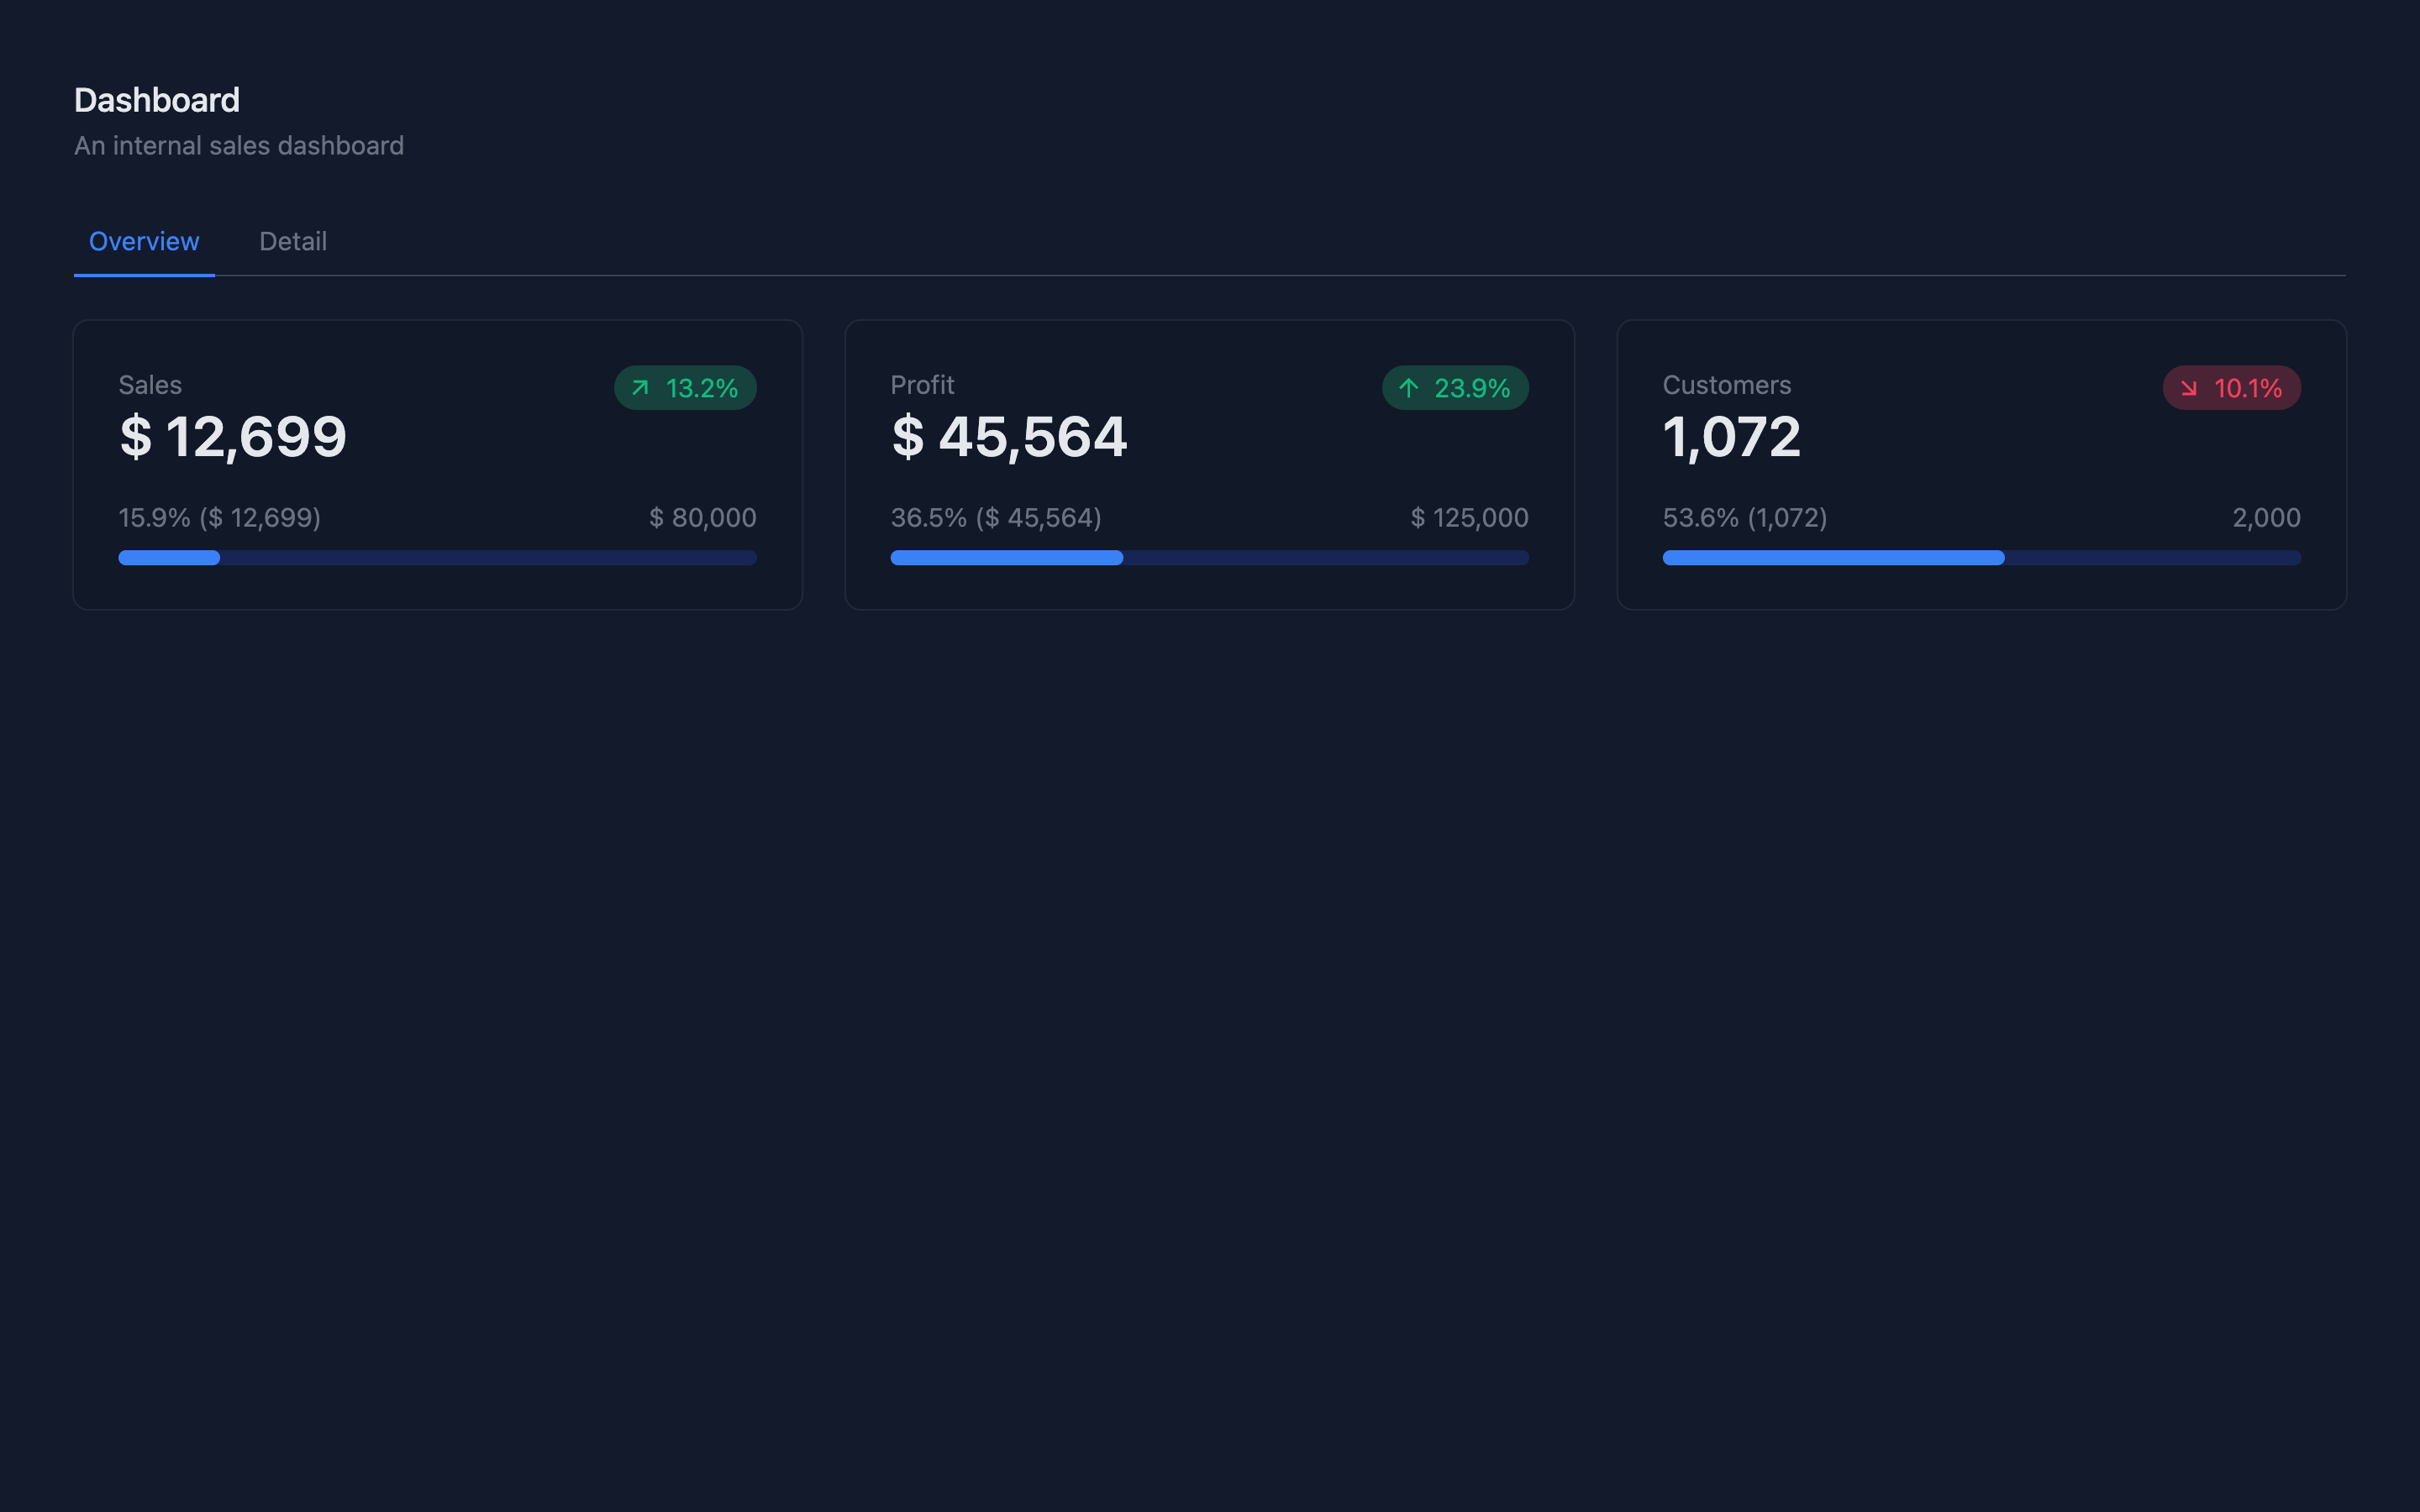
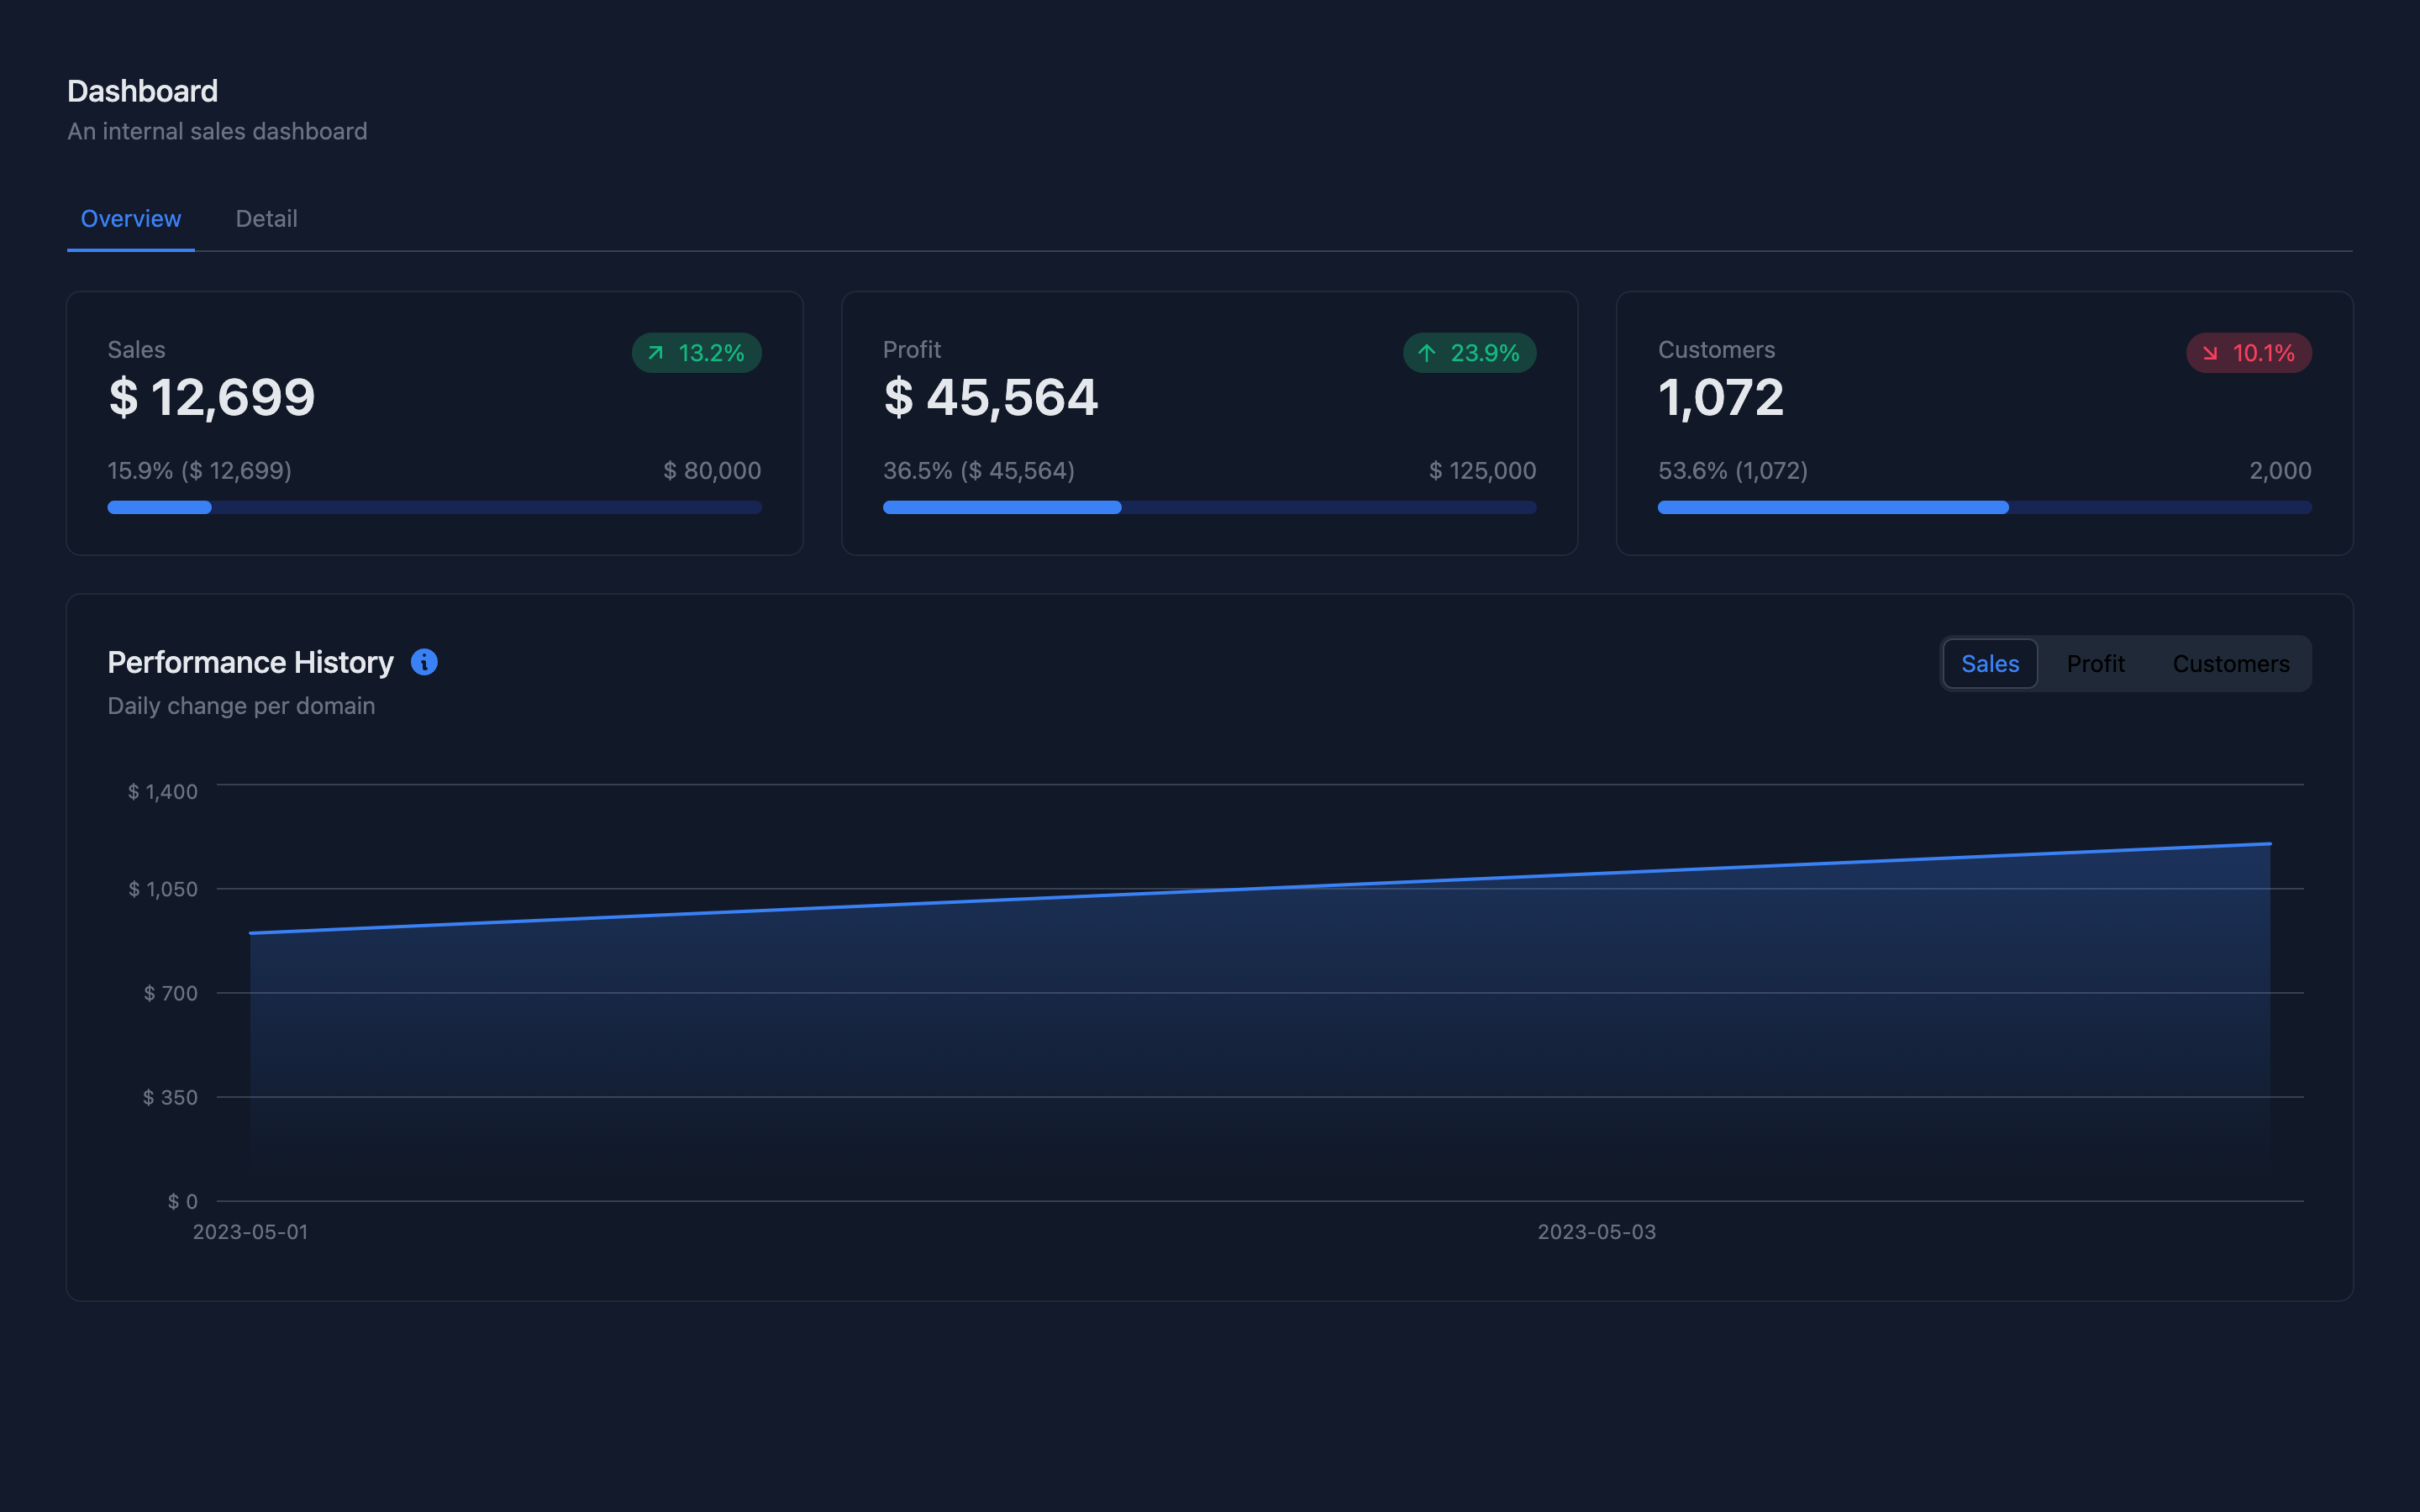
We’re going to be making a change to our internal organization sales dashboard. This dashboard is made up of a simple React frontend and a Go backend. The frontend is a single-page application that makes API calls to the backend to fetch data. The backend is a new API that returns a list of sales performance data. The frontend will use this data to render a graph of our company’s sales performance. Because this API is new and we’re not sure how it will perform, we want to test it in a production-like environment before we merge it into our main branch.
Structure
Our application lives in a directory committed to a Git repository. For the example’s sake, we assume the repository will be hosted on GitHub athttps://github.com/organization/repository.git.
The application is made up of three directories:
cmd/api- contains our Go backend API and loads the UIui- contains our React frontendpkg/performance- contains our Flipt feature flag definition
If you want to follow along you can fork our guide
repository.
Go Backend
The purpose of our Go backend is two-fold:- Serve our React frontend
- Serve our new API
/api/performance endpoint:
cmd/api/main.go
showPerformanceHistory feature flag. If the flag is enabled, we return the sales performance data.
Also of note, we’re using the FLIPT_CLIENT_REFERENCE environment variable to pass in the reference to Flipt in the evaluation call. This is used to serve a different Git branch for each preview environment. We’ll talk more about this later.
Flipt Feature Flag Definition
Our feature flag definition is stored in thepkg/performance directory. This directory contains a single file called features.yml. This file contains the definition of our showPerformanceHistory feature flag.
pkg/performance/features.yml
You don’t have to call your file
features.yml and you can spread your flag
definitions across multiple files. Check out our docs on locating flag
state to learn more.Creating Preview Environments
For this guide, we’re going to use GitHub Actions to deploy our preview environments to Koyeb. Koyeb has a nice tutorial on how to deploy a preview environment using GitHub Actions. You can find it here. To get our preview environments working with Flipt, we’ll need some way of passing the Git branch name to Flipt. We can do this by setting theFLIPT_CLIENT_REFERENCE environment variable to the Git branch name. This will allow us to serve a different Git branch for each preview environment.
To do this, we’ll need to add a step to our GitHub Actions workflow that sets the FLIPT_CLIENT_REFERENCE environment variable to the Git branch name.
FLIPT_ADDRESS environment variable to the address of our Flipt instance. This could also be configured in your application via a config file.
Enabling the Flag and Pushing to a Preview Branch
Now that we have our preview environments setup, we can enable our feature flag and push our changes to a preview branch. To enable our feature flag, we’ll need to update ourfeatures.yml file to set the enabled field to true.
pkg/performance/features.yml
Testing the Change
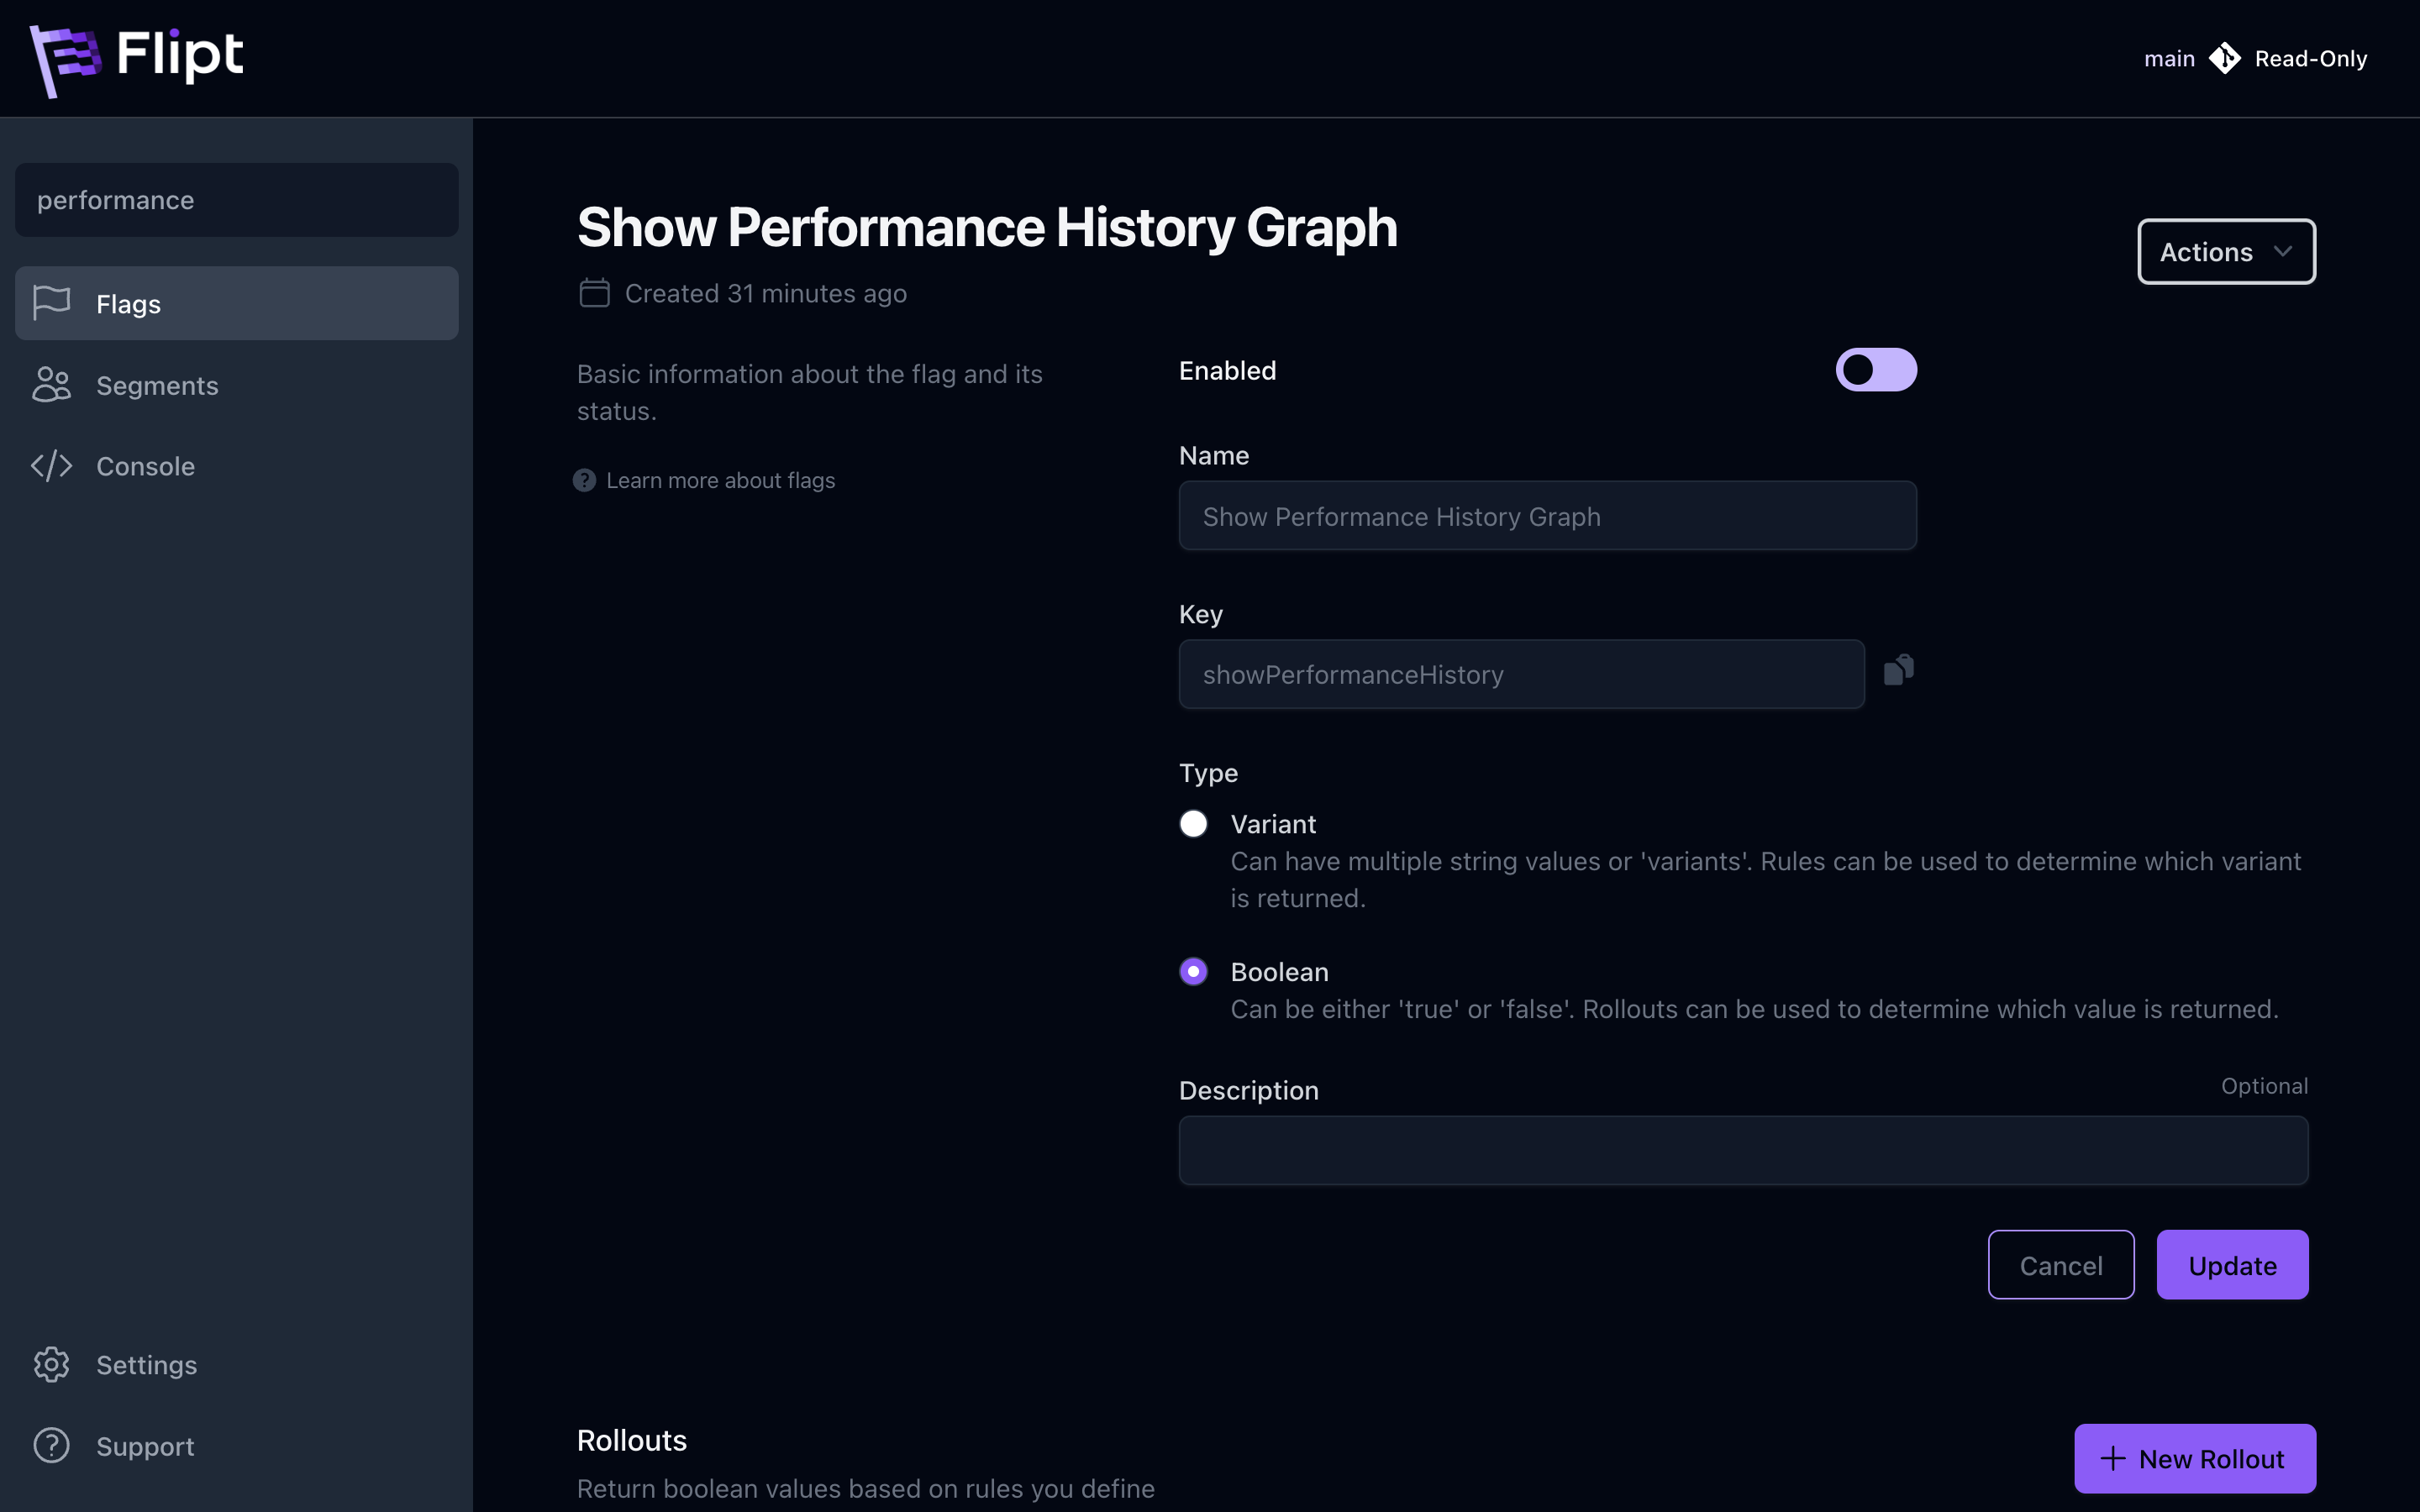
Before checking on our preview environment, let’s take a look at our Flipt instance. We can see that our feature flag is still showing as disabled in the UI. Flipt is configured to track themain branch of our Git repository by default, which is what it continues to show in the UI.

FLIPT_CLIENT_REFERENCE environment variable is set to the Git branch name.


Merging the Pull Request
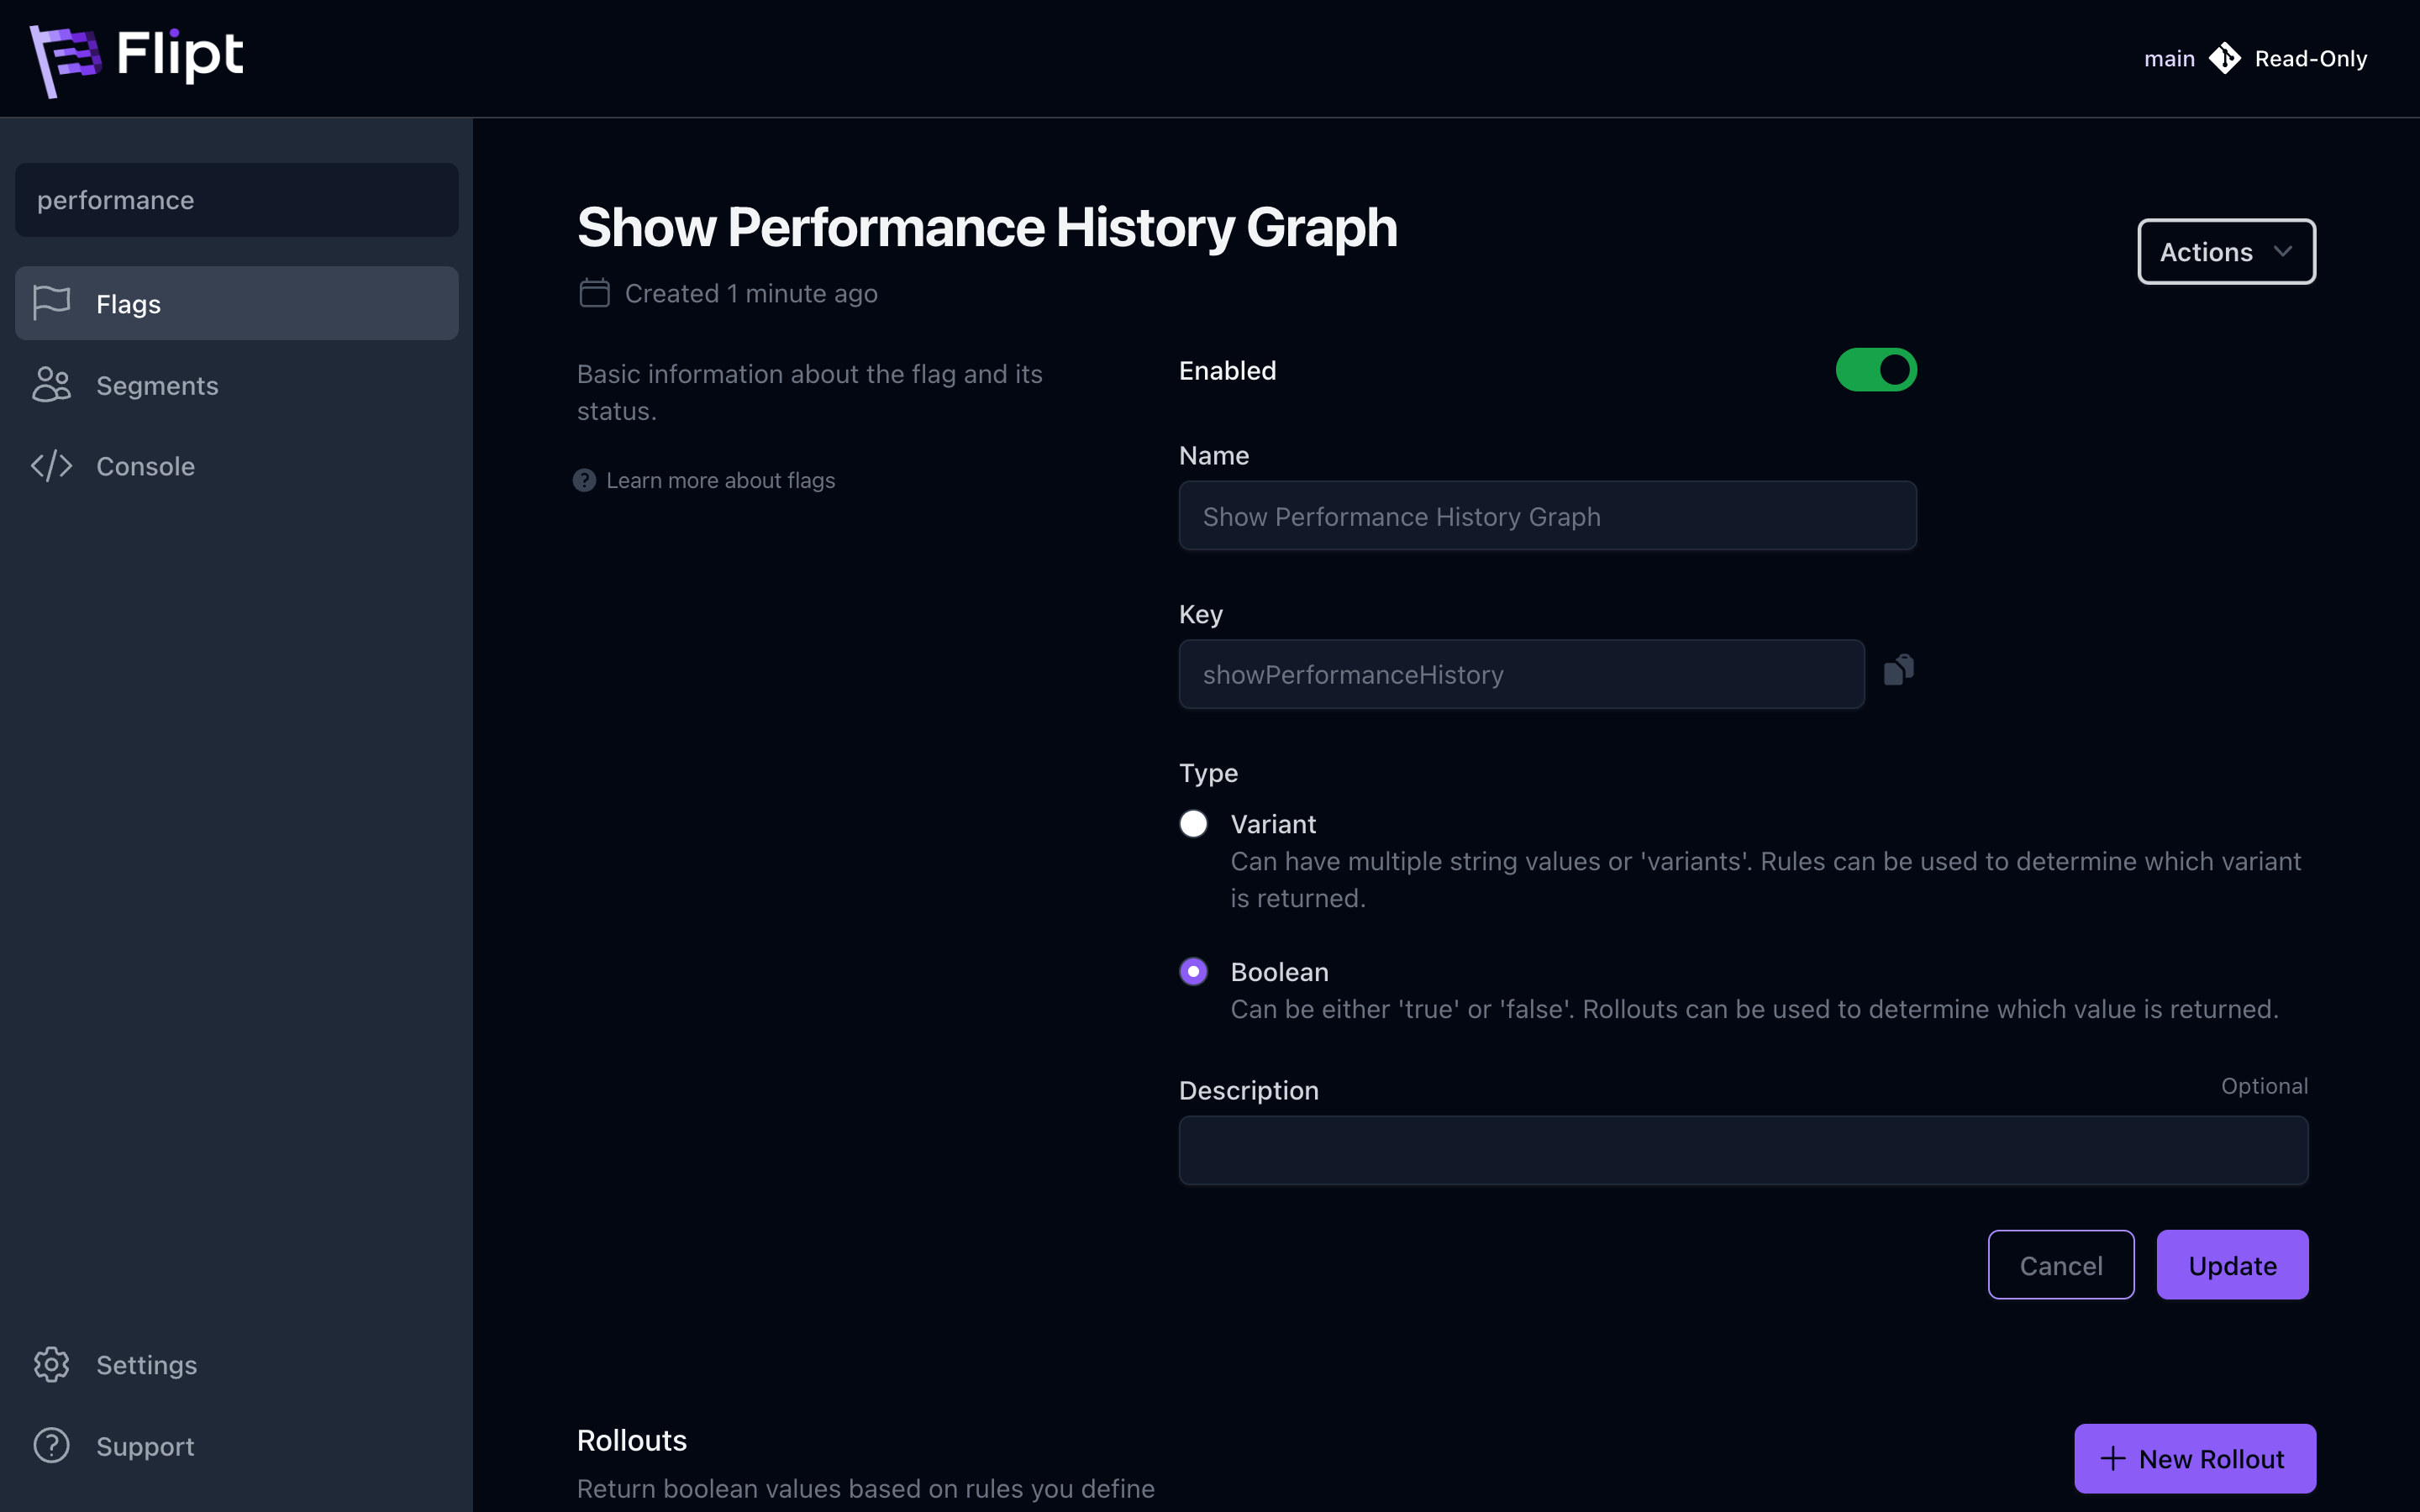
Now that we’ve tested our new API in our preview environment, we can merge our pull request and deploy our changed flag definition to production. Note that we don’t have to make any code changes in our production application. This is because our Flipt is already configured to track the HEAD of themain Git branch. This means that when we merge our pull request, our application will automatically start using the new flag state.

Recap
In this guide, we learned how to use Flipt’s GitOps integration and references to test changes in a production-like environment without affecting our production users. Using references allowed us to serve a different Git branch for each preview environment. This means that each of our developers can test their feature flag changes in a production-like environment without affecting other developers. There are likely many other ways to use references with Flipt. We’d love to hear how you’re using references in your organization.Further Considerations
References are available for all of our GET API endpoints, (e.g.GET /api/v1/flags) as well as all of our evaluation endpoints (e.g. POST /evaluate/v1/boolean).
We’ve also added support for references in all of our server side REST SDKs and our client side SDKs.
References currently only work with Git, and our git backend, like all of the declarative storage backends, mandates that the UI is read-only.
We have thoughts on how this could change in the future, but for now, this is a limitation.
You always have your editor, Git and the SCMs (GitHub, GitLab etc) for state management in the meantime.
Flipt will automatically sync your feature flag definitions to Flipt in the background. Each of these backends work by polling their sources (git, oci, local directory or object store) and the interval can be configured.
Check out the Configuration: Storage: Declarative for details on adjusting these intervals.